
The GN-X has been tagged by some modelers/collectors as the next "grunt" MS (to the chagrin of some hardcore UC fans), not necessarily replacing the iconic Zakus in appeal. The GN-X, or "JinX" as I like to call it (incidentally, that's how it's pronounced or nicknamed it in the English version of 00, so I guess I'm right on the dot), is a very fresh design and came as a surprise when Bandai announced it to be the next MG after the much-debated Ignition Mode MG Exia.

Whereas the Zaku is bulky, rugged and almost unruly, the JinX is slender, sleek, and streamlined. Instead of being mono-eyed (like most antagonist MSs), it breaks from tradition and sports a quad-eye scheme that forms an X.
And thus it began.
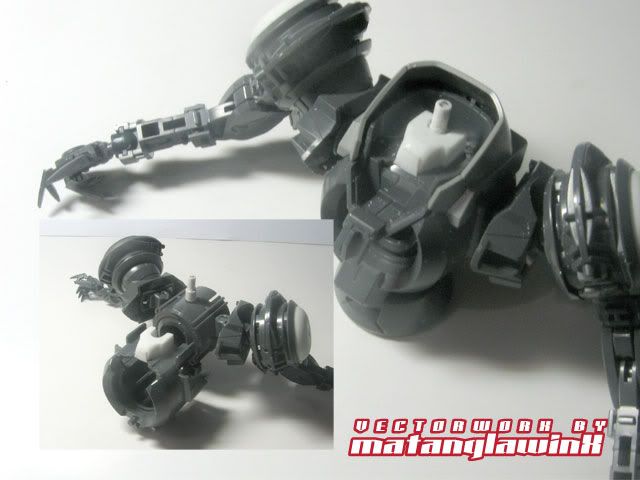
I started disassembling the kit out of nowhere and sanded down the nubs, as if I was planning on something when it was really nothing more but a simple case of OC that compelled me to do it. Then I got the idea of making an Advanced GN-X, roughly basing it on the red converted version I saw in an issue of Dengeki Hobby, and definitely adding mine own touches to the overall design.

I'll be making mostly cosmetic modifications and a couple or so functional modifications, starting with the neck.
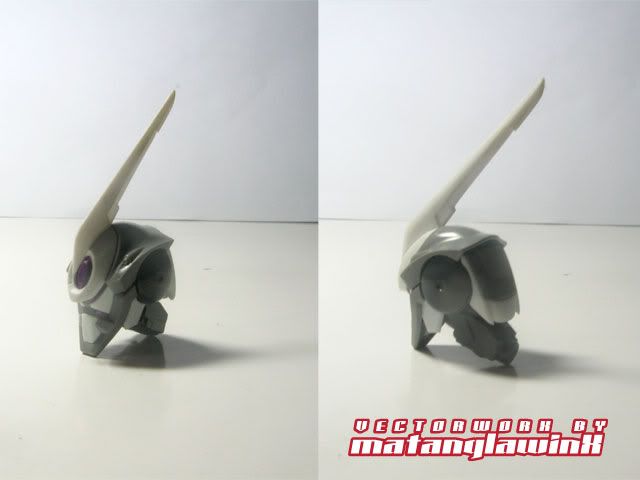
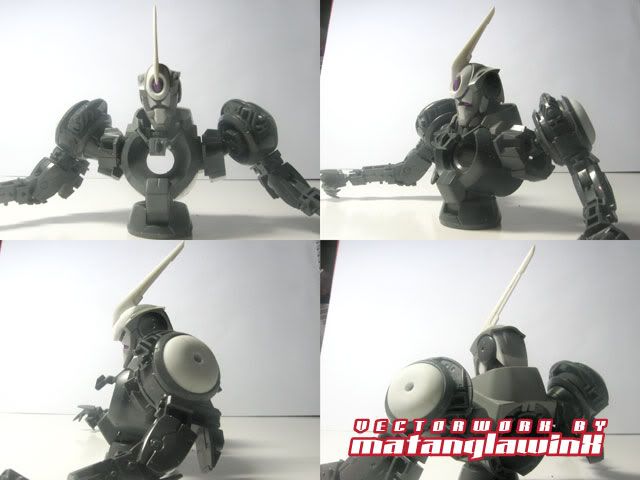
Like most kits (or MS designs, for that matter), the GN-X seems to have too short a chin/chest clarance. The overall visual result is that it seems to be slouching. This one though, also breaks from traditional straight neck design and sports a 3-point articulated curved neck that is actually hidden from view. Sufficed to say, this was the first one I considered modifying by lengthening the neck connector, effectively adding about 3mm to the neck. This was done with plaplate sandwich for the base of the neck, a piece of 3mm round beam for the neck peg extension itself, and anchored with a tube that connects the original neck peg to the extension.
Using a combination of 1mm and 0.5mm plaplates, I then added a "Stabilizer Fin" which is actually longer, swept back and more slender than the AdGNX version, but kept the crystal sensor visible. I also added jaw and back head extensions based on the added height of the neck.
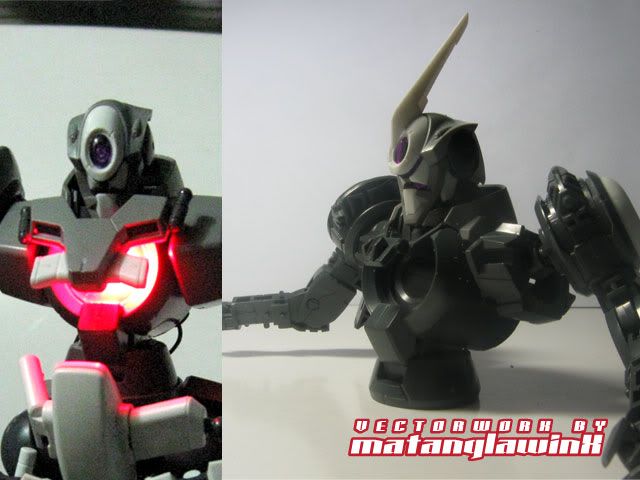
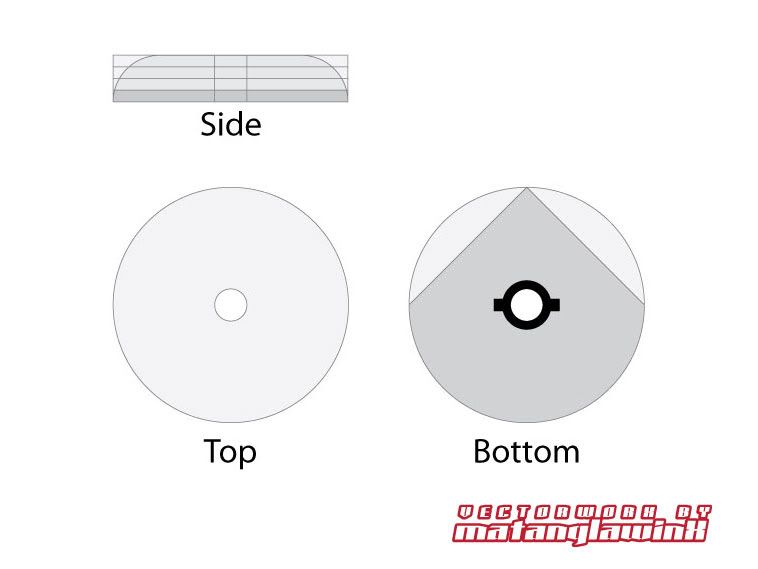
I then custom-built "shoulder pads" to replace the stock shoulder "spikes." This is done by sandwiching circular precut pieces of plaplates and later filing the resulting pieces to create the dome shape of the pads. The bottom of the part is cut after the shape of the shoulder mounts, pegs and all.
Part II | Part III | Part IV | Part V


4 comments:
love your work. i saw some of your models on some forums. glad you made a blog.
Thanks BB. I've been contemplating on one since last year, but never really got to it till recently.
ooo Loving the GNX idea and build so far. I wanna see more!
Engine: With exception to the weapon/s, this is done. I just haven't took photos of it.
Post a Comment