Showing posts with label Scarlet JinX. Show all posts

Sunday, January 23, 2011

Heatless HIPS/Plaplate Bending


Another inquiry finally prompted this post so I can simply direct people to it.  I've posted this at ZeroG and elsewhere, and have wondered why I haven't made it a blog entry before.

High Impact PolyStyrene sheets, or simply HIPS/PS sheets are alternatives to the more expensive Tamiya "Plaplate" brand.  These sheets are highly flexible and bendable to a certain extent.

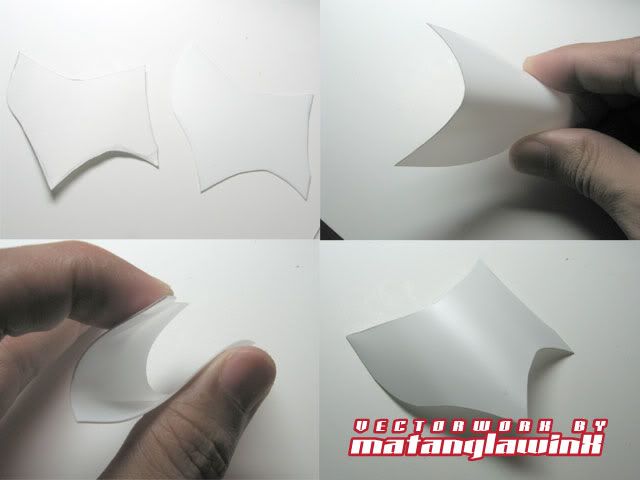
Applying heat makes it easy to bend HIPS/plaplates, but, once they harden, they become rather difficult to fix or manipulate further. Plaplates, being made of polystyrene, are rather flexible and can be bent to a point without breaking even without heat. Once bent, they would basically keep the bent shape, but maintain their flexibility until you're ready to "finalize" the shape.  Plaplates have a more obvious grain or directionality (as compared to molded plastic), and it's worthwhile to take note of it because it can snap when bent along the grain.  Bending it against the grain will at least prevent that during application of light bending force.  Also, plaplates tend to crack when bent with the matte side up, whereas, paired with directionality the smooth and shiny side seems to prevent that when doing extreme bending.

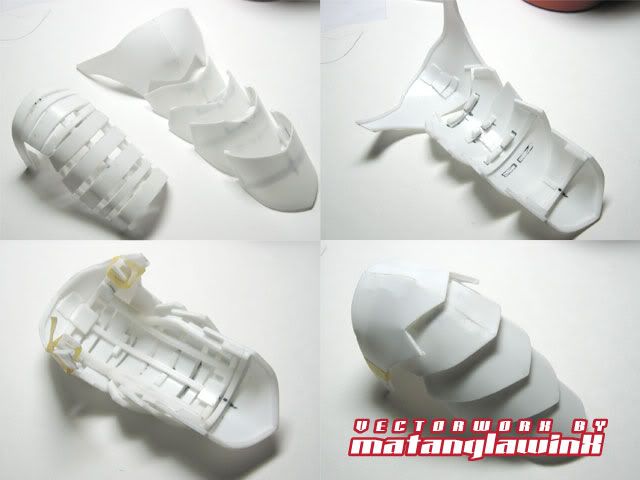
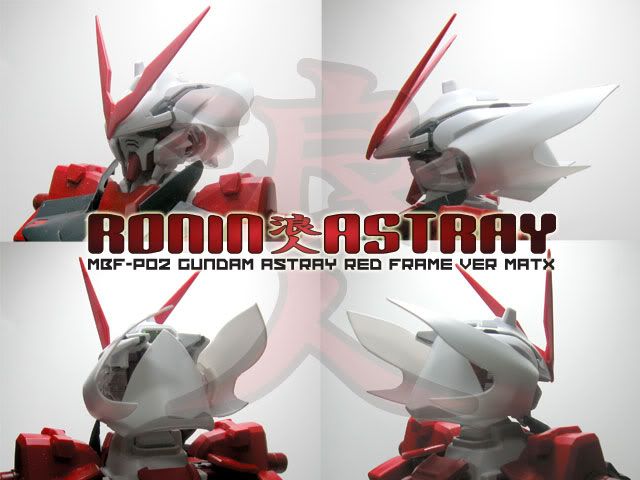
Here are a few samples of the armor parts I've done for the Ronin.
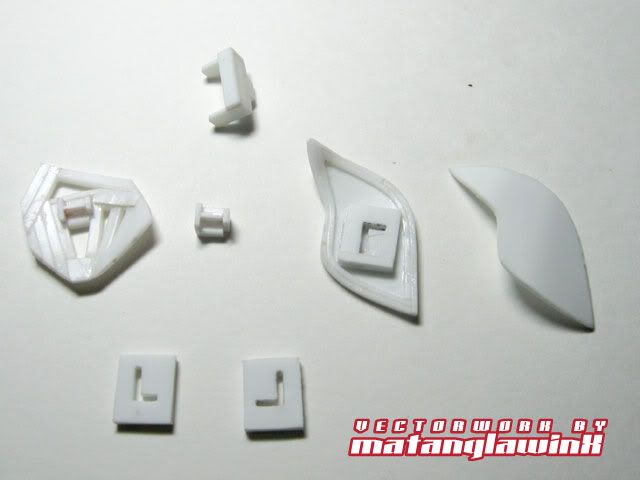
Image

Image

Image

Image

Image

Image

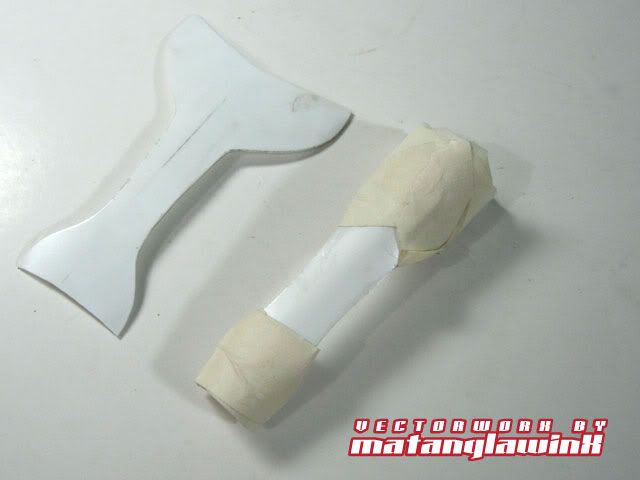
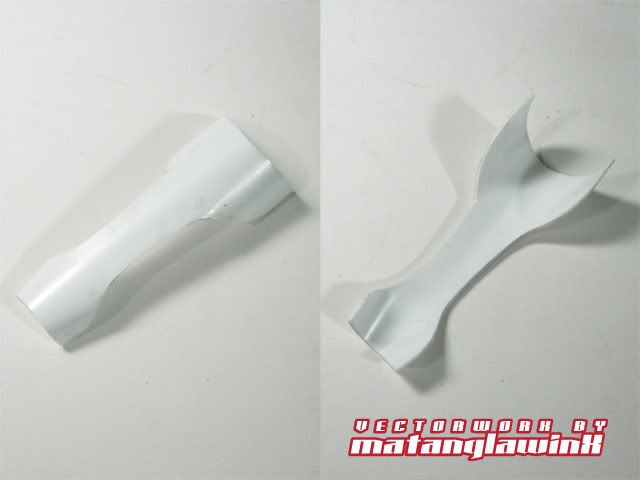
I usually use 0.5mm plates for most of these and reinforce them with 1.0mm beams to hold the shape, but 1.0mm is still flexible enough to be bent into shape. You can use a non-toothed pair of pliers cushioned with tissue or cloth for easier bending. The sample below is something I've done for the Scarlet JinX and is an add-on layer to an armor part. It's made up of two pieces of 1.0mm plaplates cemented together and was bent after the cement has fully cured (about a day).
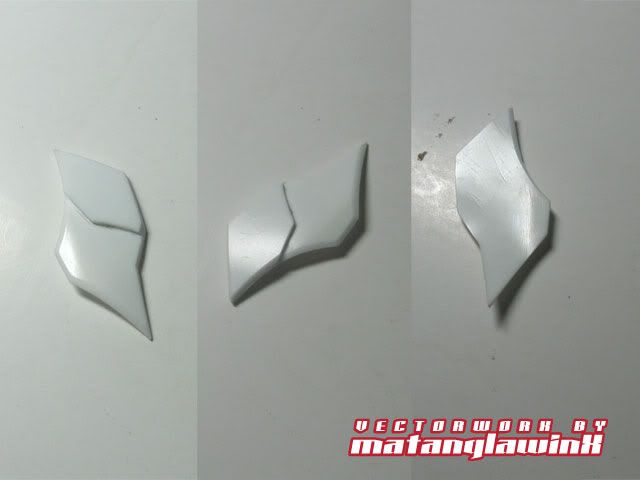
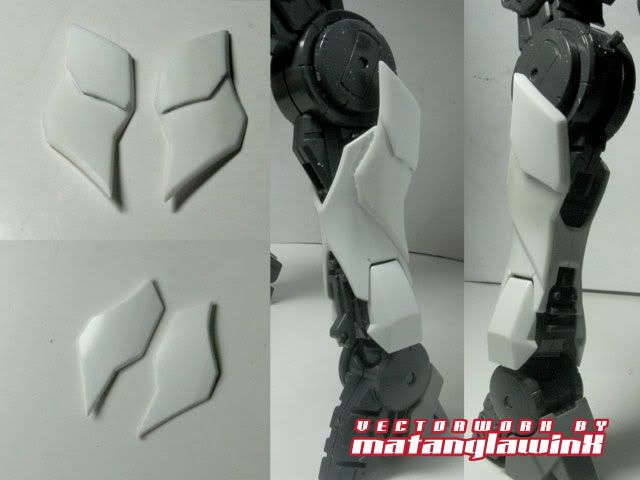
Image  


When I modded the waist of the JinX to give it more height, I added plaplates on each side of the waist  to give it more volume.

For the shape of the waist, I simply estimated the amount of curvature I needed to cut using a thinner pieces of plaplate as templates mounted on the original receptacle with double-sided tape, trimming those as I go.  Then, I attached those templates to 1.0mm plates with double-sided tape which makes it easier to cut the plates more accurately but can be easily removed after the plates have been cut into shape.
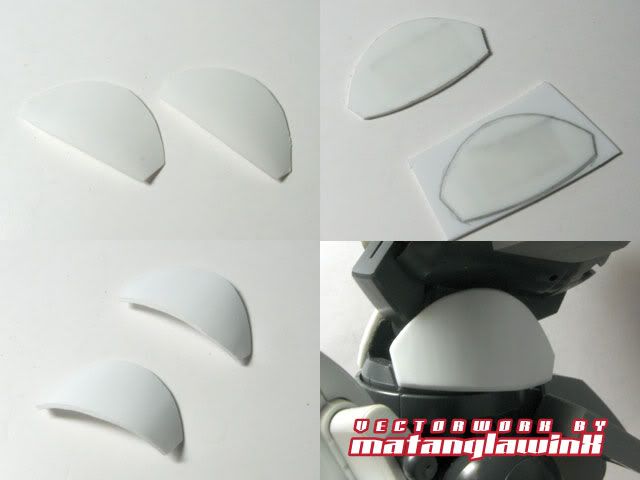


This was slowly mounted on the stock receptacle with cement, allow enough time for one section to bond solidly before smoothing the rest of it along the receptacle curvature.
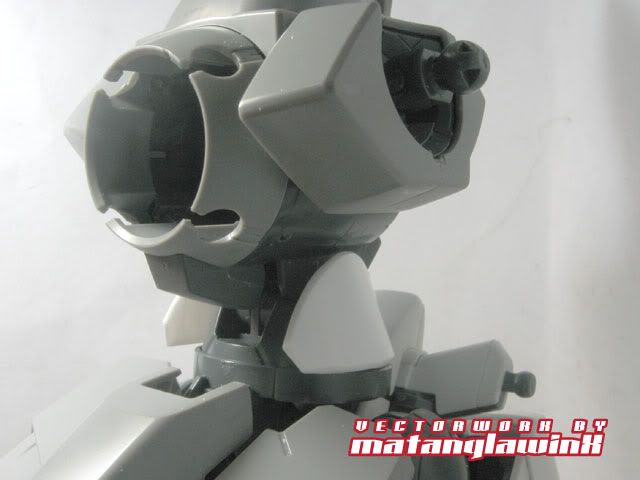
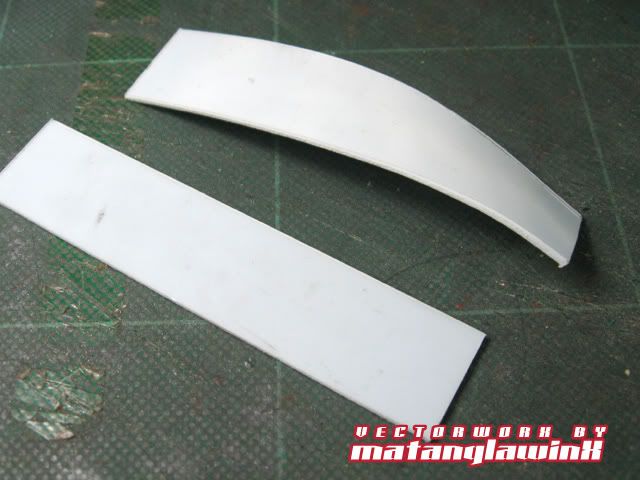

High Impact Plastic Sheets (HIPS) as they are called, are also polystyrene sheets similar if not the same as branded plaplates like Tamiya, but are a bit softer and actually easier to shape and work with. Tamiya plaplates although sturdy and stiff, actually breaks easier when bent along the grain, whereas HIPS of the same thickness can bend farther without breaking even when bent along the grain. It also has less tensile strength or spring and is less likely to counter its bent shape, hence easier to form as a curved surface.

Posted Image

Since I'm still avoiding putty at this point, I had to bend the slab two ways; perpendicularly at first, then at an angle corresponding to the curve of the section I'm building to.
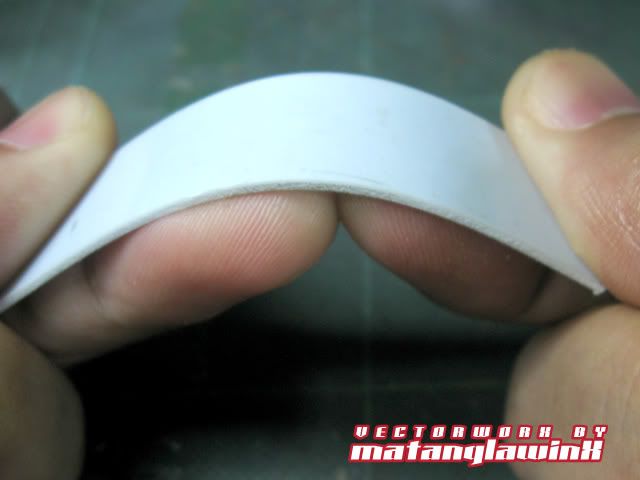
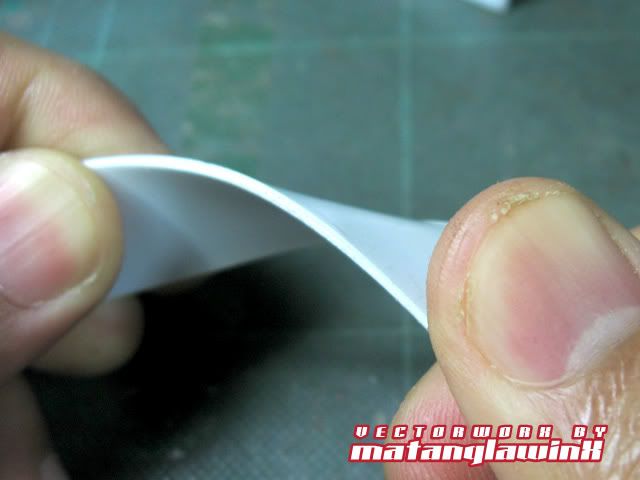
Posted Image

Posted Image


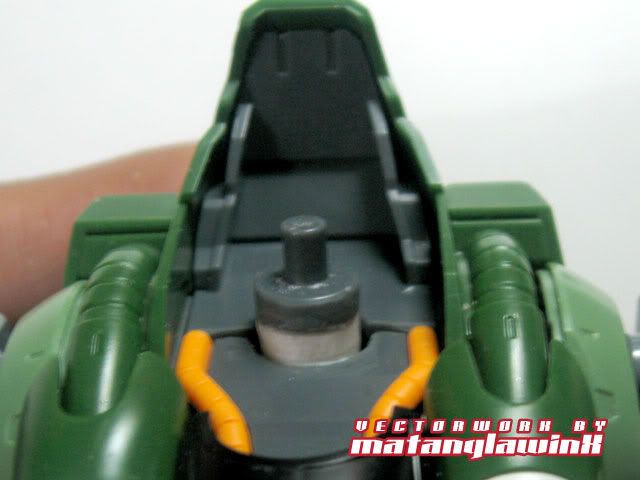
This particular section covers the side that encases the vulcan gun of the X-Walker.

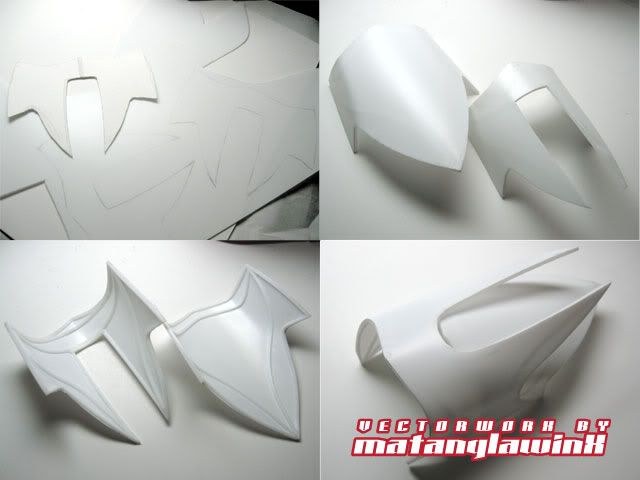
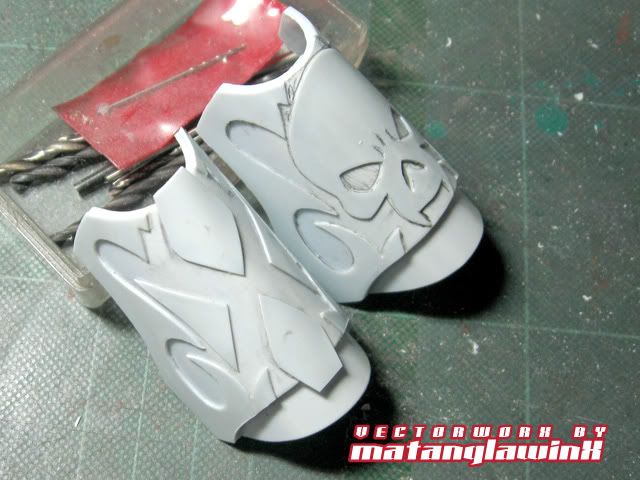
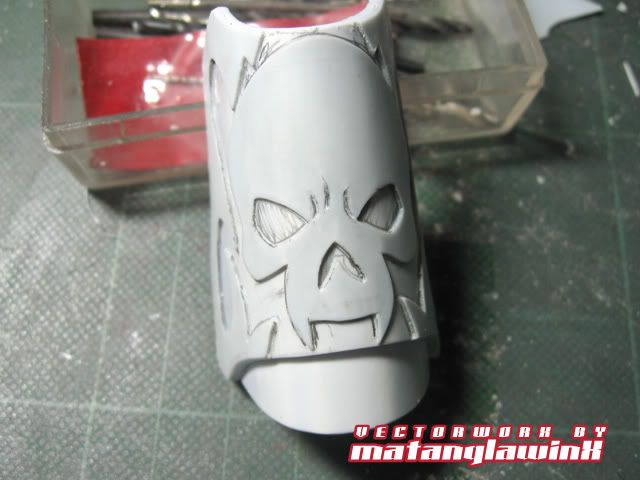
Using larger pieces of HIPS trimmings, I roughly cut a shape (half of the actual shin guard) using one of the Warhammer pics as reference. Then used that as the template to create a whole one by reflecting the shape on its edge.
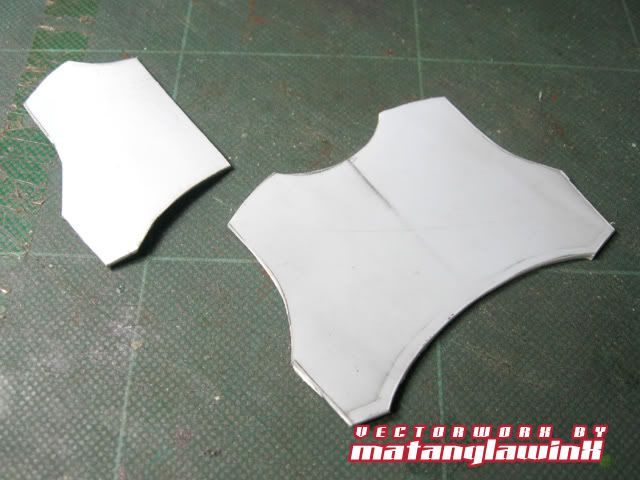
Posted Image

Then, with the usual heatless plaplate bending method, I bent the shin guards at the middle till they're supple enough and bent enough to keep that shape when cemented over the shin guard mounts. I marked the middle of the back of the shin guards to align it with the mounts.
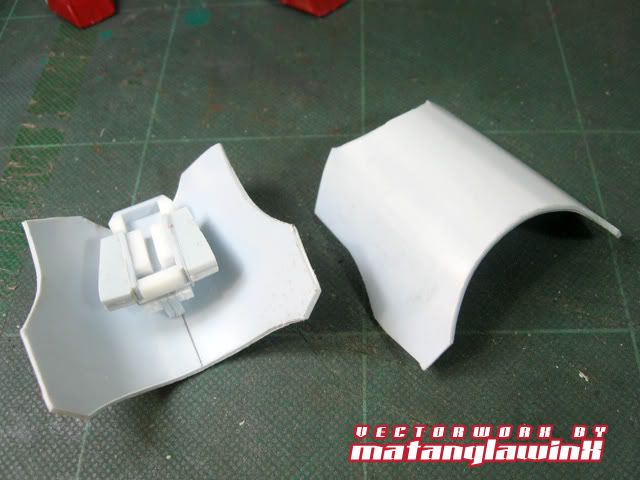
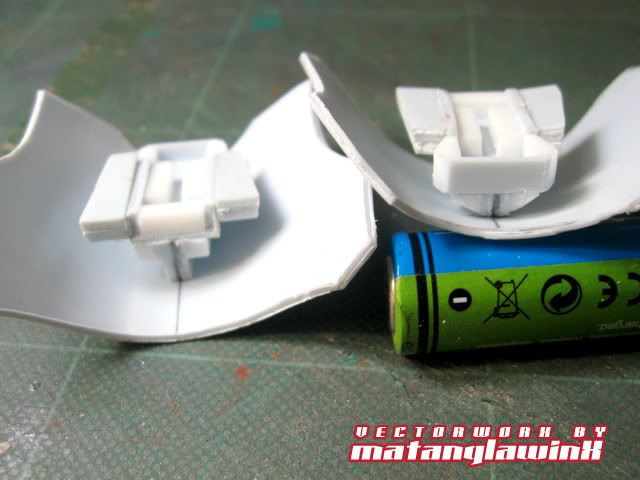
Posted Image

Posted Image

I cemented it at the middle first, then cemented the sides, reinforcing it with triangular beams and securing it with tape as it cures. The setup should hold after a few hours of curing, but, at least 24 hours is the standard.
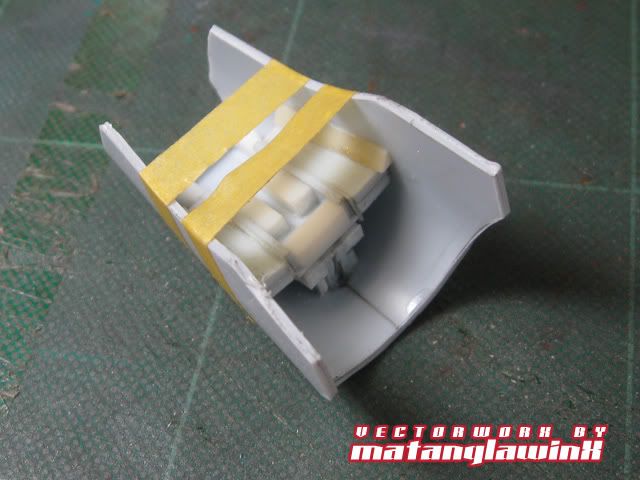
Posted Image


Plaplates and HIPS are easier to bend when they're large enough to be bent. Smaller pieces however are a bit finicky to bend into a curve properly, especially when they are already cut into shape. This piece is for the one of the Shin Guard face plates.
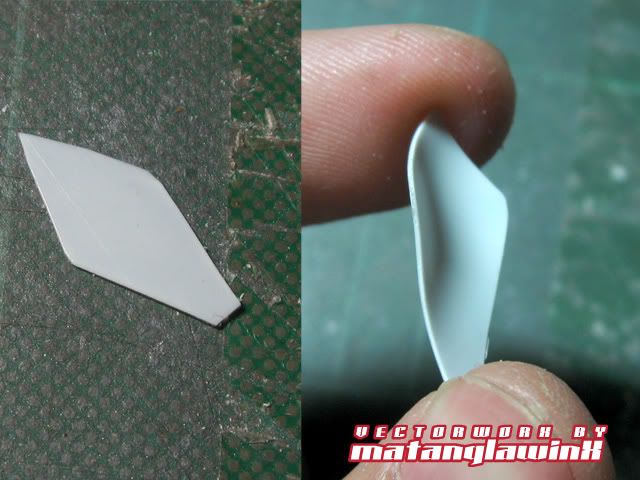
Posted Image

The trick is to bend it horizontally, then at 45 degrees alternately, then when it's soft enough, bend it vertically, instead of bending it vertically right away. Using a pipe or a round beam allows for an even bend.
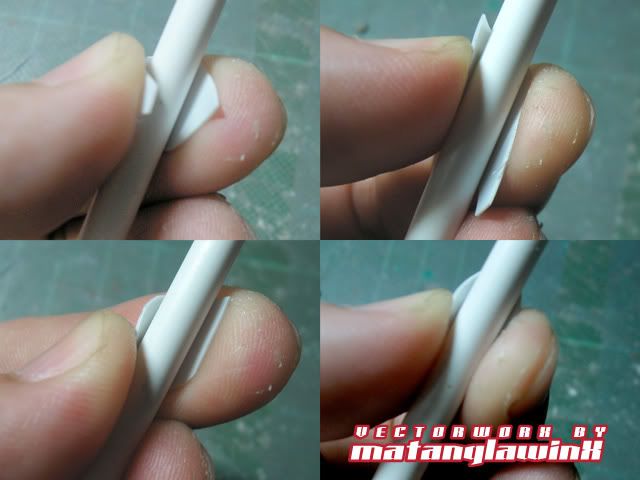
Posted Image

With that, the piece is easier to mount on the curved surface of the faceplate.
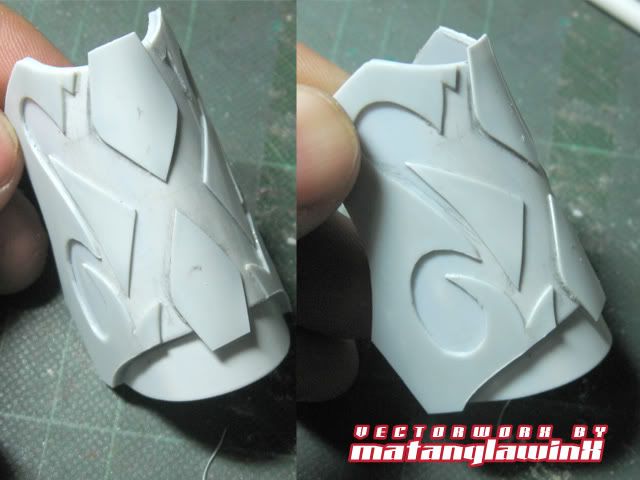
Posted Image

Posted Image


The Skull face plate.
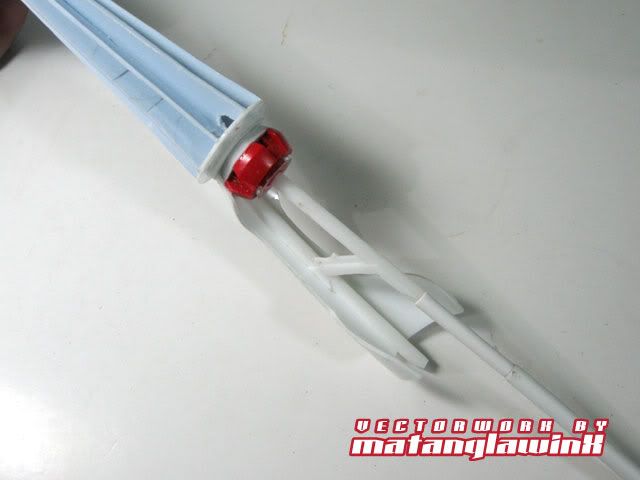
Posted Image

Tuesday, July 13, 2010

Angelus Rising Part IV: Neck Extension Mods and Skull Cap Tattoo


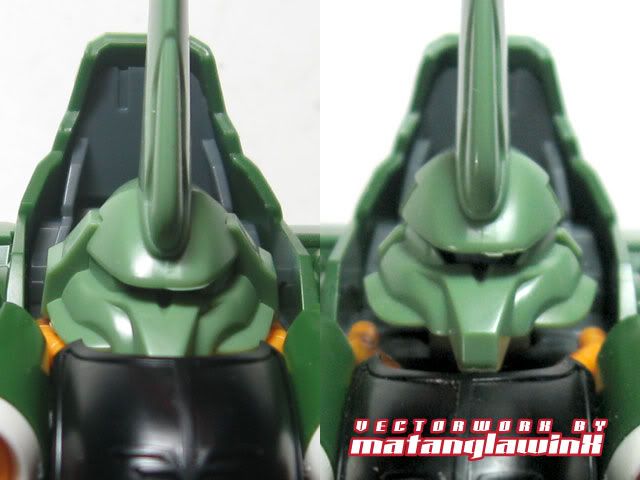
Neck Extensions.  One thing I have noticed with most kits (or MS designs for that matter) is the apparent shortness of the neck to the point that some basically have no necks that they look as if their heads were smashed into their torsos with a hammer.   Some kits, like the Exia and the Strike are proportioned well enough that they hardly need any extension modifications.  Though this might not bother some people, I believe some designs do need to have an ample length of neck to display a suit's awesomeness.

I've done neck extension mods for the Ronin, the Kshatriya, and quite recently, the JinX.  The thing about neck extensions is that if you are working with MGs or PGs, you'll run into the inherent problem of ABS plastic's semi-resistance to cement, and the problem of CA/superglue becoming brittle over time thus making it worthless for high stress/tension area repair work or modification.

The Kshatriya's Neck Extension was the "easiest" by far to pull off because of the frame construction and being made of PS.  It was quite easy to simply saw off the neck, stick an ample-sized beam in between, and mount it on to the modified frame with a generous amount of cement (saturating the modified parts allow resin build up from the cement which reinforces the ABS/PS bond since ABS will also melt a bit when saturated enough with the solvent from cement).


Friday, June 11, 2010

The Scarlet JinX WIP Part VII


A quickie update:


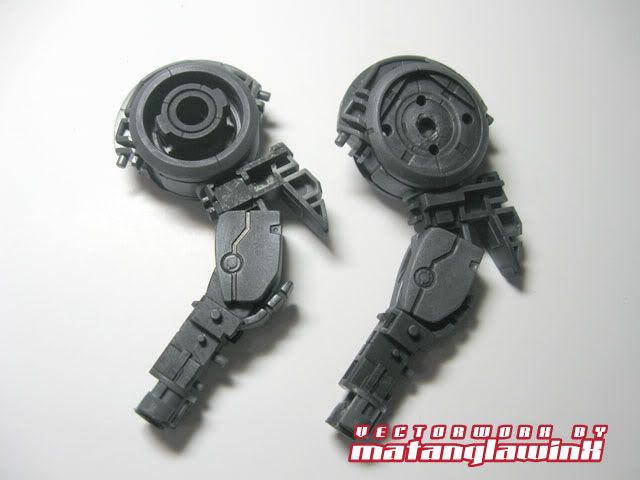
Here's another example of why I love using Flat Black.  Flat black dries semi-smooth and can serve both as primer and base coat (which makes it perfect for frame jobs, pun intended).  This is the rear skirt frame of the Jinx, painted with Flat Black, then later "carbonized" with Kosutte using cotton buds as applicators. 


The Arm Frames, assembled, painted and carbonized.


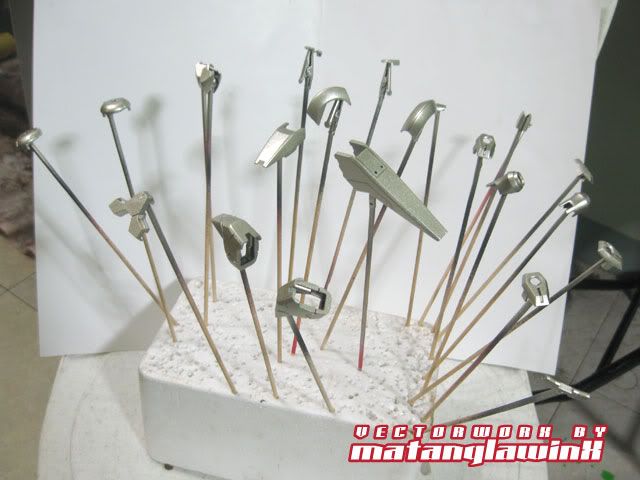
A smorgasbord of armor parts, painted with Nickel-Alloy.  Some will be painted with Honda Red later on.


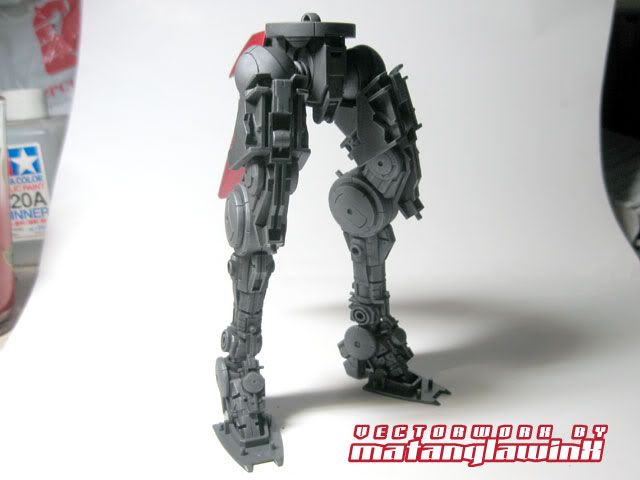
The assembled lower body frame.  I painted and carbonized most of the frame except the pegs and connectors for easier assembly.


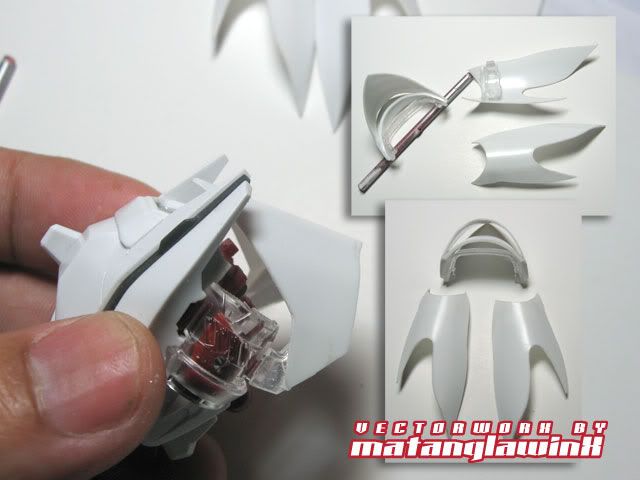
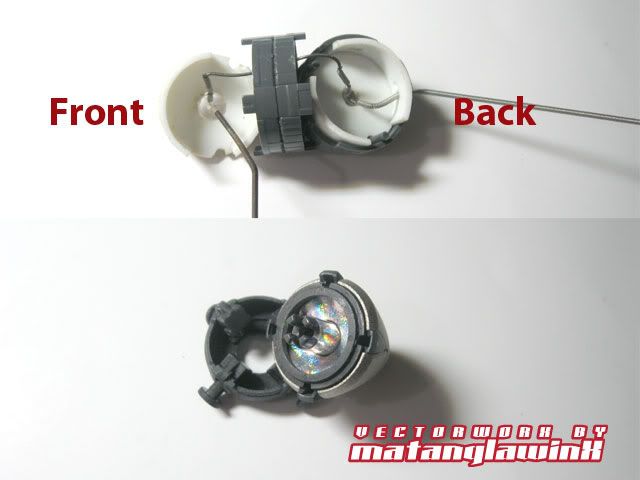
The Modified GN Tau Drive.  Although there was an option to purchase red LED modules, I opted to make my own (it's fairly easy in my case).  I've made casings using plaplates that fit into the stock drive like a charm, making it possible for me to assemble disassemble the drive easily during wiring and testing.  I used A combination of Wave and Koto Springs for a neat solderless wiring.

Unlike the MG Exia's Drive cone which has a chrome-plated core, the GN Tau Drive's core is an unplated core, and its construction blocks of most of the light when assembled, dimming the light in the process.  I got an OC attack during final assembly and figured out a way to make the light shine brighter without modifying too much of the drive.  The solution was simple:  I used a piece of Tamiya Holographic sticker as a reflector on the Drive core and cone assembly.  This increased the brightness by about a hundred per cent.


That's it for now.


Wednesday, April 21, 2010

The Scarlet JinX Lance Part II


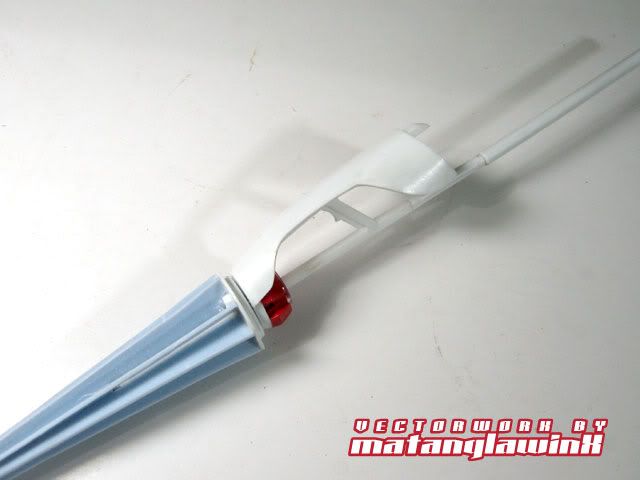
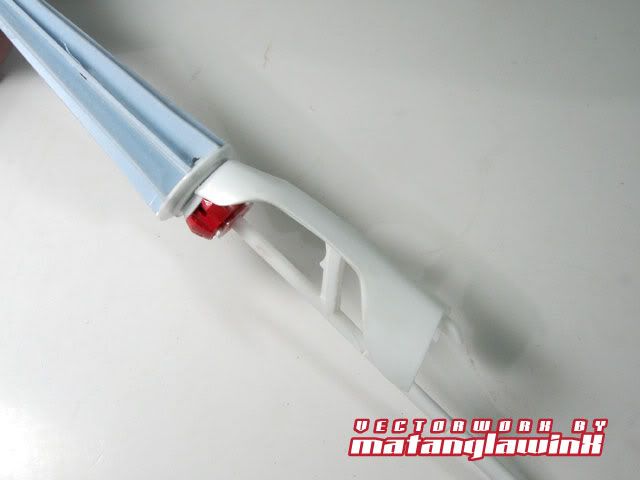
I used 3mm beams to create a combined sword guard and rifle handle for the lance.  I also added a peg and socket connection for a sturdy fit between the lance and the hilt guard.  Again, I could have simply joined the two sections together and be done with it, but it's actually part of my thought process.  Also, having this system makes it easier to paint the parts if I decide to paint them in different colors (which I realized later that I would).


More Plaplate bending.  1.0mm plaplates can indeed be bent, but certain shapes are more difficult to form.  In these cases, I use two thinner (0.5mm) plates, one cut slightly larger into shape than the other and bent separately into shape.  These two are then cemented together and continually formed into shape.

At certain times, I also use masking tape to hold the shape ( so I can do other stuff, say, like update this blog) until the cement hardens and cures.  The cement dries in as little as 10 - 30 minutes, the plates will hold the form but is still flexible enough for additional manipulation.  A cemented build totally cures and is almost impossible to bend without breaking in a day or so.


To be continued...


Saturday, April 17, 2010

The Scarlet JinX WIP Part V


Detailing.  I've employed a few borrowed techniques from DonC and a few others on plaplate detailing.  Man this is PAINFUL work (mainly because of my eyesight, and my lack of dexterity/patience when handling/cutting very small parts.  I don't know how DonC and the other guys who do this DO this).

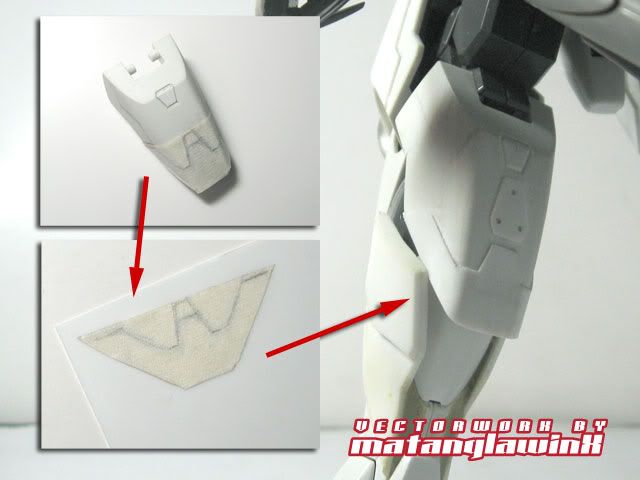
I penciled the design on the armor itself (this one attaches to the back of the thigh), then overlayed a wide piece of regular office type masking tape and and traced the initial sketch.  I then attached the masking tape to a 0.3mm plaplate and made two copies by taping another piece underneath and cutting them at the same time using scissors and side cutters.  I used this technique to most of the detailing mods that needed at least two instances of the part.


Friday, April 16, 2010

The Scarlet JinX WIP Part IV


The JinX's Double Bolo.  

"Dreams and Fantasies seem to have more meaning when they come into life..."

The JinX's custom weapon actually came to me in a dream.  It's roughly based on the shape of a Jungle Bolo, a favorite tool of most local a farmer here in the Philippines, and equally lethal a weapon that makes Rambo's army knife look like a butter knife (Rambo eventually had one eventually, if I remember it correctly).  Even before I started working on the JinX, this weapon has been playing my imagination like a melody would when I'm writing songs.

With some of my modification or scratch build projects, I usually sketch first to get a feel more of how to go about building, and some do look good on paper, but fail miserably when the first few pieces of plaplates are cut. 

The initial sketches of the Double Bolo.


Thursday, April 15, 2010

The Scarlet JinX WIP Part III


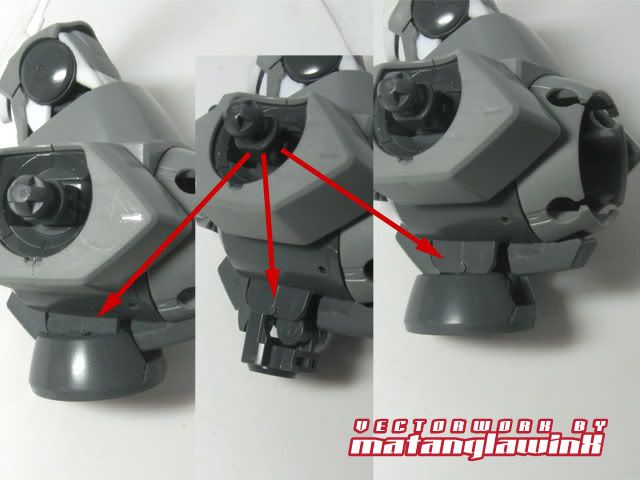
The "Simple" Waist mod.  Since I've lengthened the neck, I also decided to lengthen the waist.  I was thinking of a very complicated modification involving cutting the waist parts and lengthening them so so, but, looking at how it was constructed, the waist is comprised of a Z-type hinge (similar to double-swing doors in some restaurants).  This actually allows the waist raise a certain height, so I thought I'd exploit that instead.

The waist connection has a notch on each side that serve as pivots for the forward and backward tilt.  They rest inside the waist receptacle when mounted, but can be moved out of it so they rest just on top of the receptacle.


Wednesday, April 14, 2010

The Scarlet JinX WIP Part II


Heat-less plaplate bending.  I used a pair of toothless longnose pliers to gently bend 1.0mm plaplates into shape.  I don't use heat since the plates will harden as soon as they cool down, making it almost impossible to manipulate any further.

Sunday, April 11, 2010

Project Codename: Scarlet JinX WIP part I


While rearranging my kits, storing some and displaying others, and contemplating over the pending completion of the Crimson Cherub (the K'Triya, which I can't seem to finish because of painting issues), I stared at one of my favorite kits (next to the Sinanju and Hi-Nu) to ever get without having a second thought about getting it.

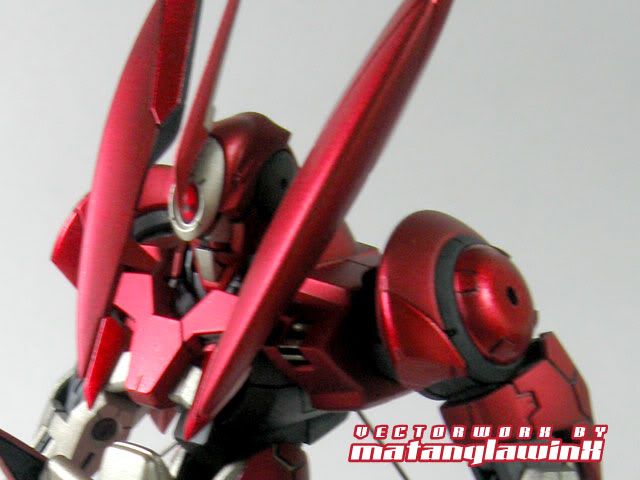
The GN-X has been tagged by some modelers/collectors as the next "grunt" MS (to the chagrin of some hardcore UC fans), not necessarily replacing the iconic Zakus in appeal.  The GN-X, or "JinX" as I like to call it (incidentally, that's how it's pronounced or nicknamed it in the English version of 00, so I guess I'm right on the dot), is a very fresh design and came as a surprise when Bandai announced it to be the next MG after the much-debated Ignition Mode MG Exia.


The Newbie Stash

Source This is a collection of specific guides for reference in Gunpla Building and Modeling in General.  • Gunpla™ and Modeling Terminolog...