The Towering Mod. Since I had already extended the neck of the Angelus by modifying the neck connection, and extended the waist by using a custom spacer I made a year or so ago for the Impaler, I had grand plans of extending the legs to give the Angelus that towering height but modifying the legs themselves, but Vanz Anazasi actually came up with a simpler and better idea by using Mighty Bond rings as spacers. I couldn't have come up with a simpler idea since this is actually similar to the spacer I made for.
I've adapted the idea 50/50. I used two pieces of 1mm plaplates to make 2mm "donut" sandwiches (I used a round punchers with just enough diameter to make the holes before sandwiching them). But, instead of just using them as spacers, I cemented the donut directly on top of that ankle section, extending that part by 2mm. As compared to later kits with ABS frames (like that of the GN-X), the Sinanju's ABS frame is more receptive to cement/PS bonding. At any rate, this modification is not so much on a high-stress/tension part, so, I wouldn't worry about it coming lose at any point.
Neat Trimming Trick. Here's something very few people know (I mentioned this in passing in earlier posts and at the tool box). There are cases when you don't have to cut the plaplate to size right away. What I normally do is cement the additional plate or modification to the part being modified, and use a side cutter to trim away the excess, using the edges of the part as a guide. The cut won't be exact at times, but I can always file any irregular areas off (even though the modified is hidden).
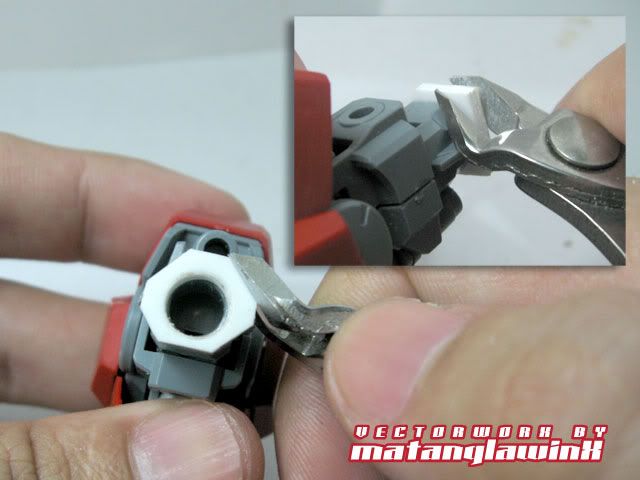
The thing is, the peg for this connection is rather short at only 5mm effective length so the modification shortened it to 3mm. Though the connection holds as it is, the ankle is a bit unstable during posing moments when the kit is assembled. So, I might extend the peg itself to compensate.
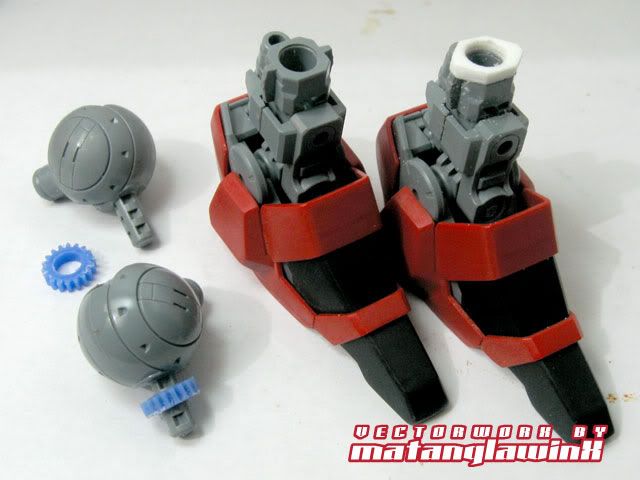
Now, for the simpler modification. I used a couple of the gear sections I saved from the wing mod (NEVER throw away useble parts) as spacers for the groin/thigh pegs. Since the thigh ped is long enough, I won't need to extend it anymore unless of course I get an OC attack and do it anyways.
Test fit. Comparing the unmodified and modified legs.
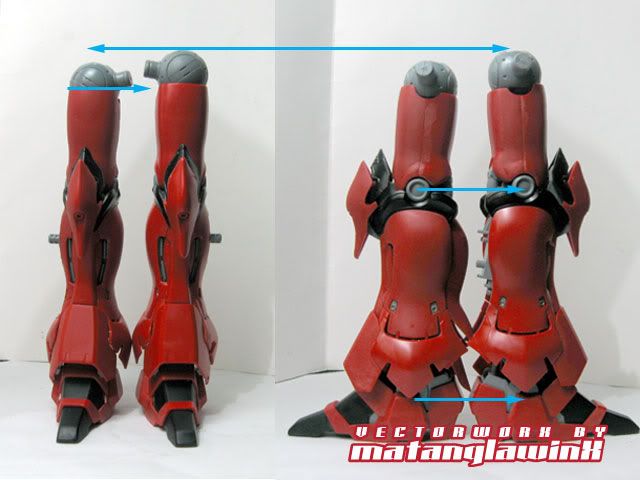
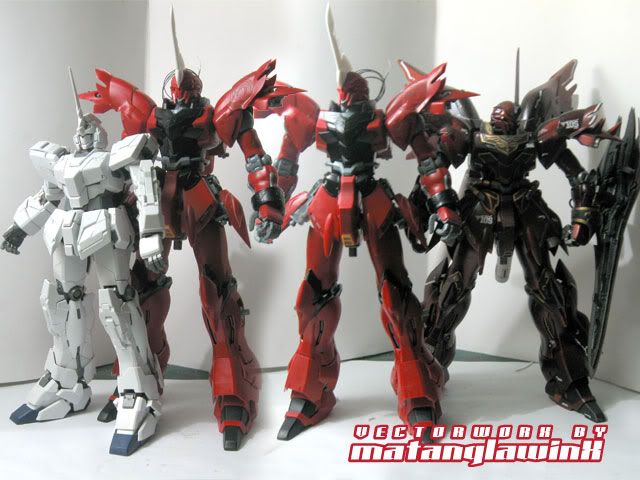
With this, the Angelus has a total additional height of 10mm (2 for the neck, 2 for the waist, 4 for the legs. The additional two is when the neck is adjusted to height). Here's a height comparison with the (ugh) Unicorn and the Impaler. Even in Destro mode, the Unicorn is only about as tall as the Impaler.


![Sherlock Holmes [Blu-ray]](https://lh3.googleusercontent.com/blogger_img_proxy/AEn0k_sIOhJjtpT09pMYndgIB_oNCYZQf_z-ul54R_7r53iGlTjaV3EfdCGDxl4ztWILMzFR1KZM_7egl0EH0HaZK4qzAIe-cwLPn_fOVOr5_rOP6Gsgf3ijsQfb7b7iqcJPMgpSdwSulpdC5d6q_A94HQxo67XVvHS7M0ilVK_ZQuxme_hogcwrGeBEQlSotGTtIybvzR3R21ax4hxju6PmDq5ZqA0KGTo39Dwd=s0-d)





