Showing posts with label PG Wing Zero Custom. Show all posts

Tuesday, January 15, 2013

The HELLRAISER Part II

Making the Impossible Possible

Although I started preparing myself, the kit and the plans for this build last November, I was only able to start i earnest cutting and hacking the parts as it drew to a close and December started coming in. Eventually, I ditched the plans I had made after assessing the kit, disassembling it and reassembling it so I'd know where things would go with or a without a manual. After making major modifications to make the WCZ head into the Hellraiser, I realized how much more work will go into its transformation from one to the other mainly because of how radically different those two looked.

Hatching a Plan

The main issue was the cockpit placement. The WZC's copckpit is located direct under the neck and deep inside the chest of the kit. The MG DSH has the cockpit at the center of the torso. This posed a problem because the PG WZC's entire torso frame is die cast metal. I will have to compensate for that and sacrifice build space later on, since I want a cockpit hatch.

I began my ordeal by slicing off the top mid front part of the chest. I realized later on that I sliced too much, following the upper slope of the chest which was way too steep. So I rebuilt that section with 1.0 WHIPS, and continue to modify and add volume to the structure to make it as similar as possible to the DSH. This in turn made the chest exaggeratedly too forward and pointy, but, as it turned out later, was a good thing.

I continued to make modifications, like slicing off the front of the chest to make room for the grills and vents.

Posted Image Posted Image Posted Image

Posted Image Posted Image

Posted Image


As I have done in previous builds, I usually employ sandwiches (1.0mm WHIPS cemented over each other) to make some of the parts. For the collar , I made 3 pieces, cemented into a cornered "U" shape, and shaved it to match the stock collar. The mid section is a 3-layer sandwich. Up to this point, I haven't made any ruler-based measurements and have relied strictly on visual estimation. To make the parts as precises as I can when I can't use the connective part itself to make estimates, I usually employ the the "masking tape transfer" method, which is laying masking tape over the part, outlining the "measurements" with a pencil and sticking that over a piece of WHIPS using it as a guide for cutting. It works all the time, with very "minimal" margin for error.

For the grills, I cut 2mm strips of 0.5 WHIPS, stair-stepped them, and mounted them on another piece of 0.5mm.

Posted Image Posted Image

Posted Image Posted Image Posted Image

Posted Image


Venting Out

Initially, I made the vent by cutting a strip of WHIPS and bending it, but I gave up on that method after it failed twice. I had to be creative with how to make it, so instead of just making it one solid part that is bent or sculpted, I decided to combine techniques. I sandwiched 3 pieces of 1.0mm, then shaped it to make the base of the vent, the cemented a piece of 0.5mm on top of it, bending it to form the pointed section. I turned the part over, and cemented another 0.5mm piece and shaped it as I proceeded. I had to make sure that the connections were saturated enough to weld together, but at the same time cure fast. (Side note: I have started working on other parts as other parts cure so I can work faster, but it's rather a bad habit that is hard to break).

Posted Image Posted Image Posted Image

As the vent was curing, I sealed the sides of the chest, cut slots for the vents, then laid over WHIPS to encapsulate the slot. The side "seal" also serves as "detail."

Posted Image Posted Image Posted Image

Posted Image


Up Next: The Terrifying Truncated Torso

Friday, January 11, 2013

The HELLRAISER Part I

Posted Image

RAISING HELL!

To those familiar with it, this project actually began last November 2012, and is my first commission. It started when Arvin Ignacio of Gundam Philippines (GPh) issued a challenge over Facebook to convert a PG Wing Zero Custom to a PG DeathScythe Hell Custom. Being it was on FB, I was tagged several times by people who knew that I was insane enough to accept the challenge. I had a class that day, and I got what is now known as a NOTIF BOMB; I got 40 notifications in a span of minutes. And, since I was tagged more than once, I was actually overwhelmed, that I had to quit my browser.

Arvin and I talked, and we agreed on a price and payment scheme. Assessing mine own speed at modifications, the build sill span at least 3 months. I've posted the WIP photos on my Online Store (which I will write about later). I haven't been able to write a decent WIP post until now, and since I've actually gone far along the build, I'll break it down into several WIP posts instead of making one huge and lengthy post.

When I accepted the challenge, a lot of people expressed their interest and expectations in the project. Someone even said it was (almost) impossible, but that person didn't know it was me who accepted the commission. Though I understand that person's notion about it being (almost) impossible, it is only such because he lacked the imagination. Great modelers, after all, have done more difficult challenges from scratch. Take that HG to RG Nu conversion by Kaku, for example.

I even had doubts myself. When I finally got the built PG WZC from Arvin, I was disappointed at how flimsy the kit was designed. As I was assessing the kit, I saw that it won't be easy even for me. The WZC and DSH had enough similarities to work on, and I decided I'd start on that.

HEADSTART

Quite literally. I started by comparing the heads of the MG DSH and the PG WZC. I noted the similarities and the differences and saw how I'll be able to use most of the parts as base for modifications.

Posted Image Posted Image Posted Image

Posted Image


I then cut and rebuilt the cheek parts to match that of the DSH and built a vent for the skull base by stair-stepping 4 pieces of 1.0mm WHIPS. I then overlaid a piece of bent 0.5mm WHIPS over the rear portion of the cheeks. This will become the case for the cheek vents.

Posted Image Posted Image Posted Image

Posted Image


I shaved off material from the rear of the head to make way for the vent mod. I mounted the Rear vent on piece of 1.0mm WHIP to hold it shape. That in turn is shaped to fit the modified head and becomes an insert.

Posted Image Posted Image Posted Image Posted Image

Posted Image


The cheek vents are made by over lapping pieces of 1.0mm WHIPS and will simply be inserted into the cheek cases. The rear vent is then encapsulated, and pegs are placed on the inside. These pegs goes into the modifed head and will keep the part in place.

Posted Image Posted Image Posted Image Posted Image

Posted Image


I modified the stock Vfin Base (or crest) by overlaying WHIPS until I had enough volume to shave off to create the pentagonal shape. The Vfins are made by sandwiching 3 pieces of shaped 1.0mm WHIPS, which are then beveled. I intentionally made them big so I have leeway for adjustments later on, but I actually like the exaggerated look.

Posted Image Posted Image Posted Image

Posted Image


Part 2 next...

Sunday, September 16, 2012

Commissions, Rainy Days and Everything in Between

Commissions.  The next step in the evolutionary process of modeling, where one gets compensated for working on something one loves to do.

Even though I have had a few inquiries before, I haven't really done or have accepted commissions because at the time, circumstances prevented me from doing so.  I've had inquiries where I am asked to do repair work, but it was simple enough, I just told the one inquiring on how to fix it himself.  There were also at least major build commissions that came to my doorstep, but I had projects back then, both Gunpla and otherwise, so I wasn't able to do make a commitment.  There were also hints by people if I wanted to sell my previous builds, but all I can tell them was, "I'll think about it" and never followed through.

The fierce look of the Deathscythe
(Photo credit: Gunpla-Inochi)

Raining Hell.  It was a rainy day.  Someone from Gundam Philippines, a local group of modelers and collectors, issued a challenge that was right up my alley and was too hard for me to resist.  The Challenge?  Convert a PG Wing Zero Custom to a DeathScythe Hell.  I wouldn't have noticed the thread, that group has very active members who constantly post almost anything under the sun aside from the usual stock of Gunpla and toy-related stuff, if not for the fact that I was tagged at least twice on that thread, and once tagged, I get all the notifications when someone posts after the tag.  I got at least 20 notifications on that post alone, and since I was at an off-site training at the time, the notifications I  got ballooned.

Coming Soon!

In one of my replies I said, "If this is serious, I'm in.  I'll need references."  I listed the DeathScythe as one of my top ten favorite mobile suits, so it was that more than anything else that made me accept the challenge.  I needed an excuse to get an MG DSH, and surely enough, I got one.  Aside from being my reference, I'll also me modifying the MG DSH to reflect what modifications I will put on the conversion.  Hence, the Hellraiser Project is born.

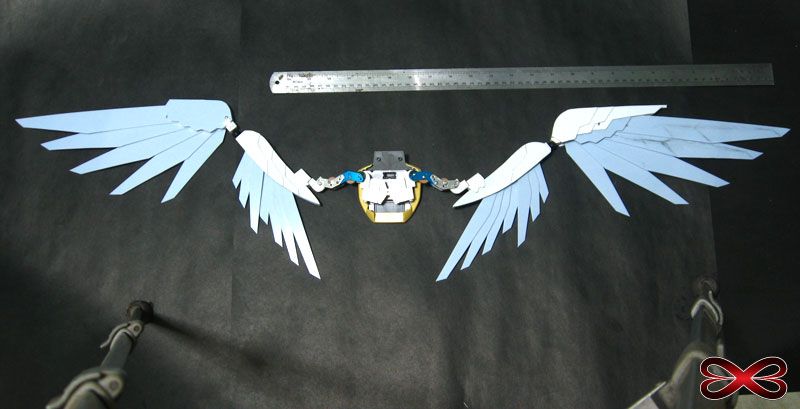
This is going to be enormous.  My thoughts linger on how I simplified my wing design and construction for the Bathala, but even that is still rather complicated because it is fully articulated in several places, compared to the that of the Deathscythe Hell's wings.  So, it wasn't a stretch that I didn't see the wing as a major thing to worry about, but, it would be the major part of the build since it'll be built entirely from scratch.

The Bathala's Wings
The MG Deathscythe Hell's Wings.

Even though Arvin Ignacio, the one who issued the challenged, and I haven't talked details yet, I was already thinking of how to improve the DSH's wing (I actually have been thinking about it since the MG DSH was released).  I'll modify the Wings as such there won't be any gaps when it is fully spread.  If I am able to do that on the MG, I'll be able to do it on the PG.  I won't be replicating the MG Wing point by point in internal construction because of the scale and like always, weight issues, but the functionality of the two will be similar.

I have leeway on making the PG DSH's wing more stable because it has a solid structure throughout.  I'll also tweak the design, making the the curves curvier and longer, to give it a more organic look.

Second Wind.  In the heat of it all, Bryan Mallorca, one of the people who hinted on having me do a commission (at the time, I thought he was just responding to my joke about him giving me a rare kit if I do a commission) followed through and asked me if I was willing to do it.  He mentioned two kits, and I chose The HGUC Stark Jegan to build as I please and turn it to a "MatX Custom."  He and I met that afternoon over Hungarian sausage (along with a friend of mine) and sealed the deal.  This commission, which I hereby tentatively dub the Hercules, and the Hellraiser are now intertwined.  I will work on the Hercules while modifications on the Hellraiser are curing, using the quick techniques I've developed while building the Bathala ang the Haribon.

A Third and a Fourth, and maybe a Fifth.  The adage, "when it rains, it pours," have more than once applied to me, and literally most of the time during rainy seasons.  I get more projects, more opportunities, more brushes with serendipity during the rainy season, when I often choose not to go out in the rain.  But, I don't see rain as a bad thing any more than one would see clouds in the sky as signs of rains to come.  I just go on my day as it is, even though rain, and the weather in general, affect me directly in more ways than one.

Those people who also hinted on having me do commissions have also finally formally asked, even if it was just hypothetical.  As such, there are a few things for me to look forward to.

Speaking of the Haribon, I haven't touched it, literally, for almost 2 weeks now because of work-related stuff, and it stands on top of my mousepad, eerily eyeing my every move with an almost accusing stare.  The Hellraiser Project will have to wait a month, as my dreams of the Haribon might turn into nightmares, like when I was building the Ronin for the second time.  This is something I need to have done, not because there is a deadline for a competition, but I plan to do more builds as well finish the ones I've started in as short a time as possible.

The Newbie Stash

Source This is a collection of specific guides for reference in Gunpla Building and Modeling in General.  • Gunpla™ and Modeling Terminolog...