Showing posts with label PG Red Frame Astray. Show all posts
Friday, December 30, 2011
The Dragon Ronin Gallery
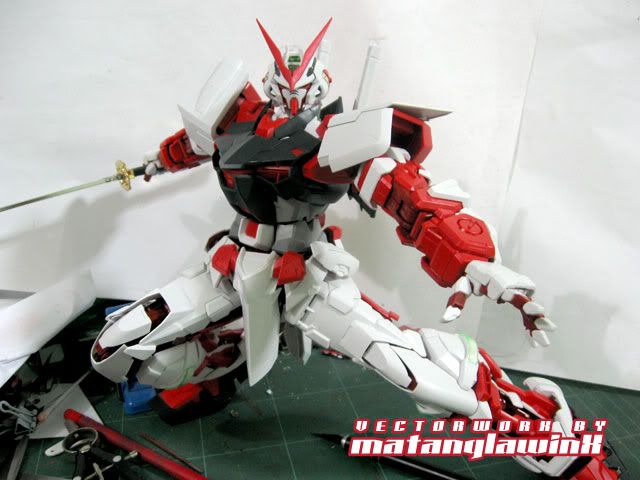
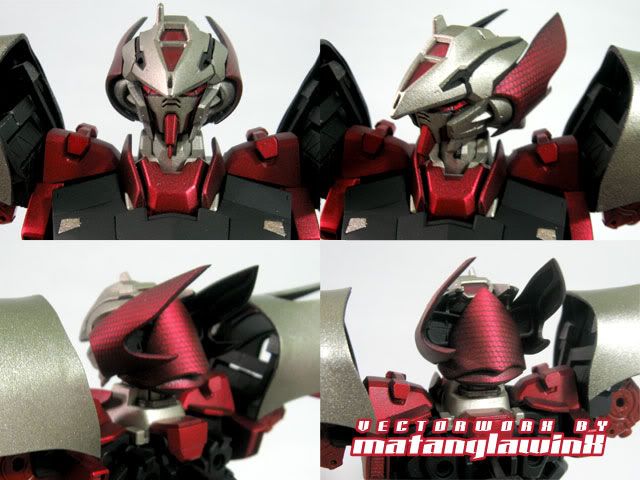
It took me a while, but I was finally able to take gallery pictures of the Ronin. The pictures speak for themselves.


Sunday, April 24, 2011
The Dragon Ronin Astray Revisited
For one that has been done a long time ago, The Dragon Ronin Astray has been getting a fair amount of views and also a few inquiries if I'd still finish it. Since I was a bit stuck on the how to proceed with the Turn X (it's not so easy when I'm considering whether the conversion parts have to fit on to the Turn A's frame, or build a new frame altogether, for some parts, like the chest), I revisited the Ronin's WIP and dismantled the kit.
There'll be a few things I have to rework on the Ronin, but it's mostly the Samurai armor I designed for it. I'll be simplifying it, for one, and would have decide whether to keep the frame flat black with red accents, or dark red with gold accents. I've also broken down the WIP into several parts, since personally, I've had trouble with the page loading forever with all those pictures in one post, especially when my internet access is at a crawl.
This project was leaps and bounds for me. Before it was the Big Red/Hi-Nu, and the Impaler/Sinanju, both of which paled in comparison to the amount of work I had done in modifications, as well as having developed a few "new" modification and scratch-building techniques as I was working.
I'll work on this soon, probably as I work on the Masurao, and the "secret" project DC, myself and a few others are planning.
There'll be a few things I have to rework on the Ronin, but it's mostly the Samurai armor I designed for it. I'll be simplifying it, for one, and would have decide whether to keep the frame flat black with red accents, or dark red with gold accents. I've also broken down the WIP into several parts, since personally, I've had trouble with the page loading forever with all those pictures in one post, especially when my internet access is at a crawl.
This project was leaps and bounds for me. Before it was the Big Red/Hi-Nu, and the Impaler/Sinanju, both of which paled in comparison to the amount of work I had done in modifications, as well as having developed a few "new" modification and scratch-building techniques as I was working.
I'll work on this soon, probably as I work on the Masurao, and the "secret" project DC, myself and a few others are planning.
Monday, January 3, 2011
Julius Lim: Scratch-Build Master
Plenty of people consider me a pla-plate/scratchbuild master, but, there's one guy I absolutely look up to who is even better (and faster) at it than I am.
Julius Lim did a scratchbuilt Dendrobium (albeit partial because of the size limitation of BAKUC) as part of his entry for 2009. That alone wowed me to do better at my efforts, but, I'm limited by mine own pace. He also converted a Saz into a Sinanju which served as his entry for 2008.
His current project is nonetheless a huge one. He's converting a PG Red Frame Astray into a Blue Frame 2nd Revise, and I guarantee, this is one build to watch out for. I'll be updating this entry with his progress.
Julius Lim did a scratchbuilt Dendrobium (albeit partial because of the size limitation of BAKUC) as part of his entry for 2009. That alone wowed me to do better at my efforts, but, I'm limited by mine own pace. He also converted a Saz into a Sinanju which served as his entry for 2008.
His current project is nonetheless a huge one. He's converting a PG Red Frame Astray into a Blue Frame 2nd Revise, and I guarantee, this is one build to watch out for. I'll be updating this entry with his progress.
Update: Check Part II of the WIP HERE.
Saturday, April 24, 2010
The Dragon Ronin Astray Part XI
And the Deadline Passed Me By...
The Gerbera Straight and Tiger Pierce blades. I won't be stripping off the chrome, but, I'll just remove the nub marks.
Stripping the gold off the sword parts is soooo slow since I couldn't find Chlorox. Winrox is like Zonrox.
The last picture is after 24 hours of soaking.
Decided not to use the stock backpack since it'll take me more time modifying, so I customized something similar. I used the surplus Strike groin armor as the mold for the build.
Progress of the backpack.
The objects in the last pic are ear cleaners....
The paints...
More back(pack) pains..
The mysterious thingee that has been giving me deja vus...
Initial paint stages...
A technique I used before with the Big Red/HiNu.
Instead of clear/clear gloss, I used flat/matte clear as a top coat, essentially defeating the purpose of the shiny metallic effect, but yielding, at least for me, better results...
Subtle color difference between the Tiger Pierce (left) and the Gerbera Straight. I achieved this by varying the coats of Metal Alloy over flat black, then Honda Red. I used Metal Alloy instead of my usual Gold 351 since it gives a more striking and visually better effect.
The sword guards, pummels and sheath ends finally stripped of its gold coat. There's still a wee bit left, but I'll sand those off.
Gotta love flat black. It's a primer and base coat in one, and gives a nice, deep tone to metallic paints.
Muted metallics. They look good enough to eat...
The stock thruster, and the custom.
Another kosutte trial. I will be using a couple of Sinanju H4 thrusters inside the custom ones.
The scabbard/sheath painted with Metal Alloy and the sword guard painted with Metal Alloy + Gold 351.
The scabbard/sheaths of the Tiger Pierce and Gerbera Straight.
The layered armor of the groin guard...
Presanding, when done right, and the parts are aligned well, basically removes the seamline even without cement. This is perfect for ootb snapbuilding.
The Gerbera Straight (top) and the Tiger Pierce.
Black and Red...
The yet to be finished Zen Shrine dio.
Unfortunately, I won't be able to make it to the deadline, and even though I still had a few hours left, I'd rather not ruin a good build by rushing it.
With the head mods, the Ronin's neck looked visually short, so I decided to mod the neck joint and added 3mm, just enough to give it clearance.
I cut away the base of the ball joint from the main connector used 2mm beams and 1mm plates to rebuild the shaft. I then added pegs to the base, drilled holes to the main to make a strong connection.
Fits like a glove.
Before and After modifications...
I will have to "thicken" the neck later on.
Assembly update.
There's a-plenty I need to rework. Project's on-hold indefinitely...
Subscribe to:
Posts (Atom)
The Newbie Stash
Source This is a collection of specific guides for reference in Gunpla Building and Modeling in General. • Gunpla™ and Modeling Terminolog...
-
With the intent of going full AB, dropping if not minimizing my use of Bosny spray cans, I got an Airbrush + compressor set from a friend ...
-
Rather, I had these sent to my school since I was on an off-site training. Bosny Philippines has once again graciously sent me free stuff, ...
-
This tip was brought on courtesy of a question Krescenhaze asked regarding height proportions of Gundams (or any MS design for that matt...