Showing posts with label Angelus. Show all posts

Sunday, July 14, 2013

Stripping Paint? Try Denatured Alcohol


I haven't been able to work on anything Gunpla quite recently (except for assembling a couple of kits or so, or further mangling old kits, just to break my monotony) mainly because I currently have overlapping projects, aside from a pending domicile change.  There's also no relevant issue for me to rant on, so this blog has stagnated a bit

So, here's something I posted over Facebook, which I am only now able to post here, for the benefit of those who do not know who I am on FB.

Stripping paint is a pain.  We all know this for a fact.  We tried different soaking mediums with varying results.  Hobby kit plastics (PS and ABS), as we all know, melt in certain mediums, so it's quite important to know which one works for our purpose and which do not.

As far as my research is concerned, brake fluid seem to do the job quite quickly, but the downside is, it's highly toxic and may not be good for plastic in the long run.  Hobby grade thinners are only good for thinning paint, but they also seem to damage certain plastic over time, making them brittle when saturated (as I have experienced with my NG RF Astray and MG HiNu).  It might just have happened due to my carelessness, but, I have stopped using hobby grade thinners, especially since I use mostly industrial grade spray can paints (which HGTs work poorly on) and Vallejo Hobby-Color and Game Color Acrylics which are water-based.

Then, there's denatured alcohol.  I have long known the potency of the stuff even before I tried it myself, from other modelers who have been using it.  Since it's alcohol, it's basically "safe."  It's only toxic if you ingest it, and the only real downside of it is, it can dry your skin after prolonged use (which gloves can help with).


Denatured Alcohol strips paint from parts quick and easy. The "time lapse" above shows parts from one of my old projects, the Angelus.

The paints used are Bosny Flat Black/Flat White/Grey Primer, Nickel Metal Alloy, Honda Red 67 and RJ London Pearl White. Bosny paints are industrial automotive paints.

Frame 1: The parts, before soaking.

Frame 2: Denatured alcohol, in 40mL soaking canister

Frame 3: After a few seconds of soaking. The liquid starts working as soon as the painted part is dropped.

Frame 4: The clear Honda Red "dissolves" into the liquid.

Frame 5-6: With the still un-soaked part in the background, the metallic nickel and flat white soften and loosen hold from the surface, simply rubbing it with bare fingers dislodges it from the plastic. At this point, the primer/flat black becomes "powdery." Majority of the paint can be easily brushed off with a medium-bristled brush, or a used toothbrush, even in the nooks and crannies/details.

Frame 7: The second kneecap armor, still un-soaked. This was later thrown in with the rest of the parts.

Frame 8: While the first batch of photos were processed, the parts continue to soak. They were then taken out and given a stern brushing.

All in all, Denatured Alcohol can strip paint, even as hardy as industrial ones, in as little as 30 minutes.

Saturday, November 6, 2010

Thursday, November 4, 2010

Black Red, and Gold!

  
The expert who didn't want to argue is still arguing about the difference of injection molded plastics and sheet plastic when I've reiterated it had no bearing in the discussion, and the one who claims to be ignoring me and my posts is checking out my blog.

Kewl.  I've always known that guy was too insecure for his own good.  I don't often talk about issues like these on my blog, not that I don't consider them any less important, but there are times that even I run out of patience or get annoyed with the very same type of people.  I'm still human after all.

Anyways, Murphy's starting to rear his ugly head as I enter the final leg of the build and, I realized the grainyness of the metallics are quite reduced if I don't layer them with black or another color.
Here's the shield of the Angelus.  The gold stands out quite nicely against the black and red.  The "Stringy" texture is done by scribbling lines using Technical pen over Flat Black.  The India ink dries semi gloss.  It's one of those techniques I discovered quite by accident back in the days I was drawing/coloring heavily on paper (there weren't computers or Adobe for that matter).  I'd often use ink over flat black poster color, and sometimes, through an overshoot of dexterity or being too careful, I'd overshoot my target line and into the flat black.  Later I realized it could be used to my benefit, as you see now.

I made a few mistakes removing the mask and the red edges are quite uneven.  I might be able to fix those with clear red enamel later on.


Monday, November 1, 2010

Mishaps, Contemplation and More Kossute Magic

 
As the BACWC draws near and most everyone are doing the finishing touches on their entries, I've also slowed down a bit from painting especially with the weather changing like a woman who can't make her mind which donut to pick.  In my experience, I've been able to "sense" the weather changes and adjust how I paint parts.  The good thing about painting with cans is one can work quickly even with layered colors because of their fast drying properties and most primer-based paints like the Flat Black I adore so much doesn't really care what kind of weather there was (or for that matter, what mood I was in).  With flat black, my layering works still, but with longer drying times since I was going for a smooth finish instead of textured this time off. 

I've had a few mishaps, but, nothing I can't handle.  I've finished the Chimera in less than week, considering that painting that monstrosity was a PAIN to begin with with all the parts interlocking with each other.

Anyways, most people think my entry consists only of the Chimera Diorama, but, to some, it should come as no surprise that the Angelus hopefully will also ascend this weekend.  My previous blog entry, the Sinanju cables, was the clue that I'm cooking up more than just one mythical beast.

It seems that my itch turned rash turned zombie infection of a build called the Chimera superseded the Glory of the Angelus, but I was actually deciding if I'll simplify the Angelus wings further.  While deciding (after completing the Chimera's paint job), I did start painting the Angelus, almost with disastrous results.  The shield basically disintegrated before my eyes as paint trial upon paint trial just wouldn't work.  The red bled through the paint mo matter what I did. I even layered both flat black, and primer gray to shield the white paint (Bosny 40 White and Flat White) to no avail, so, Instead of ruining my momentum and wasting any more paint, I realized I should use that to my advantage.  I shan't be showing the booboo turned "innovation" just yet, though.

Also, I've got a few "negative" reactions from some people about the Chimera's chosen scheme (Owing that I was using the same Nickel Alloy) paint, but, hopefully, they'll change their minds later on.  Sufficed to say, the Angelus and the Chimera, both being mythical creatures, have similar schemes with different accents.

Anyways, here are a couple of snapshots of the Angelus' main back pack frame, painted with the usual flat black then enhanced with Kosutte.  To achieve the effect on the thruster bells, I masked the outer then painted the inner of the bell with my layered red combo.  I left the outer plastic bare and progressively sanded the surface (400-500-2000) for the Kosutte to give it that "almost-metal" shine everyone likes.


I mentioned before that all will be revealed on the 5th of November (as a post-dated entry), but I misread the details of the submission regarding the dates.  Deadline for emailing is on the 3rd, actual submissions on the 5th and 6th, NOT the 4th and 5th as I originally thought.  I originally set it on the 5th because I though that was the second day of submission, and Kisapmata offered me a ride on that date.  Worse case scenario is I will have to submit on the 6th to maximize my build time, because I still don't have a diorama to speak of.

Tuesday, August 31, 2010

Angelus Rising Part IX: Powering up the MonoEye


While working on the Unicorn improvements I got a chance to finish ALL the painful engravings on the Angelus' armor, but kinda screwed up the shield.  Sufficed to say that I'll be fixing that.  I'll start working on the diorama this week, and hopefully my plans for the dio will pan out.

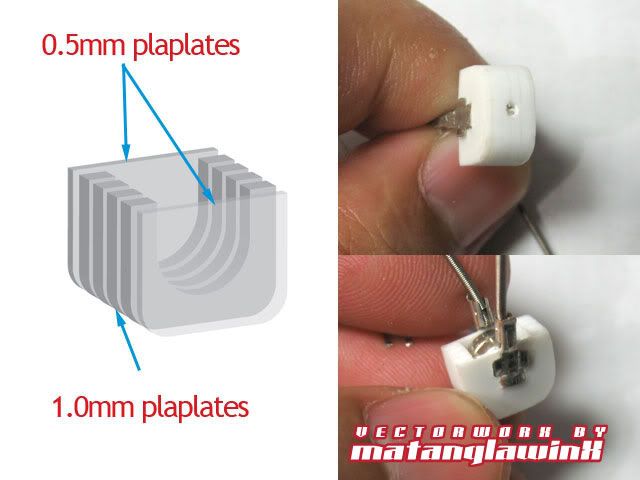
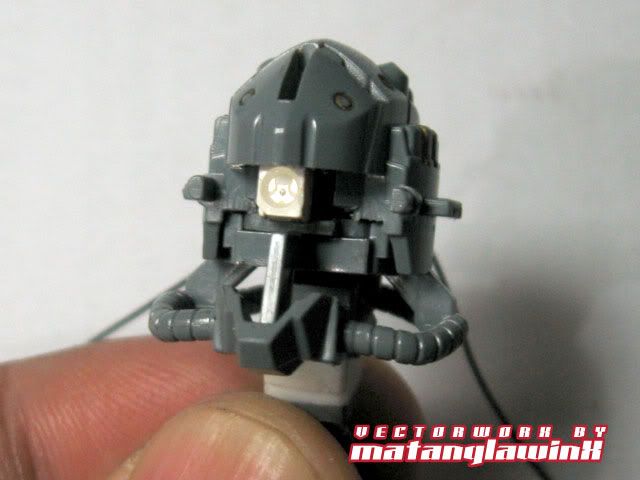
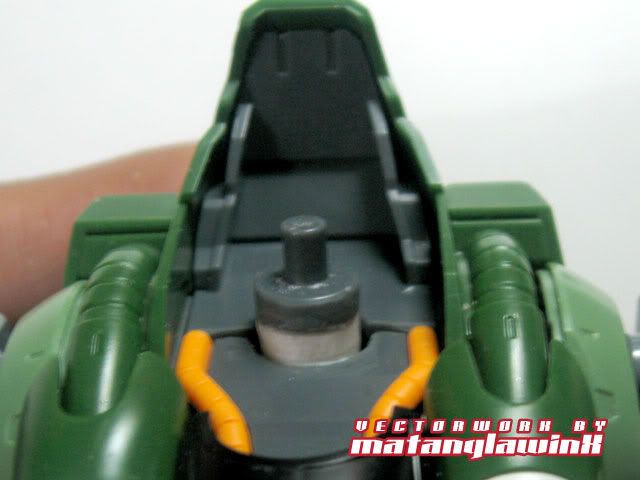
Alternatively, I've been thinking on how to power the Monoeye and decided on a rather simple setup.  Instead of building an external power pack, I opted to use the main back pack to encase the batteries.  I've used two of the second to the smallest batteries I have on stock (each is 2mm thick).  I built a battery case by sandwiching four ample-sized pieces of 1mm plaplates together and carving out the middle to fit the diameter of the batteries.  I then cemented 0.5 mm at opposite sides to enclose the case and drilled a small hole underneath to help push the batteries out. 


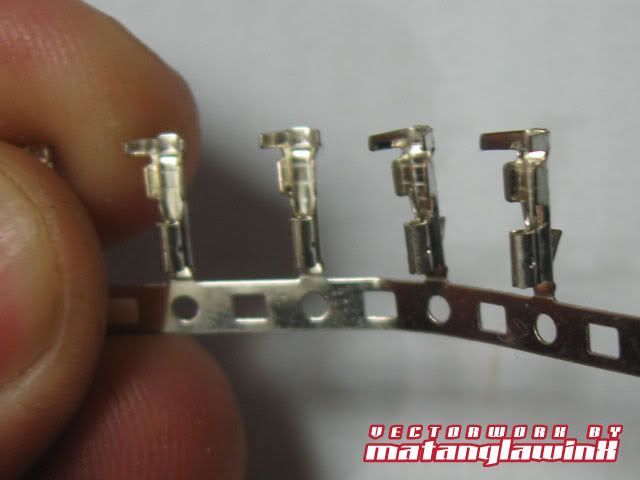
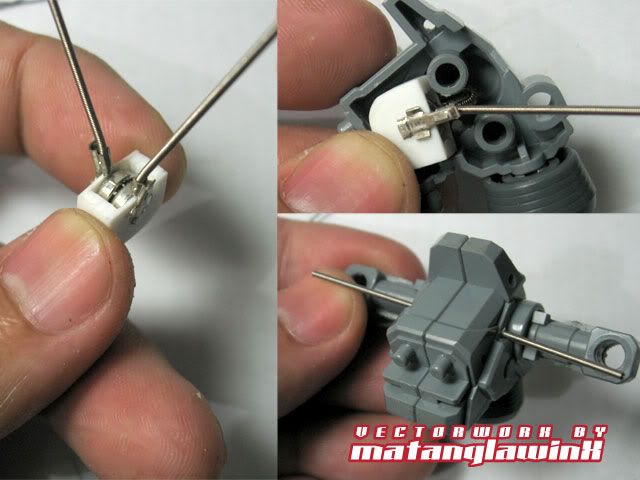
For contacts, I used metal wafers used in electronic circuits.  These nifty little buggers come with connector modules or can be purchased as is.  I simply mounted it on the 0.5mm plates by punching slits on the plates inserting the legs, and securing it by bending the legs.  The bent part become the contact points.


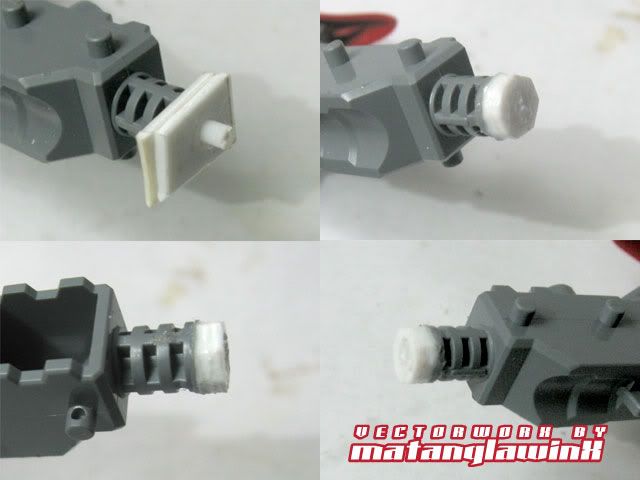
I then added 1.0mm wave springs (which I now prefer over kotobukiya springs because the latter have the tendency to rust over time), and simply encased the setup between and withing the back pack frame.  The only modification done in this case is removing one of the connector pegs to fit the battery pack.


I'm still deciding if I'll include a micro switch in the setup, or simply employ a contact assembly as it is now.


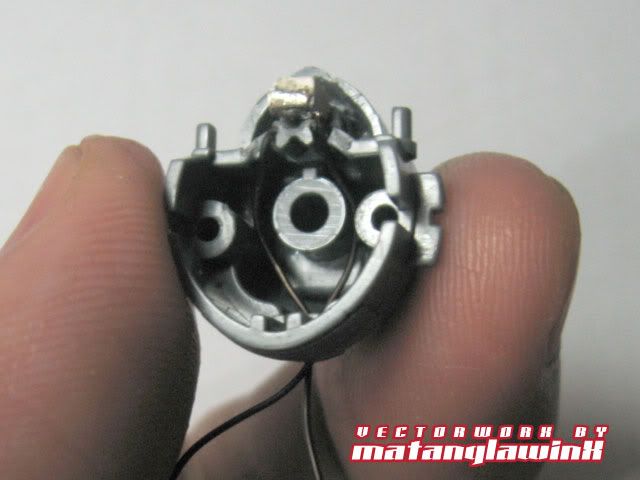
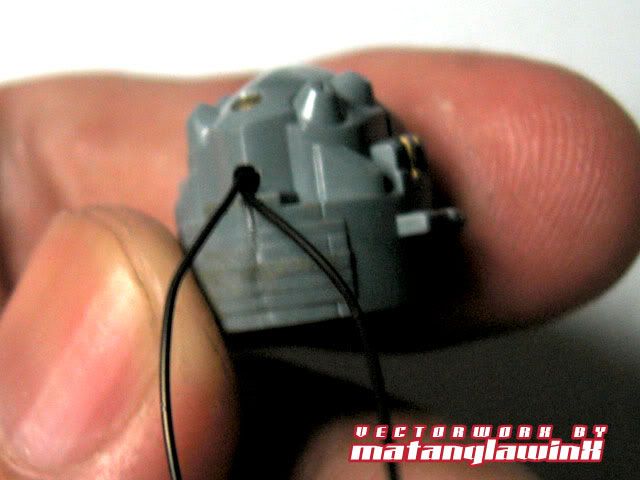
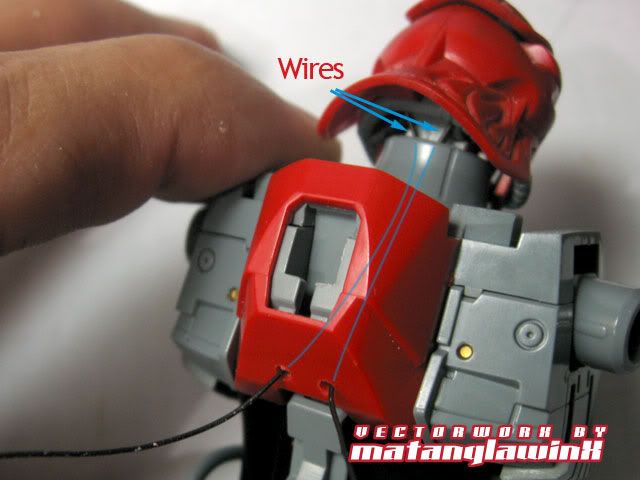
The Monoeye Wiring.  I decided to be neater with this build by hiding the wiring altogether.  Since the Angelus' head frame is actually small, there wasn't really enough room to maneuver the wiring if I have decided to use springs (as I have done with the Impaler).  It's a good thing I was forced to use thin wires here because I don;t have to worry about the wires coming into contact and causing a short circuit.  I let the wire run inside the head cavity towards the back of the head. 


There's enough space between the head frame and the head armor to let the wire run through freely without being stressed.


From there, I simply routed the wires into the neck frame into the chest cavity, then out the lower back, just below the back pack mount. When mounted, the back pack hides the wires coming out.  I'll be mounting 1.0mm springs over the wires at this point for consistency.


Wednesday, August 11, 2010

"Sculpting" Plaplates


Plaplates. Those venerable sheets of plastic that we all use, have used or will use, here, now and again. Its versatility is bound only by the imagination of creator who wields the knife brave enough to cut it, and maybe a piece of flesh every now and then. People have cut it into pieces and recreated scale architectures, or have peppered armor with it till its almost bullet proof, repaired parts and and even built armor, made sandwiches good enough to eat (if one is hungry enough) with it, and whathaveyous from days on end.

My favorite part of a build is modifying or even repair work, so much I am starting to believe I break things just to get a chance to fix them, and with all these, the mighty yet humble plaplate reign supreme.

But today, I tackled something a bit different. Instead of deliberately finding things to fix, I made something instead. Like I mentioned a few posts before, I have redesigned the Sinanju's emblem to make it some of my own and have somewhat become overly ambitious. The Angelus emblem is more than a challenge to make, not because it's difficult to cut plaplates, but, difficult to cut in SMALL curved details.

I printed the design of the Angelus Emblem to scale, on paper, and as soon as I've seen the printed version, I knew I was in trouble. This one in particular is the chest emblem of the Angelus, so it's smaller and more tedious to work on.


Posted Image


Sunday, August 1, 2010

Angelus Rising Part VIII: More Quick Fixes

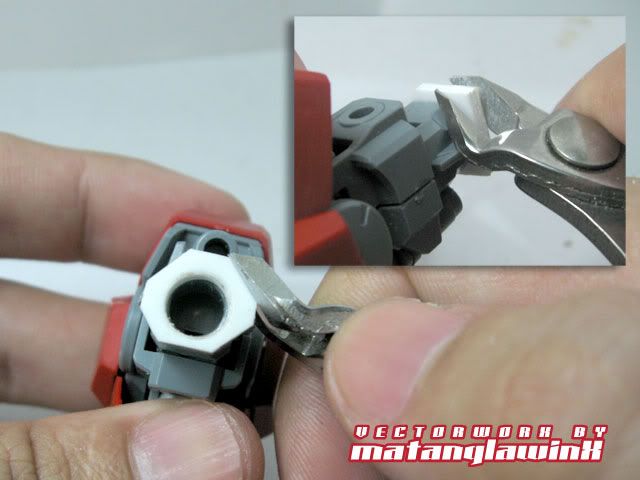
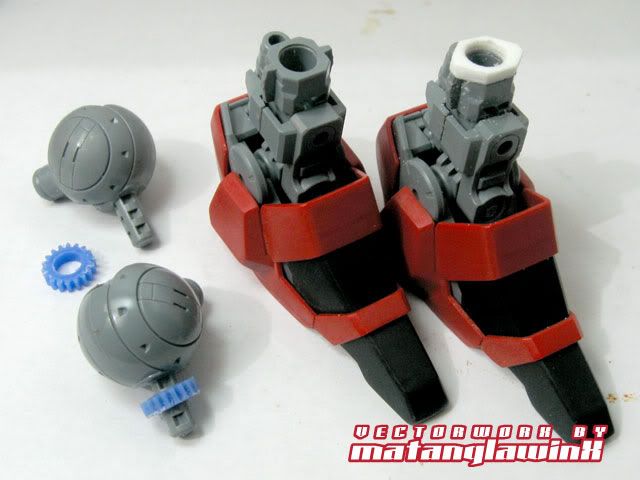
Like I mentioned in the previous update, the ankles were a bit unstable due to the extension made to the hole section of the assembly, so I decided to extend the peg section as well with the core method.

Using a 2mm bit, I drilled a hole through the center axis of the peg, dabbed a bit of cement over the hole and inserted a 2mm beam which extends about 3mm over the length of the peg.  I then sandwiched two pieces of apt-sized 2mm plaplates, drilled a hole through them as well, and laid that over the peg/core assembly, cementing the core to the plates in turn. 


After 10 minutes or so, I trimmed the excess off with the side cutter, then filed it into shape.


Thursday, July 29, 2010

Angelus Rising Part VII: More Extensions


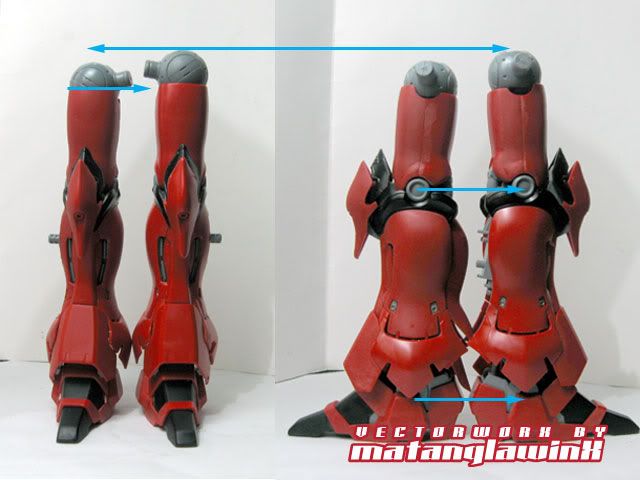
The Towering Mod.  Since I had already extended the neck of the Angelus by modifying the neck connection, and extended the waist by using a custom spacer I made a year or so ago for the Impaler,  I had grand plans of extending the legs to give the Angelus that towering height but modifying the legs themselves, but Vanz Anazasi actually came up with a simpler and better idea by using Mighty Bond rings as spacers.  I couldn't have come up with a simpler idea since this is actually similar to the spacer I made for.

I've adapted the idea 50/50.  I used two pieces of 1mm plaplates to make 2mm "donut" sandwiches (I used a round punchers with just enough diameter to make the holes before sandwiching them).  But, instead of just using them as spacers, I cemented the donut directly on top of that ankle section, extending that part by 2mm.  As compared to later kits with ABS frames (like that of the GN-X), the Sinanju's ABS frame is more receptive to cement/PS bonding.  At any rate, this modification is not so much on a high-stress/tension part, so, I wouldn't worry about it coming lose at any point.

Neat Trimming Trick.  Here's something very few people know (I mentioned this in passing in earlier posts and at the tool box).  There are cases when you don't have to cut the plaplate to size right away.  What I normally do is cement the additional plate or modification to the part being modified, and use a side cutter to trim away the excess, using the edges of the part as a guide.  The cut won't be exact at times, but I can always file any irregular areas off (even though the modified is hidden).


The thing is, the peg for this connection is rather short at only 5mm effective length so the modification shortened it to 3mm.  Though the connection holds as it is, the ankle is a bit unstable during posing moments when the kit is assembled.  So, I might extend the peg itself to compensate.


Now, for the simpler modification.  I used a couple of the gear sections I saved from the wing mod (NEVER throw away useble parts) as spacers for the groin/thigh pegs.  Since the thigh ped is long enough, I won't need to extend it anymore unless of course I get an OC attack and do it anyways.

Test fit.  Comparing the unmodified and modified legs.


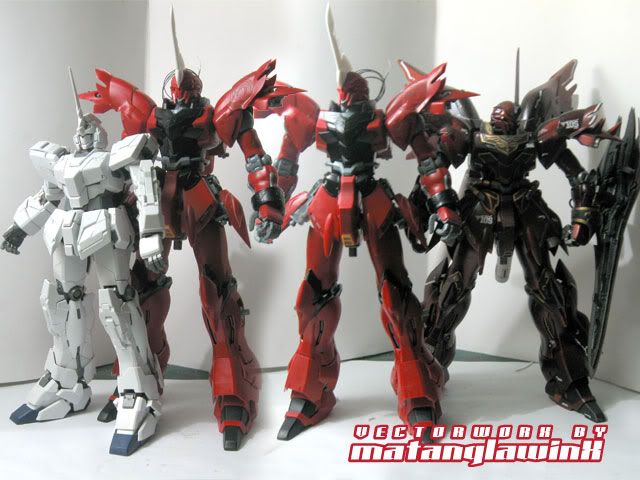
With this, the Angelus has a total additional height of 10mm (2 for the neck, 2 for the waist, 4 for the legs.  The additional two is when the neck is adjusted to height).  Here's a height comparison with the (ugh) Unicorn and the Impaler.  Even in Destro mode, the Unicorn is only about as tall as the Impaler.


Wednesday, July 28, 2010

The New Look of the M.A.C. Forums


I haven't updated for a while since DonC and I were working on the MAC Forums, tweaking it here and there, then we decided to convert it from the InvisionFree to the Zetaboards engine/format.  The new format takes little getting used to, but has more nifty features and is more user friendly.  We had to sacrfice the Topic Subscription option though, since ZBoards saw that people were abusing it and was slowing the system down with all the subscriptions. 

Maybe we'll get that later when we upgrade.

The Forum now has  additional sections, like the MAC Features where we will have weekly features of anything Gunpla, whether it be a kit, a technique, a modeler or whathaveyou, and a section dedicated to Gunpla Bloggers.

The Forum is skills and techniques driven, and focuses more on the Hobby itself.  No technique is too old, too new, or too personal.  If it's applicable to Gunpla or modeling in general, we will have it.


I'm still working on the Angelus.  I feel there's no use posting another update for since since I'm just basically doing the armor engravings, which pretty much looks the same if one thinks about it.  The engraving takes time mainly because it is quite painful to do at smaller details and more curvy details, and I would want to avoid too many scratches if I can.

The thing is, there is a much bigger picture with regards to the Angelus build.


Saturday, July 24, 2010

Angelus Rising Part VI: More Engraving Adventures


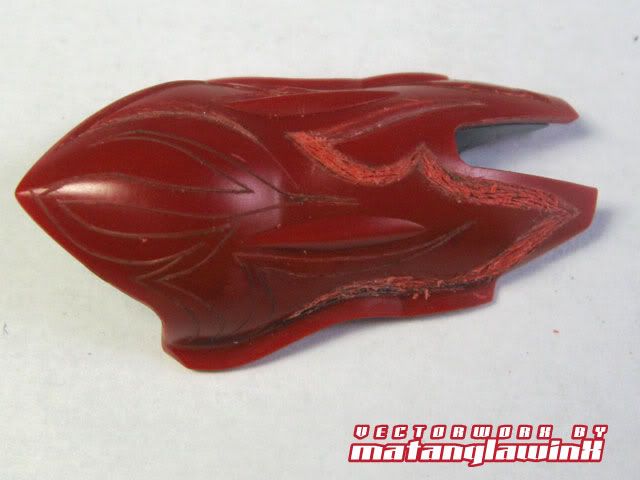
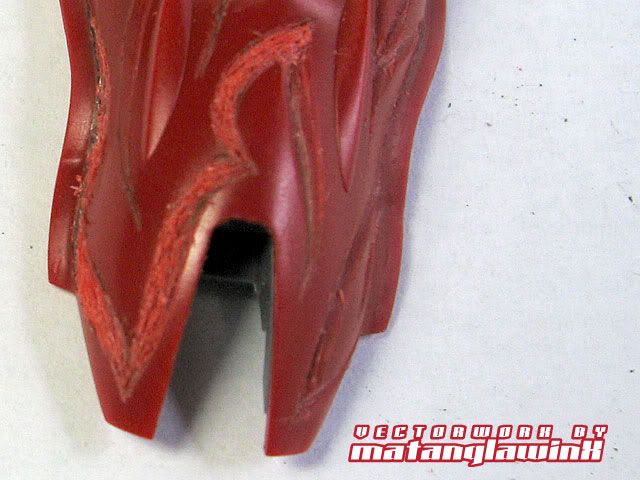
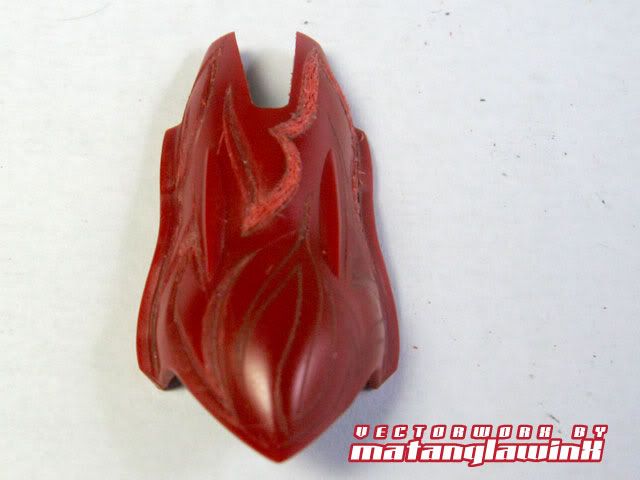
The "Sharpness" of a Blunt Knife Blade.  I'm engraving almost exclusively with the blunt knife now, mainly because the rotary tool is a tad difficult to control over the Sinanju's curved armor parts, and it does not remove material as much as I want to.  Instead, I score the pattern first, then etch away material in criss-cross strokes to weaken the plastic within the score marks.  I can then scrape away the weakened plastic "easily" with the same blunt knife, smooth out the engraved sections with the needle point, and then further smooth it down with the knife.


Monday, July 19, 2010

Angelus Rising Part V: Wing Mechanism Improvements


A swiveling Move.  Even the original Impaler Wings had a progressive spread (one wing "feather" over or under the next one) which is in nature how a bird's wings spread out.  The lighter v2 Wings is an over/under design where the middle section is actually the dominant one, which is just okay, but, being me, I couldn't resist the urge to make the wings progressive regardless.

I have had the idea for more than a week, but, I didn't want to needlessly do the modification and damage an already working v2 prototype since I've already wasted time and material on previous ones ), so I let the idea percolate and "ripen" in my mind.

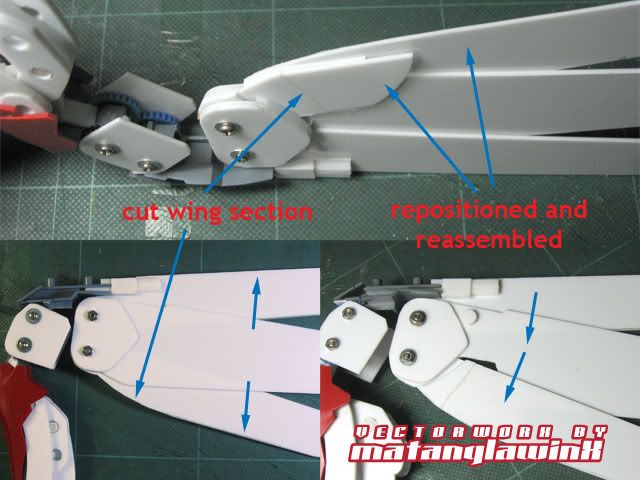
The solution was fairly simple:  I just needed to cut a section from the middle wing near the base of the gear box, and used that as padding for the inner wing.  I then cut the inner wing just midway the cut section, and cemented that to the padding.  I cut extra pieces of plaplates to "mend" the now shorter inner wing to make it flush on itself and to lock the middle wing as well on the other side when the wings are spread.


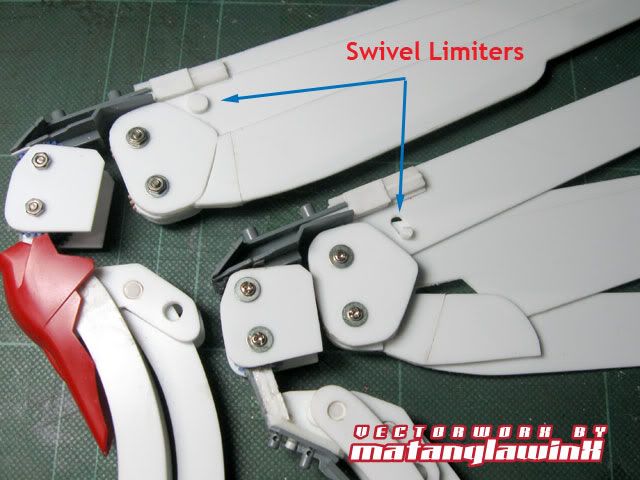
I then bore holes appropriately on the outer and middle wings and added a swivel limiter on each of the the triads so that they won't spread as much when opened.  You can see the cut section on the middle wing, and how the modified inner wing "locks" the middle wing when spread out.  This hopefully will prevent the inner wing from bending down when the wings are spread.


That's it for now...

Sunday, July 18, 2010

The Angelus Binary Blade


The Angelus won't be complete without its own custom built weapon, so I made one for it from scratch (well, not entirely from scratch, since I modified one of the beam saber hilts as THE hilt for the custom scratch built blade).  I was going to build a scythe cum spear for the original Impaler X, but decided on a sword for the Angelus.

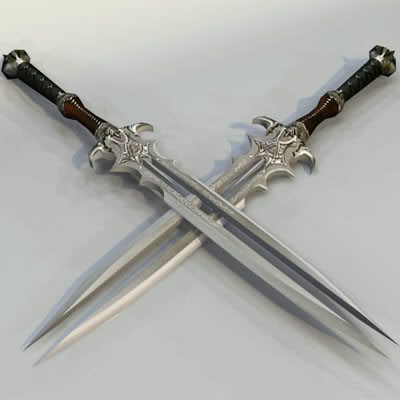
I did an online search for reference blades and swords, and here are a few of the interesting ones:

From Wolf Demon Valenor's Photobucket album:


The fifth one looked appropriate enough with the feathery trimmings and all, but this was the one that caught my eye:


which I got from Hans Rodger's Photobucket album.  This image have appeared on several websites, so I'm simply crediting where I got this from.

I decided to reference the Angelus Blade from the dual blade.  Of course, by referencing, I'd still be making one of my own design.

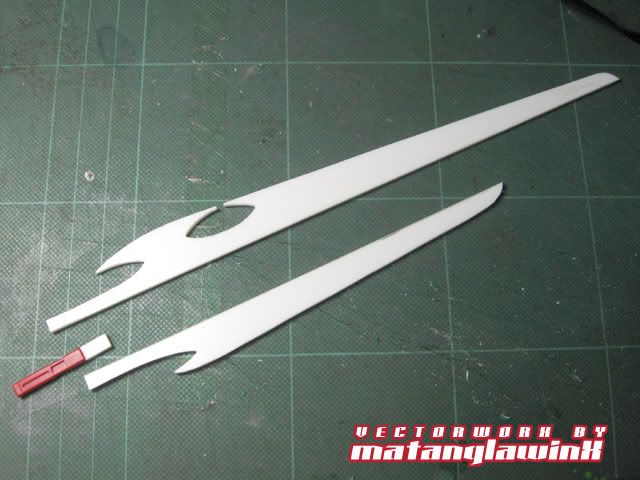
I cut the basic blade shapes from sandwiched 1.0mm plaplates (for sturdiness) and modified the beam saber hilt to fit an attachment for the sword guard (which was later re-modified since the first mod failed miserably and broke easily).  I made the blades from recycled pieces of plaplates that I initially cut for the wings (I had a few trials and errors).


Tuesday, July 13, 2010

Angelus Rising Part IV: Neck Extension Mods and Skull Cap Tattoo


Neck Extensions.  One thing I have noticed with most kits (or MS designs for that matter) is the apparent shortness of the neck to the point that some basically have no necks that they look as if their heads were smashed into their torsos with a hammer.   Some kits, like the Exia and the Strike are proportioned well enough that they hardly need any extension modifications.  Though this might not bother some people, I believe some designs do need to have an ample length of neck to display a suit's awesomeness.

I've done neck extension mods for the Ronin, the Kshatriya, and quite recently, the JinX.  The thing about neck extensions is that if you are working with MGs or PGs, you'll run into the inherent problem of ABS plastic's semi-resistance to cement, and the problem of CA/superglue becoming brittle over time thus making it worthless for high stress/tension area repair work or modification.

The Kshatriya's Neck Extension was the "easiest" by far to pull off because of the frame construction and being made of PS.  It was quite easy to simply saw off the neck, stick an ample-sized beam in between, and mount it on to the modified frame with a generous amount of cement (saturating the modified parts allow resin build up from the cement which reinforces the ABS/PS bond since ABS will also melt a bit when saturated enough with the solvent from cement).


Sunday, July 11, 2010

Angelus Rising Part III: Of Horns and Wings


The Angelus Horn.  Like in most kits, the V-fins and horns are often the most easiest to modify or customize.  These are identifiers of those MS designs that sport them, and is most variable in protagonist machines.  The Sinanju's stock horn is very basic and is similar to the "stabilizer fin" of most Zakus and seem out of place in a slew of curvy and massive armor plates.

Scratchbuilding master Julius "Juju" Lim built a whole Sinanju using an MG Saz as a base which was also featured later on in an Issue of Dengeki.  I kinda like how he remodeled the Sinanju's horn and made it look organic.


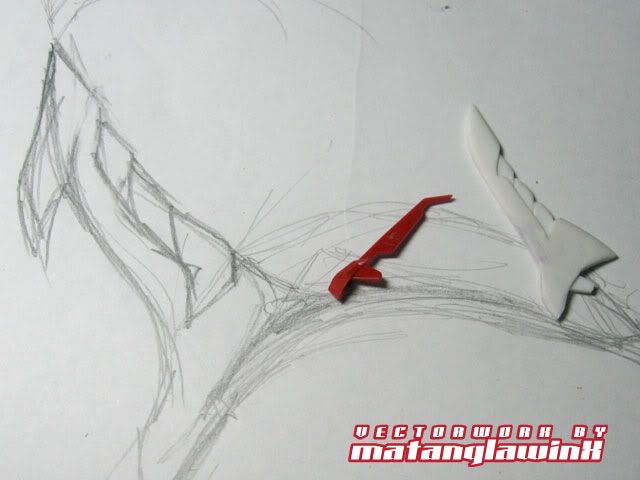
But, rather than copy his redesign, I opted to design mine own that follows the Angelic theme I had in mind, well, sort of.  I usually start with a sketch, and with trial and error prototyping, arrived at this semi-final shape.

Tuesday, July 6, 2010

Angelus Rising Part II: The Revelation


The Rise of the Angelus.  A Major Update.  By now, a few people already have an idea what kit the Angelus is built on.  The Sinanju, by far, is my most favorite MS design (next is the GN-X, then the Exia), both in form and "functionality."  It has the perfect blend of lines and curves, and has a great overall balance.  My first Sinanju, the Grim Impaler, attests to that; it looks great out of the box, and better with the right color scheme even without modifications.

The Angelus technically is a year in the making, after I've shelved the Impaler X/Devil Wings idea.  I've now resurrected it and gave it a new call sign, as well as a new overall concept.  Like I mentioned before, this is a thematic, non-Gundam universe build, so I guess I'll have a few more raised eyebrows and condemnation from a few UC hardcores I know.

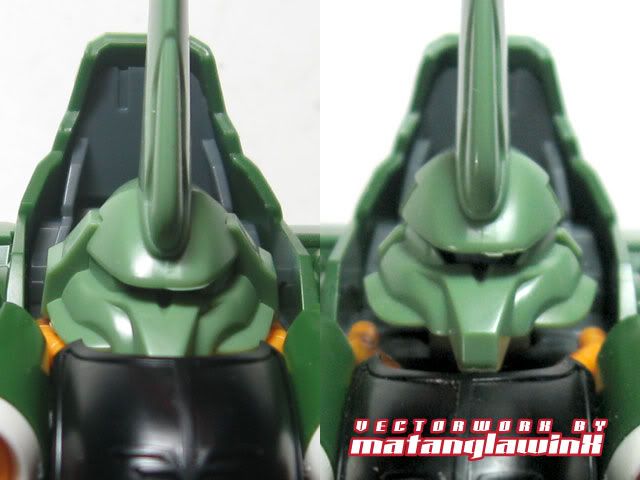
Lighting Up the Angelus' Mono-Eye.  LEDs have always been a dilemma for me mainly because it has been difficult to procure small enough SMT/SMC (Surface Mount) LEDs.  The smallest I could get so far were the standard 3mm bulbs, then I was able to find a few 1X2mm surface mounts at a cellphone shop at Baclaran, which later on proved a bit difficult to use because of its size (as in, they are almost flat, and their contacts are a tad too small for my taste).  Then a fellow modeler tipped me off to a shop near De La Salle Taft called e-Gizmo.  The shop sells a lot of nifty electronics stuff, surplus machine and board parts, robotics, and of course, LEDs.  Though their LED selection is still basically limited, they have more compared to other shops like Alexan and Deeco.

I got me a few 1X2mm Surface Mount LEDs, but it was these that got my interest.

Tuesday, June 29, 2010

Project: Angelus Rising Part I


A step beyond scribing.  While the JinX percolates, and the Qan[T] in limbo, I've started on a new project that involves more of my trademark functional modifications, and this time, engraving on plastic.  I've chosen an angelic/demonic/gothic theme for this build (hence the title), and has so far tested my patience and dexterity more than any of my previous builds.

This build has been more than a year in the making.  After that initial concept I did a year ago, I basically scrapped the idea and went on doing other stuff.  Until now.
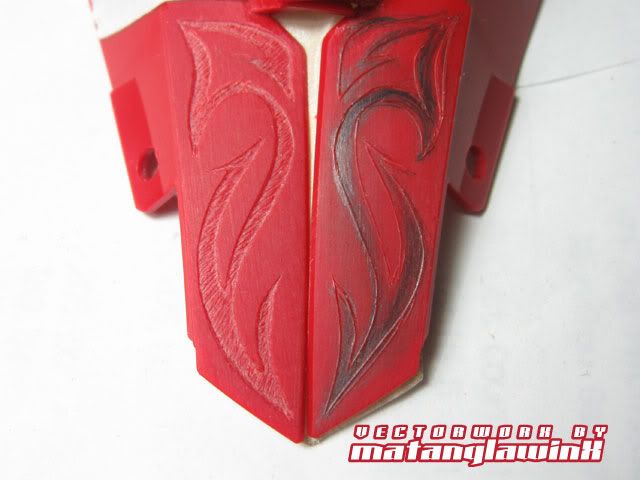
Anyways, here's a sneak peak.  I penciled out the design DIRECTLY on the plastic, lightly sanded so the graphite has something to bite into.  I then used a knife to score the plastic, then deepened the grooves with a needlepoint bit mounted on my pin vise.  I used my rotary tool and the needlepoint engraver bit to remove material to achieve what is illustrated below.

I then went back to my other needlepoint and engraved the streaks, then sanded the surface to make the engraving stand out.


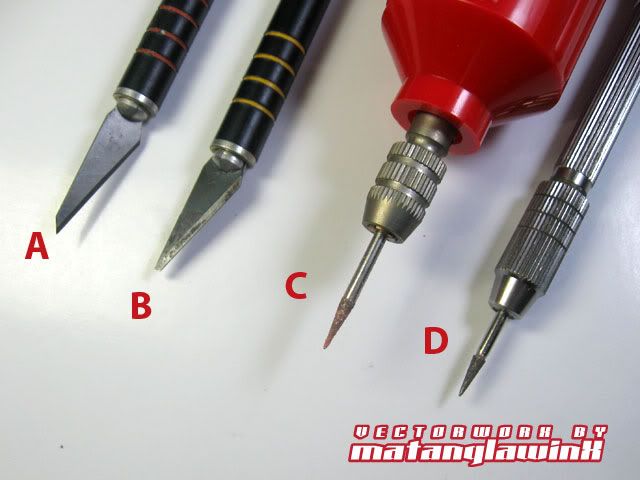
Tools of the Trade.  To execute this "painful" process, you'll need:
A] Sharp knife blade; for smooth gliding scoring on bare plastic.
B] Blunt knife blade; for deepening the scores on the plastic (I have had this blade for over a year).
C] Engraving needle bit mounted on a Rotary tool.  This helps speed up the engraving process.
D] Engraving bit mounted on a pin vise, for engraving the "african tribe scar tattoo" texture.


The Revelation this weekend.

The Newbie Stash

Source This is a collection of specific guides for reference in Gunpla Building and Modeling in General.  • Gunpla™ and Modeling Terminolog...