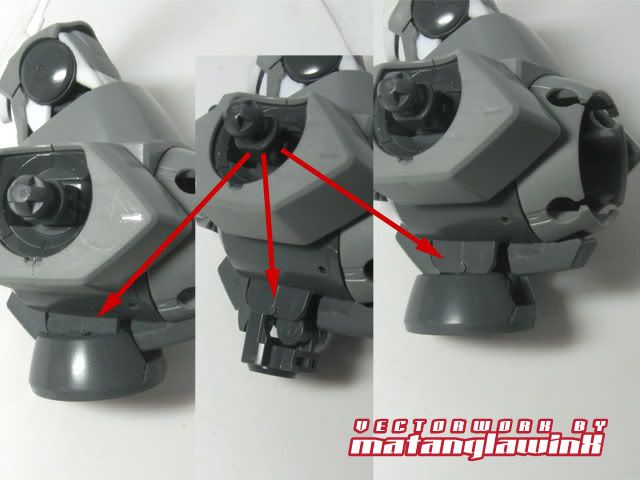
The "Simple" Waist mod. Since I've lengthened the neck, I also decided to lengthen the waist. I was thinking of a very complicated modification involving cutting the waist parts and lengthening them so so, but, looking at how it was constructed, the waist is comprised of a Z-type hinge (similar to double-swing doors in some restaurants). This actually allows the waist raise a certain height, so I thought I'd exploit that instead.
The waist connection has a notch on each side that serve as pivots for the forward and backward tilt. They rest inside the waist receptacle when mounted, but can be moved out of it so they rest just on top of the receptacle.
This lengthened the waist about 4mm-6mm, but made Scarlet look like the mecha version of Barbie. So I added plaplates on each side of the waist to give it more volume.
For the shape of the waist, I simply estimated the amount of curvature I needed to cut using a thinner pieces of plaplate as templates mounted on the original receptacle with double-sided tape, trimming those as I go. Then, I attached those templates to 1.0mm plates with double-sided tape which makes it easier to cut the plates more accurately but can be easily removed after the plates have been cut into shape.
For the shape of the waist, I simply estimated the amount of curvature I needed to cut using a thinner pieces of plaplate as templates mounted on the original receptacle with double-sided tape, trimming those as I go. Then, I attached those templates to 1.0mm plates with double-sided tape which makes it easier to cut the plates more accurately but can be easily removed after the plates have been cut into shape.
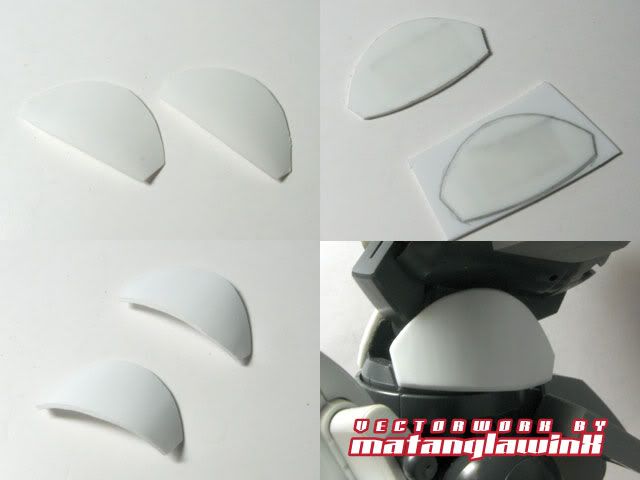
This was slowly mounted on the stock receptacle with cement, allow enough time for one section to bond solidly before smoothing the rest of it along the receptacle curvature.

Again, I seem to manage to break something during handling, especially when I've modified a part. This time, I broke the waist connector of the JinX when I was SIMPLY adjusting its position while inserting it to the modified waist armor. I tried a simple cement fix, but realized it won't hold even after 24 hours of cure time have elapsed because of the nature of ABS plastic, which is not as receptive as PS plastic to the "melting ability" of Cement. The section that broke was just too weak to begin with especially since it's a high-stress part.
So, I had to rebuild the broken section with a piece of round beam and strips of plaplate (which is actually PS type). I used a 3mm round beam, inserted it into a snug hole on a 1mm pla-plate sandwiched between 0.3mm plates (this type of sandwich is stronger compared to a bare 1mm plate since the cement helps make the plate sturdy when it cures). I also cut a 4mm tube, inserted the beam to increase the diameter of the beam. I shaved the excess to make it fit snugly on the receptacle. I trimmed that later on to fit the cut I made onto the original base of the part, then reinforced it further with 1.0mm plaplate.
I cut a section of the bottom of waist armor to fit the modification.

Click HERE for Part IV


No comments:
Post a Comment