Monday, January 31, 2011

The X Walker


Here's my contribution to the Concept Mecha Group Build. I'll be making a biped walker type mech/droid inspired by non other than this beast:

Posted Image

I won't actually be copying ED-209, but rather make something similar in terms of form and function. Since the GB called for using scrap materials, I opted to go for parts from my ever growing scrap pile of surplus kit parts. Rummaging through that pile, I found these:

Posted Image

Adding a little bit of plaplates and beams, I turned those parts into these:

Posted Image

When assembled, looks like this:

Posted Image

Posted Image

I know what rzero1 has done are statues, and that was what I was actually planning to do, but, the engineer in me couldn't help but make it a functioning mecha with moving parts and poseable.

That's it for now...


----


Edit: So as not to be too narcissistic, I've simplified the name to "The X Walker."

Thursday, January 27, 2011

MAC Forums Concept Mecha Group Build


This Group Build started when rzero1 posted funky-looking but nonetheless impressive "junk bots" which he scratch-built using nothing but scraps.  This just goes to show that we don't really need to use expensive materials to create great works of art so as long as creativity is always there.  Here are a couple of what rzero1 has done so far.


DC23, my f5 partner in crime and I will be featuring the finished bots in their own gallery.  I might join in the fray since I do have a few things I can use in my ever growing scrap pile.  Kriz Cook of KrizCreations will be overlooking the builds during the course of the project.


Sunday, January 23, 2011

Heatless HIPS/Plaplate Bending


Another inquiry finally prompted this post so I can simply direct people to it.  I've posted this at ZeroG and elsewhere, and have wondered why I haven't made it a blog entry before.

High Impact PolyStyrene sheets, or simply HIPS/PS sheets are alternatives to the more expensive Tamiya "Plaplate" brand.  These sheets are highly flexible and bendable to a certain extent.

Applying heat makes it easy to bend HIPS/plaplates, but, once they harden, they become rather difficult to fix or manipulate further. Plaplates, being made of polystyrene, are rather flexible and can be bent to a point without breaking even without heat. Once bent, they would basically keep the bent shape, but maintain their flexibility until you're ready to "finalize" the shape.  Plaplates have a more obvious grain or directionality (as compared to molded plastic), and it's worthwhile to take note of it because it can snap when bent along the grain.  Bending it against the grain will at least prevent that during application of light bending force.  Also, plaplates tend to crack when bent with the matte side up, whereas, paired with directionality the smooth and shiny side seems to prevent that when doing extreme bending.

Here are a few samples of the armor parts I've done for the Ronin.

Image

Image

Image

Image

Image

Image

I usually use 0.5mm plates for most of these and reinforce them with 1.0mm beams to hold the shape, but 1.0mm is still flexible enough to be bent into shape. You can use a non-toothed pair of pliers cushioned with tissue or cloth for easier bending. The sample below is something I've done for the Scarlet JinX and is an add-on layer to an armor part. It's made up of two pieces of 1.0mm plaplates cemented together and was bent after the cement has fully cured (about a day).

Image  


When I modded the waist of the JinX to give it more height, I added plaplates on each side of the waist  to give it more volume.

For the shape of the waist, I simply estimated the amount of curvature I needed to cut using a thinner pieces of plaplate as templates mounted on the original receptacle with double-sided tape, trimming those as I go.  Then, I attached those templates to 1.0mm plates with double-sided tape which makes it easier to cut the plates more accurately but can be easily removed after the plates have been cut into shape.


This was slowly mounted on the stock receptacle with cement, allow enough time for one section to bond solidly before smoothing the rest of it along the receptacle curvature.


High Impact Plastic Sheets (HIPS) as they are called, are also polystyrene sheets similar if not the same as branded plaplates like Tamiya, but are a bit softer and actually easier to shape and work with. Tamiya plaplates although sturdy and stiff, actually breaks easier when bent along the grain, whereas HIPS of the same thickness can bend farther without breaking even when bent along the grain. It also has less tensile strength or spring and is less likely to counter its bent shape, hence easier to form as a curved surface.

Posted Image

Since I'm still avoiding putty at this point, I had to bend the slab two ways; perpendicularly at first, then at an angle corresponding to the curve of the section I'm building to.

Posted Image

Posted Image


This particular section covers the side that encases the vulcan gun of the X-Walker.

Using larger pieces of HIPS trimmings, I roughly cut a shape (half of the actual shin guard) using one of the Warhammer pics as reference. Then used that as the template to create a whole one by reflecting the shape on its edge.

Posted Image

Then, with the usual heatless plaplate bending method, I bent the shin guards at the middle till they're supple enough and bent enough to keep that shape when cemented over the shin guard mounts. I marked the middle of the back of the shin guards to align it with the mounts.

Posted Image

Posted Image

I cemented it at the middle first, then cemented the sides, reinforcing it with triangular beams and securing it with tape as it cures. The setup should hold after a few hours of curing, but, at least 24 hours is the standard.

Posted Image


Plaplates and HIPS are easier to bend when they're large enough to be bent. Smaller pieces however are a bit finicky to bend into a curve properly, especially when they are already cut into shape. This piece is for the one of the Shin Guard face plates.

Posted Image

The trick is to bend it horizontally, then at 45 degrees alternately, then when it's soft enough, bend it vertically, instead of bending it vertically right away. Using a pipe or a round beam allows for an even bend.

Posted Image

With that, the piece is easier to mount on the curved surface of the faceplate.

Posted Image

Posted Image


The Skull face plate.

Posted Image

Saturday, January 22, 2011

An EPIC battle...

... between good and evil, where the fate of the world hangs in the balance.  All of time and space will shake at its foundations, and our future shall remain uncertain.

Regardless, who ever wins, we lose.

Wait, wait.  I got it all WRONG.  It's a face-off between Master and Student, Kenny Lim, aka Toymaker and DC23, aka Energizer Bunny.  And it's about FRAKKIN' time.


Tuesday, January 18, 2011

Uncanny...

  
No, I'm not talking about the Comic Book, "The Uncanny X-Men" (which I used to collect when I was way younger), but the seemingly coinciding random events that involves Middleway (one of the songs in our self-titled album), the Anime my bandmate and guitarist extraordinare AJ used as a backdrop for the music video he made (he thought the story appropriate for the song, and I agree), and somewhat, if I am now guilty of giving it (a well-deserved) overexposure, the
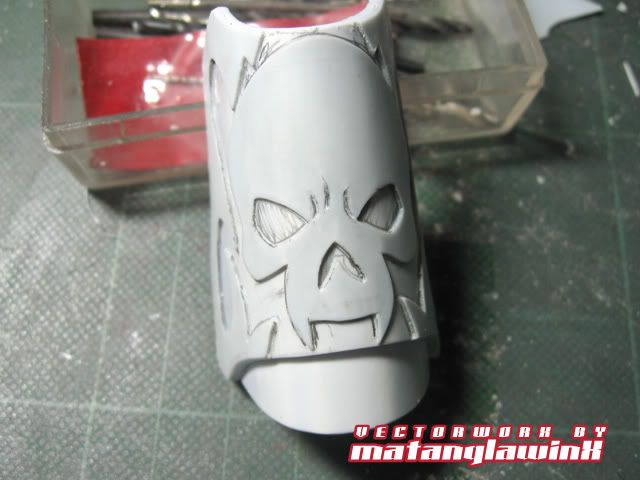
 Chimera.

AJ made the music video July of last year and told me about it after posting it on YouTube.  I didn't give it much thought back then (though I did ask what the Anime was about), mainly because I had been pre-occupied with a lot of things up until now.  I haven't watched the anime in its entirety as I just finished watching the anime, (I rarely do and when I do, it's mostly those about mechas, samurais and warriors, and sci-fi stuff).  Digressing a bit, I've always liked Bleach, Naruto and the likes, most of the Gundam series, and earlier on, the Classic Voltes V, Mazinger Z, Grendaiser, Mekanda, etc.  I've also watched both the anime and live action versions of Deathnote, and who could forget the slashings of Kenshi Himura in Samurai X?

I probably missed the sci-fi relevance of the anime AJ used back then because I totally spaced-out on the title.  "The Girl Who Leapt Through Time" is, obviously about a girl leaping through time.  As Japanese animes have it, it's the reason WHY she did the Quantum dance that made the anime interesting.   According to AJ, she leaps back through time to avoid the advances of the boy who likes her (well, that, aside from the obvious do-overs of any mistakes she have made, especially her grades).  Later on, Chiaki, the boy was revealed to be more than meets the eye.  The scenes AJ used to sequence with Middleway were head on, especially at the part where the boy and the girl were walking amidst a crowd of people frozen in time, and the guy walking away, leaving the girl confused looking for him.  It even has a Live Action version of the same title released just last year, and Riisa Naka, who voiced the main character in the anime is the same one who played the main character in the movie (as I read the synopsis and the character list, the story is a bit different.

So, where does the Chimera come in all these Jazz?

If you allow me to segue bit further (I have a penchant for long and detailed intros to my stories at times, mainly because I want to be as clear as I can), a couple of MAC members at Facebook recently tagged me twice when they posted about the Middleway music video, and the song generated a mild increase in plays, both at Facebook and our 
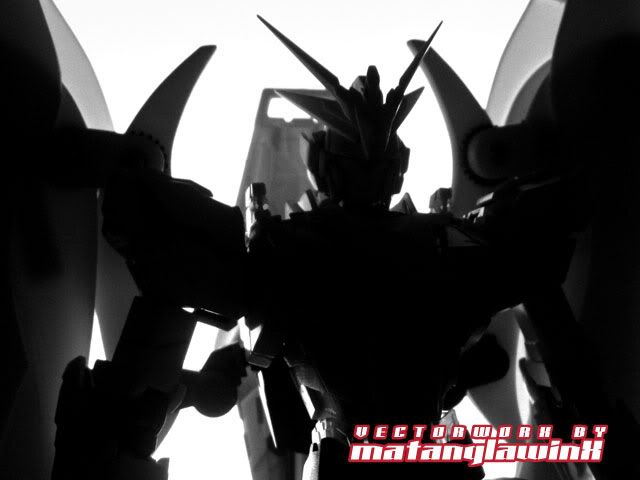
website, as well as Youtube (a lot of people sent me messages earlier on when we first released it that they like the song).  It was only then that I started looking up the anime, to finally be able to watch it.  It was then that I got chills when I found images relating to it, specifically, this one:

Source: http://anonymousxwrites.blogspot.com

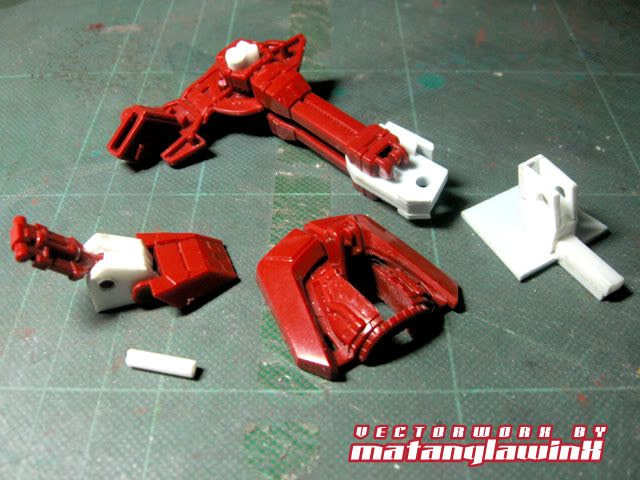
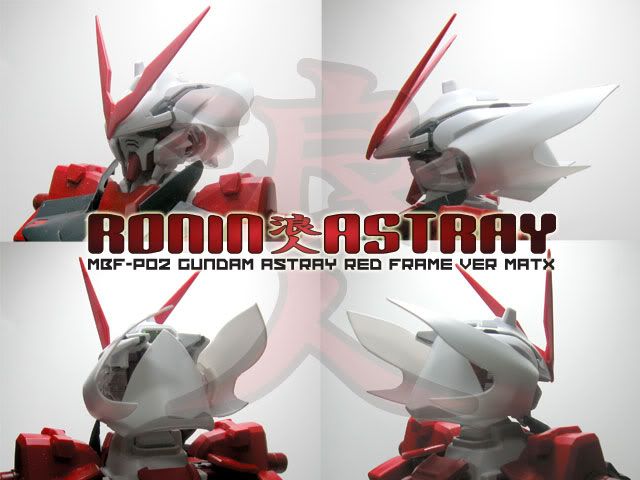
It wouldn't really haven't been too significant if not for this:


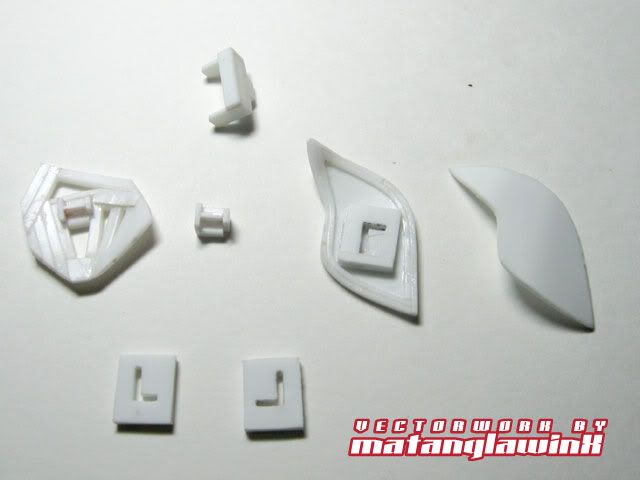
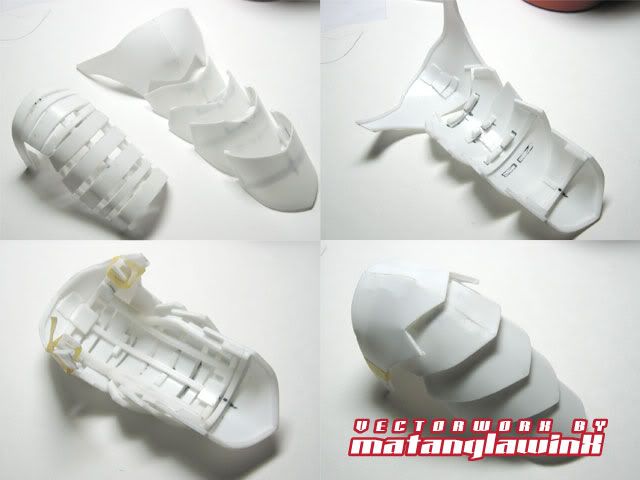
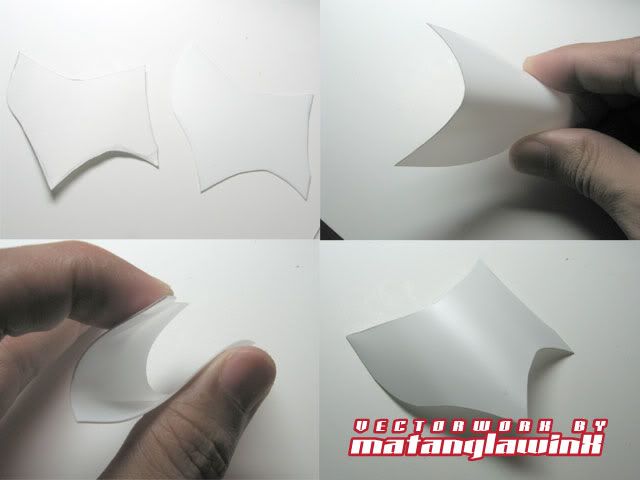
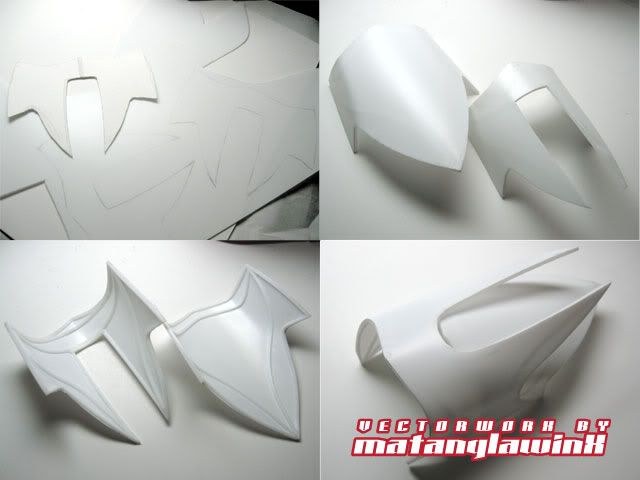
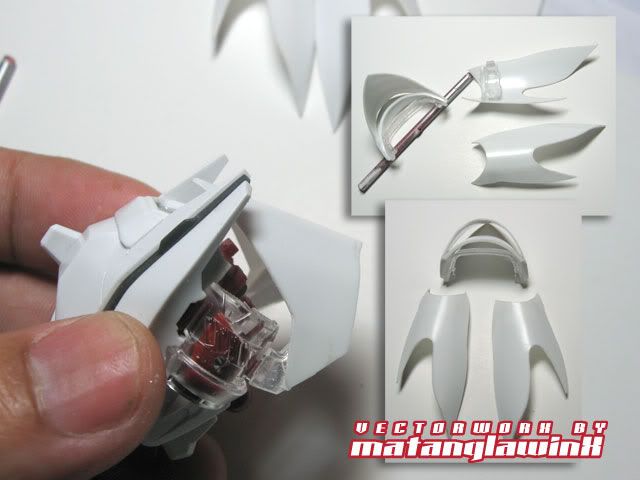
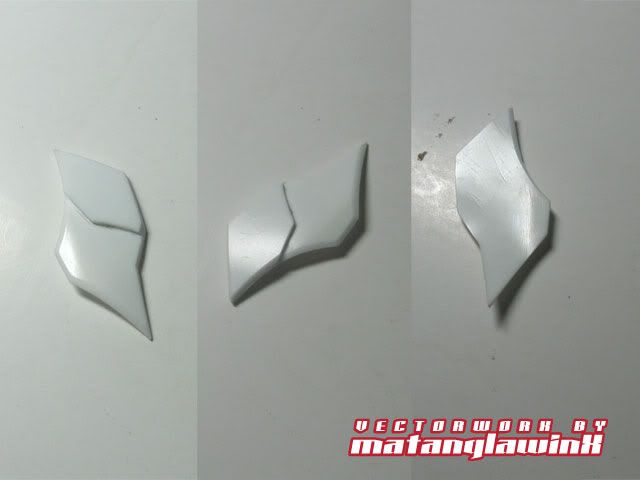
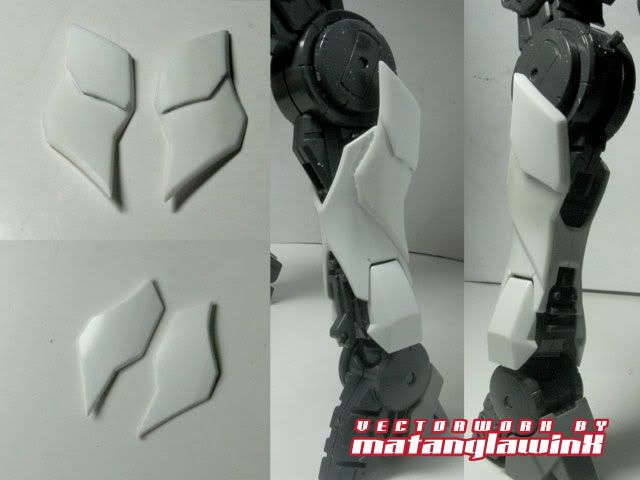
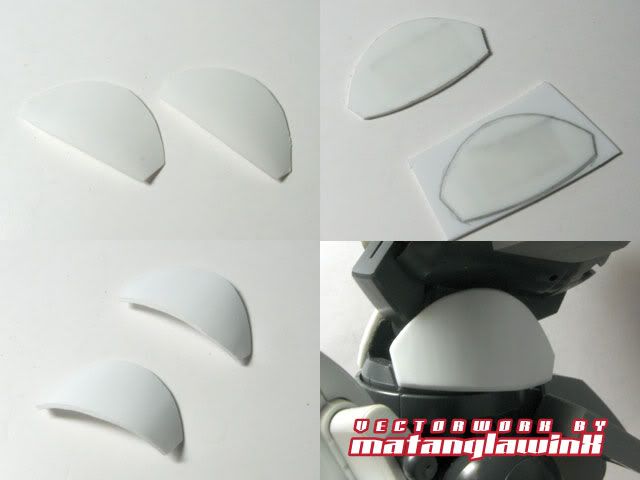
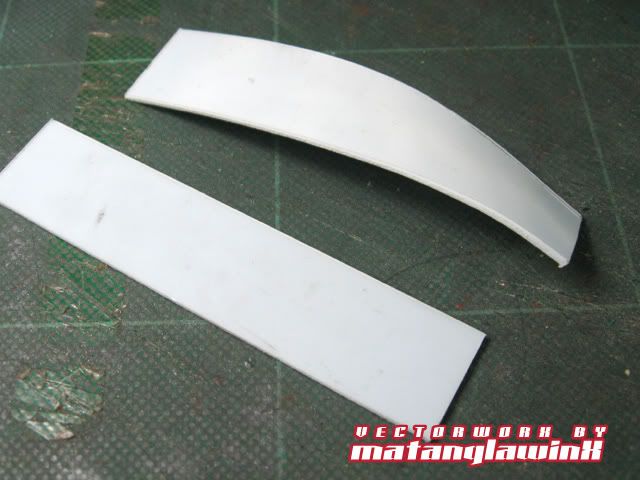
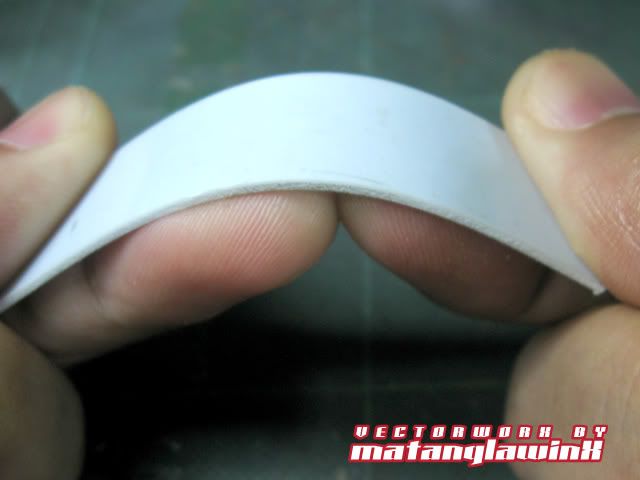
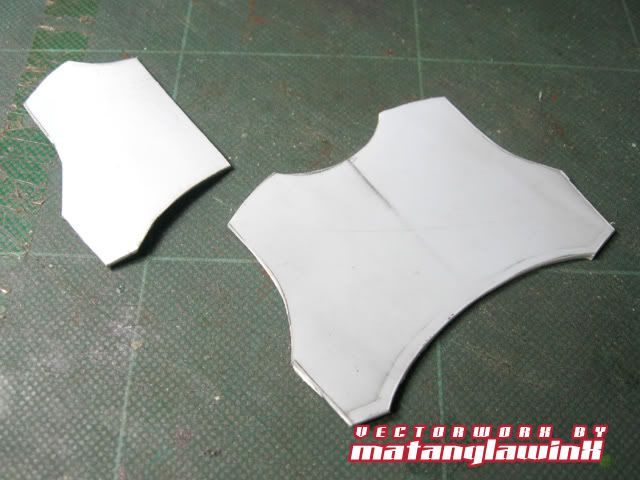
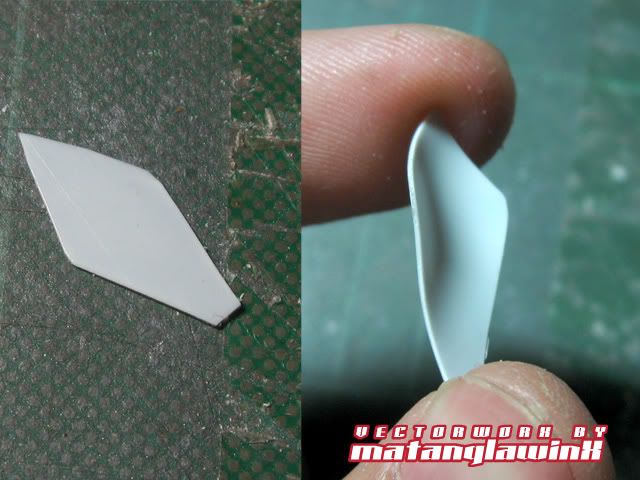
The similarities are uncanny.  I shot this quite recently, after my month-long hiatus from anything Gunpla (which wasn't really a hiatus, since I've been tinkering with plastic during that time, albeit in relative blogless silence).

At my age, I no longer believe too much in coincidences, but this one, insofar as coincidences in my life are concerned, is pretty much too close for comfort.  The girl who is the object of the story of Middleway, in some aspects, also looks like an anime character.

Even the source I got the picture of the leaping girl is much of a coincidence to my pseudonym.  I call myself X, which stands for the mathematical "unknown."

Oh, did I mention that the Pilot of the Chimera is a girl?


Tuesday, January 11, 2011

The CORE Method Groin Fix

This was an answer to a PM question at MAC forum, but I'll put it as a tutorial somewhat.

Breaking/broken parts are inevitable. Even simple handling and/or assembly can break a part that's structurally weak or has inherent molding flaws, like bubbles in the molded part, or in my recent blog post, directionality of the molded plastic. The latter is not so much of a problem until it comes to sanding; each time you complain about having a nub mark at an odd position which makes progressive sanding an entire part necessary, you can attribute it to directionality.

In my case, I break a lot of parts especially during test fits and modifications. Sometimes, a part is just too darn weak, or, I'm just too darn impatient. When I break a part though, I no longer fret because I've learned a few trick on how to fix them.

So here's one, strangely enough, not by me, but, something I can relate to nonetheless because it's all too familiar.

DarkWorkx sent me these two pictures:


I assumed this is a groin part from an HG/HGUC kit (I was later told it was an FG kit). My experience with most HGUC kits I have is that they do break often at the groin. Sometimes, they make the connecting pegs/balls so weak, it breaks easily after a few fittings. This same thing happened to the Ice Queen AFTER she's been painted and propped for a shoot. As such, the "easiest" way to fix this and make the part stronger than before is to employ the CORE method.


Referencing the picture above, drill a lateral hole on the base of the peg/ball joint and on the hip ideally the connective parts that broke so you can align them easily later on. Make sure that the hole is just big enough to fit a piece of runner or round beam SNUGLY (it should hardly move even without cementing them together). Next apply enough cement to the holes, plug the core in, and align the parts together using the other side as a guide. If you also have extra thin cement, use that to saturate the surface of the join. Let cure for AT LEAST 24 hours or more preferably. Work on something else if you're impatient.

I guarantee, this method works since I have employed it a few times on broken MG groins, joints and pegs extension modifications as well (where I had to combine ABS with PS plastics). If done correctly, the repaired part should be stronger in normal handling situations than it was factory made.

Here are a few examples.

Hi-Nu groin peg fix:


Angelus Leg Extension and Wrist Joint fix:


Angelus Neck Extenision:


Chimera Neck Extension:


The Chimera; With Wings

It may seem like I'm on massive Chimera overload with the recent posts, but, I can't really help it.  I'm proud of this beast.  I've been asked by a few people about its wings, and why I decided to leave it out.

Simple:  It looks better without it.  Someone at HobbyFanatics noted it when I "revealed" a prepaint test-fit, tight-shot, silhoutte of the Chimera with wings mounted during its final WIP stage.


Monday, January 10, 2011

Height Proportions

This tip was brought on courtesy of a question Krescenhaze asked regarding height proportions of Gundams (or any MS design for that matter. I used to teach a little comic book art back in the 90s, so I'm quite familiar with the subject in human anatomical terms.

My reply:
Regular human proportions is 7.5 heads tall (1/0.5/2.5/3.5) for the head/neck/torso/legs respectively, or 3.5 from head to groin and 4 from groin to feet. Ideal "heroic" proportions is 8 heads (1/0.5/3/4) This proportion is used to balance the bulk of heroic or muscled characters. Most Gundams and other MS designs do not follow any standard proportions but follow mostly the flow of the design of the MS, so some are like 4/5, with the head too small and looking as if it's hammered down the shoulders, with the neck not visible in most cases. So far, only two are "almost" human in proportions; The Strike, and the Exia.

I know you're asking this mainly for the Unicorn, because so far that kit has the WORST proportion, around 3/5.

Check this link out for reference

Try this yourself though; you can gauge proper proportions when you do this; sit down, then prop your knee toward towards your shoulder. You'll see that the tip of your knee should just be about the same level as the base of your neck.

The link above provides images I am too lazy to reproduce, so let me just credit the author for having it done, before allowing my lazy @$$ hotlink his post. It was quite coincidental I found it having relative images for both human and Gundam proportions.

Tuesday, January 4, 2011

The Ascent of the Chimera


This is one of the test shots I've done for the Chimera. I used a technique to have it in flight mode without having it mounted on a stand. I added a little Lens Flare effect to make it more fun.


It looks better without the wings I've made for it (as was intimated by a few people who saw it).

(Edit: I gave up on fixing my lighting problem for the sky layover, but I believe the black background gave the Chimera justice in highlighting its details.)

(Additional Edit:  The eye is an LED mod, not a Photoshop effect).

The Newbie Stash

Source This is a collection of specific guides for reference in Gunpla Building and Modeling in General.  • Gunpla™ and Modeling Terminolog...