Using a 2mm bit, I drilled a hole through the center axis of the peg, dabbed a bit of cement over the hole and inserted a 2mm beam which extends about 3mm over the length of the peg. I then sandwiched two pieces of apt-sized 2mm plaplates, drilled a hole through them as well, and laid that over the peg/core assembly, cementing the core to the plates in turn.

After 10 minutes or so, I trimmed the excess off with the side cutter, then filed it into shape.
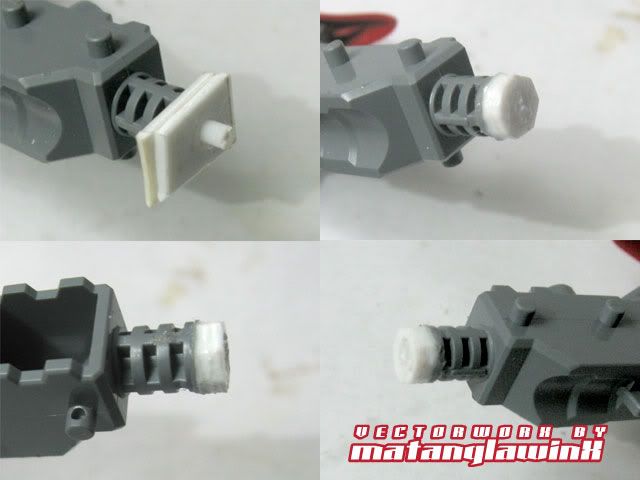
I then progressively saturated the bond with extra thin cement, filed it, saturated it again, then filed it in a span of an hour to let the resin seep into the plaplate. Saturating, the plaplate, when done correctly, gives the plaplate/ABS bond enough strength. The resin also gives the assembly enough "bite" when inserted to the hole of the ankle.

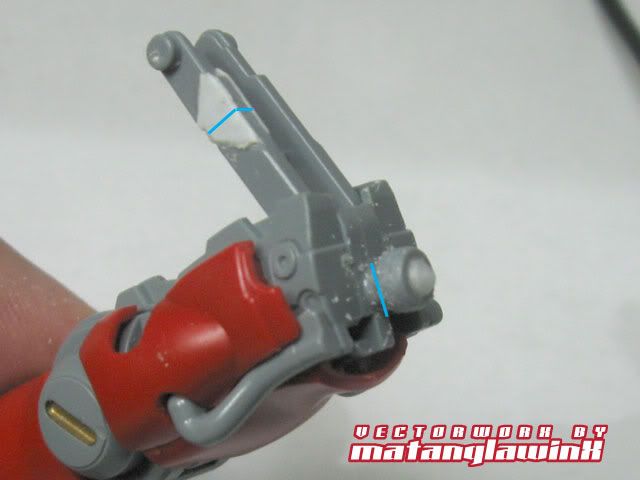
Mishaps galore. With the type of modifications I do, it is quite necessary to do test fits, hence assembling and disassembling of parts every so often. Normally, this shouldn't pose a problem, but, there are certain cases when a test fit reveals either material quality or production flaws. This section is the swivel mechanism for the arm "shield" that holds the beam saber hilt when not in use. Since I won't be storing the hilts in them, It wasn't really important if I fixed this to keep it swiveling, or simply keep it fixed.
An OC attack proved futile my attempt to ignore the break. So while I was disassembling the arm, the wrist ball joint connecting the arm to the hand assembly broke, so I had two things to fix instead of one.
When I experienced my first broken part years ago, I went into panic, thinking there's no way for me to fix this. I have broken most everything, from groin joints, to elbows, to Vfins, and even the Impaler's lower ankle joint (either as an inherent flaw or as a result if the ABS being saturated with acrylic thinner as a result because I hand painted the frame), and panic gradually turned into anticipation of something to fix.
These two are relatively a piece of cake.
The swivel was easy. It was a very clean lateral break (blue line), and the part didn't even come of the base, so all i needed to fix it was to cement the broken part, then sandwich it between two pieces of 0.3mm plaplates. saturated with cement, of course.
The ball joint was also a clean break, but this one came off the base, so this was going to be tricky. The solution? The coring method. I used a 2mm beam a core and aligned the holes with the drill bit. This one was tricky alignment wise because it has to be perfectly aligned when bonded, else, the wrist will look crooked when assembled.
For these two fixes, I let the bond cure for at least 24 hours. The bond is actually stronger if not as strong as the stock.


No comments:
Post a Comment