Saturday, September 18, 2010

The Chimera Borne Part II


Misplacement mishap. I spent the better half of my evening yesterday when I discovered the top chest armor (collar armor) was missing from the rubble of plaplates on my workstation. I was pretty sure I didn't remove it since I was making test fits for the head and the waist, so I turned my parts containers upside down, literally, looking for the part, as well as underneath my couch which I spend a lot of my time whittling away on plastic, and my cutting table. I had a mild panic because it was a semi-critical part that I might have swept at one point when I was tidying up, but I wasn't too worried because I had another unbuilt kit stashed under my bed. I was also considering rebuilding the thing, since I was basically going to make modifications anyways.

I had a sudden burst of realization that it might be somewhere near my computer, so I did a rough search. I breathed a sigh of relief when I found it lying innocently amidst dust and dirt just a few inches outside the lower shelf of my computer stand.

Moral of the story: always keep note of what you are working on.

Anyways, Another "cascade" flaw I discovered and fixed is the front skirt not having enough allowance to flip upwards when the Chimera is in kneeling position. I made modifications on the connections themselves by extending the ball joint and shaving a little from the top of the socket. I also cut about 2mm from the top part of the skirt and rebuilt it with 0.5mm plaplate to maximize the angle it can flip upwards.

Posted Image

Sunday, September 12, 2010

The Chimera Borne

I decided to convert my "Tutorial in Progress" Unicorn project (otherwise known as "The Itch") into my BAKWC entry this November.

The Chimera is a mythological creature that Has the head of a Lion, the body of a Goat and the tail of a Dragon/Serpent, and is sometimes depicted by artists as having 3 heads (Lion, Goat and Dragon) and wings like that of a bat or dragon. I chose the Chimera more for its mythological meaning rather than the visual, though I might take a few elements of the mythos into the build

I've had additional modifications made on the Vfin assembly to make it stable and "thicker" on the forehead. The modifications have a secondary purpose.

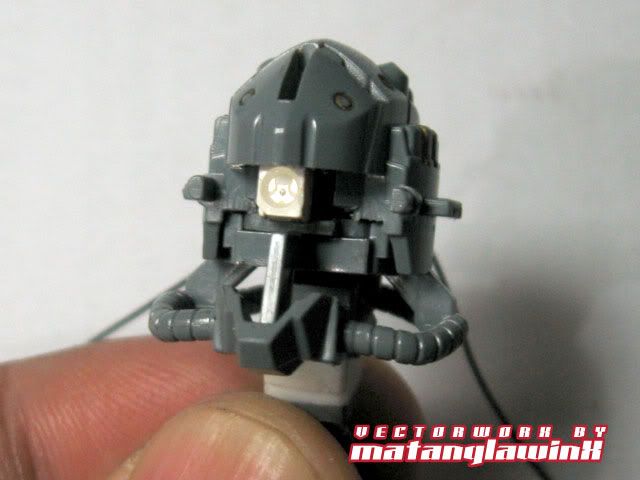
Anyways, the flaws of the Unicorn continue to reveal themselves the further I dwell into the project. For an MG, it's quite strange that the Unicorn does not have crystal eye (the NG RF Astray had one, and so did the older 1/100 HG Wing mechas). The eyes are cut from the H-runner which is made of ABS, and thus prevent any "easy" LED modifications to be made. I wasn't planning on using the Destroy mode's face anyways so it wasn't much of an issue. With that I opted to give the Chimera a monoeye LED.


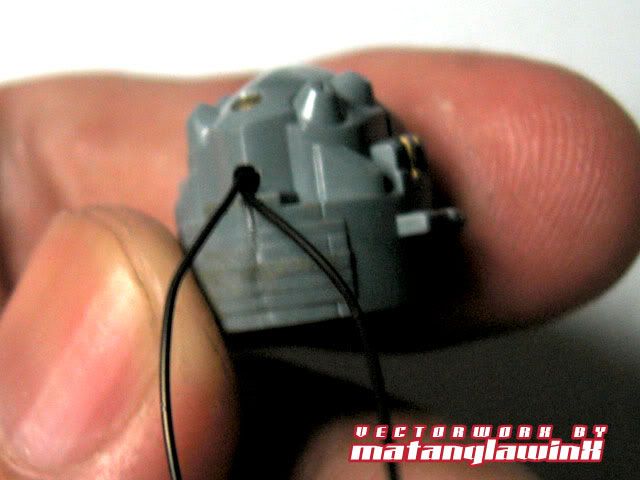
The modification is rather a simple one. I used a 1X2 surface mount LED, this one had rather small contact points that I crimped a little to be able to mount the 0.5mm koto springs I used for contact points.

I wanted a Red Monoeye, but the only color available with that size is green, so I cut a piece of transparent red runner, shaped it to fit the internal mask assembly and glued it directly over the LED. The resulting color was a bright orange, so I hand painted it with several coats Tamiya Clear Red (with 30 minutes of drying time in between for maximum adherence) and top coated it with Semco clear acrylic.

The result is actually very favorable. Will fix the light leaks, of course, as soon as I start painting.


-----------

Also, I missed my HLJ/Tomopop Prize delivery yesterday.  It was a Saturday after all.  The Delivery guy left the receipt with my neighbor who gave it to me this morning.  Will be getting it hopeful on Monday.

Monday, September 6, 2010

Now THAT is one hell of a Unicorn...

I'm not easily impressed, but there are rare occasions that makes me just say "Sh!t, now THAT is a modification."

This is one of those occasions.  Like I have mentioned a few times too many, I don't like the Unicorn, but this is something Special.


More here  http://bbs.xhood.net/thread-12371-1-1.html

Tuesday, August 31, 2010

Angelus Rising Part IX: Powering up the MonoEye


While working on the Unicorn improvements I got a chance to finish ALL the painful engravings on the Angelus' armor, but kinda screwed up the shield.  Sufficed to say that I'll be fixing that.  I'll start working on the diorama this week, and hopefully my plans for the dio will pan out.

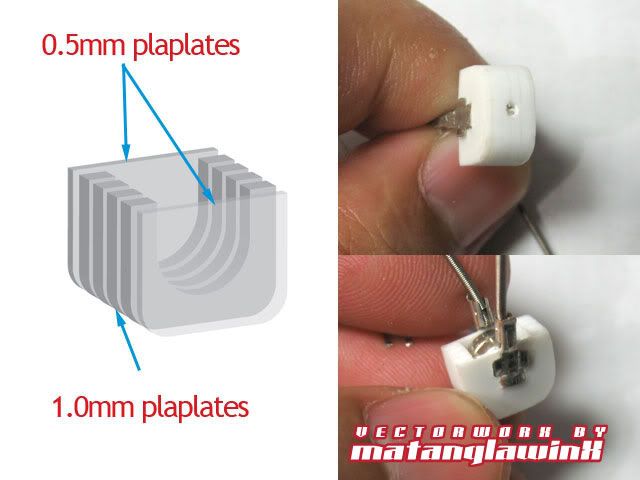
Alternatively, I've been thinking on how to power the Monoeye and decided on a rather simple setup.  Instead of building an external power pack, I opted to use the main back pack to encase the batteries.  I've used two of the second to the smallest batteries I have on stock (each is 2mm thick).  I built a battery case by sandwiching four ample-sized pieces of 1mm plaplates together and carving out the middle to fit the diameter of the batteries.  I then cemented 0.5 mm at opposite sides to enclose the case and drilled a small hole underneath to help push the batteries out. 


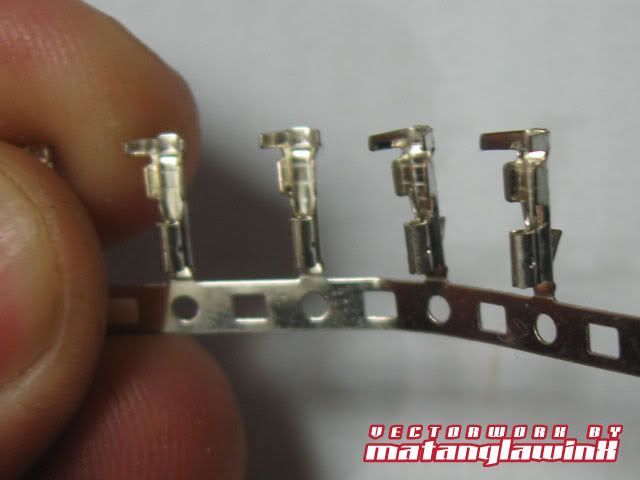
For contacts, I used metal wafers used in electronic circuits.  These nifty little buggers come with connector modules or can be purchased as is.  I simply mounted it on the 0.5mm plates by punching slits on the plates inserting the legs, and securing it by bending the legs.  The bent part become the contact points.


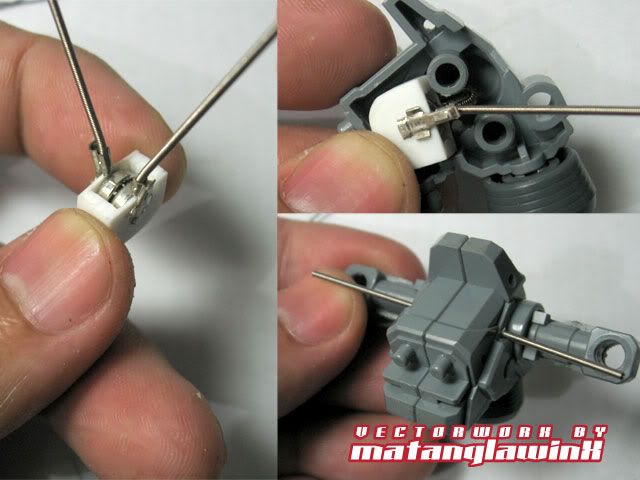
I then added 1.0mm wave springs (which I now prefer over kotobukiya springs because the latter have the tendency to rust over time), and simply encased the setup between and withing the back pack frame.  The only modification done in this case is removing one of the connector pegs to fit the battery pack.


I'm still deciding if I'll include a micro switch in the setup, or simply employ a contact assembly as it is now.


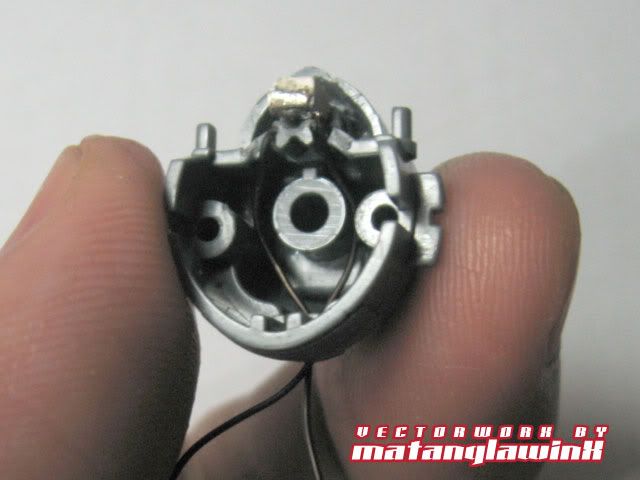
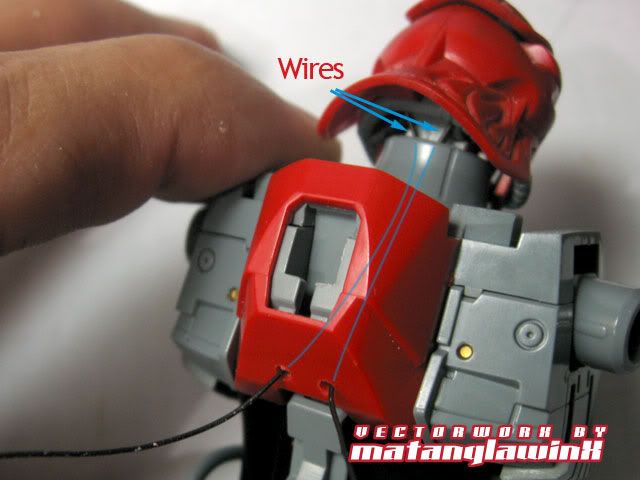
The Monoeye Wiring.  I decided to be neater with this build by hiding the wiring altogether.  Since the Angelus' head frame is actually small, there wasn't really enough room to maneuver the wiring if I have decided to use springs (as I have done with the Impaler).  It's a good thing I was forced to use thin wires here because I don;t have to worry about the wires coming into contact and causing a short circuit.  I let the wire run inside the head cavity towards the back of the head. 


There's enough space between the head frame and the head armor to let the wire run through freely without being stressed.


From there, I simply routed the wires into the neck frame into the chest cavity, then out the lower back, just below the back pack mount. When mounted, the back pack hides the wires coming out.  I'll be mounting 1.0mm springs over the wires at this point for consistency.


Saturday, August 28, 2010

Hobby Link Japan's "Playing with Plastic" Competition Winners


DonC already blogged about this, and we both didn't know till someone mentioned it to him, and till I visited the MAC Forums where he posted the results just a few minutes ago.


DonC won the Best Diorama category with The Graveyard, while I bagged the Best Modification Category with the Ice Queen.  I like how HLJ described the Ice Queen as "composed, cold and callous."


The second placers in both Diorama and Modifications were also impressive.  I don't really like the Overflag, but Hadi did a good job with the modifications.


Click HERE or the contest image above for the complete list of Winners.  HLJ's results page is more concise and descriptive, with the gallery of enties, so you might want to check that out too...


Sunday, August 22, 2010

More Itchy and Scratchy...


Like I mentioned previously, I cut the top part of the hind leg armor fins and reattached them "flayed out" to allow the free movement of the knee joint.

Posted Image

Posted Image


The Unicorn now kneels more naturally, with the addition of the waist articulation and extension.

Posted Image

Posted Image


With the waist comes the neck. I was trying to avoid having to extend the Unicorn's neck (to no avail), mainly because it's significantly smaller than the Sinanju's, and as i discovered later, had not much leeway for cement hold with a core extension even after a full day's curing (letting it cure for longer than that wouldn't have made any difference because the PS core simply had too little to hold onto the ABS base).

The solution: I shaved a V-shaped cut that tapers towards the plaplate sandwich extension (a total of 2mm thick). I then cemented a piece of plaplate of the same shape as the tapered cut. The taper helps hold the PS extension to the ABS along with that of the core. I also extended the neck casing with small pieces of shaped 0.5mm plaplates.

Posted Image


I used the single Unicorn horn as the base for a smaller, simpler, custom Vfin (which I may or may not detail later).

Posted Image


I've also lengthened the part that locks the back of the Unicorn in Destroy mode. It now serves as an articulation lock. Along with that, I've shortened the middle part of the waist that hampers waist rotation. The waist can actually rotate more than 90 degrees, similar to the improved OVA/HD version.

Posted Image


Strike a pose...

Posted Image

Wednesday, August 11, 2010

"Sculpting" Plaplates


Plaplates. Those venerable sheets of plastic that we all use, have used or will use, here, now and again. Its versatility is bound only by the imagination of creator who wields the knife brave enough to cut it, and maybe a piece of flesh every now and then. People have cut it into pieces and recreated scale architectures, or have peppered armor with it till its almost bullet proof, repaired parts and and even built armor, made sandwiches good enough to eat (if one is hungry enough) with it, and whathaveyous from days on end.

My favorite part of a build is modifying or even repair work, so much I am starting to believe I break things just to get a chance to fix them, and with all these, the mighty yet humble plaplate reign supreme.

But today, I tackled something a bit different. Instead of deliberately finding things to fix, I made something instead. Like I mentioned a few posts before, I have redesigned the Sinanju's emblem to make it some of my own and have somewhat become overly ambitious. The Angelus emblem is more than a challenge to make, not because it's difficult to cut plaplates, but, difficult to cut in SMALL curved details.

I printed the design of the Angelus Emblem to scale, on paper, and as soon as I've seen the printed version, I knew I was in trouble. This one in particular is the chest emblem of the Angelus, so it's smaller and more tedious to work on.


Posted Image


The Newbie Stash

Source This is a collection of specific guides for reference in Gunpla Building and Modeling in General.  • Gunpla™ and Modeling Terminolog...