Wednesday, July 7, 2010


Tuesday, July 6, 2010
Angelus Rising Part II: The Revelation
The Angelus technically is a year in the making, after I've shelved the Impaler X/Devil Wings idea. I've now resurrected it and gave it a new call sign, as well as a new overall concept. Like I mentioned before, this is a thematic, non-Gundam universe build, so I guess I'll have a few more raised eyebrows and condemnation from a few UC hardcores I know.
Lighting Up the Angelus' Mono-Eye. LEDs have always been a dilemma for me mainly because it has been difficult to procure small enough SMT/SMC (Surface Mount) LEDs. The smallest I could get so far were the standard 3mm bulbs, then I was able to find a few 1X2mm surface mounts at a cellphone shop at Baclaran, which later on proved a bit difficult to use because of its size (as in, they are almost flat, and their contacts are a tad too small for my taste). Then a fellow modeler tipped me off to a shop near De La Salle Taft called e-Gizmo. The shop sells a lot of nifty electronics stuff, surplus machine and board parts, robotics, and of course, LEDs. Though their LED selection is still basically limited, they have more compared to other shops like Alexan and Deeco.
I got me a few 1X2mm Surface Mount LEDs, but it was these that got my interest.

Tuesday, June 29, 2010
Project: Angelus Rising Part I
A step beyond scribing. While the JinX percolates, and the Qan[T] in limbo, I've started on a new project that involves more of my trademark functional modifications, and this time, engraving on plastic. I've chosen an angelic/demonic/gothic theme for this build (hence the title), and has so far tested my patience and dexterity more than any of my previous builds.
This build has been more than a year in the making. After that initial concept I did a year ago, I basically scrapped the idea and went on doing other stuff. Until now.
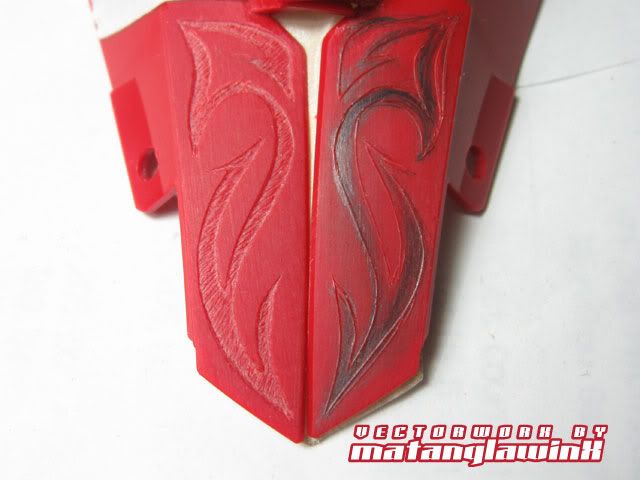
Anyways, here's a sneak peak. I penciled out the design DIRECTLY on the plastic, lightly sanded so the graphite has something to bite into. I then used a knife to score the plastic, then deepened the grooves with a needlepoint bit mounted on my pin vise. I used my rotary tool and the needlepoint engraver bit to remove material to achieve what is illustrated below.
I then went back to my other needlepoint and engraved the streaks, then sanded the surface to make the engraving stand out.
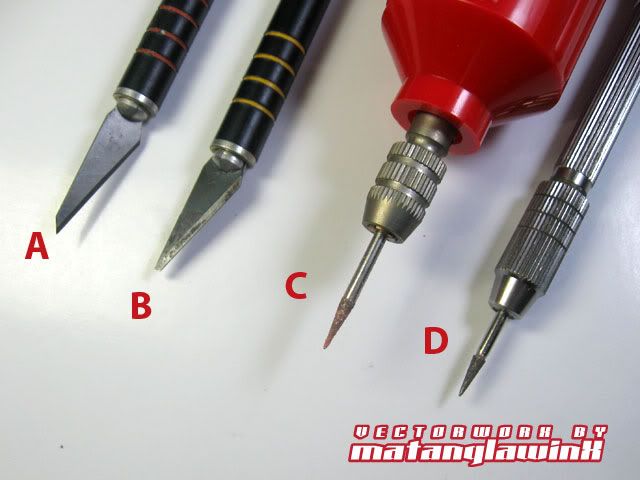
Tools of the Trade. To execute this "painful" process, you'll need:
A] Sharp knife blade; for smooth gliding scoring on bare plastic.
B] Blunt knife blade; for deepening the scores on the plastic (I have had this blade for over a year).
C] Engraving needle bit mounted on a Rotary tool. This helps speed up the engraving process.
D] Engraving bit mounted on a pin vise, for engraving the "african tribe scar tattoo" texture.
The Revelation this weekend.
Friday, June 25, 2010
More Plates and Sandwiches (of the Plastic Variety)
For this particular part, I used one of my Tamiya 4WD option parts (this one being an aluminum bumper extension) as a template. I used double-sided tape to secure it onto 1mm plaplate, then cut it out with scissors and trimmed to shape with my side cutter. I was making 4 two-piece sandwiches so I cemented the first cut shape onto the plaplate, cut that out, secured that with tape, and repeated the process a few more times.
This method allows me to shape, file and drill holes onto the parts making them as similar as possible, with the tape holding the parts together quite firmly and wouldn't really budge at times unless I pry the sections apart with a blunt knife.

And VOILA! By now, the build is "taking shape," and one guy at MAC Online actually guessed what this thingamajig is.

This method allows me to shape, file and drill holes onto the parts making them as similar as possible, with the tape holding the parts together quite firmly and wouldn't really budge at times unless I pry the sections apart with a blunt knife.
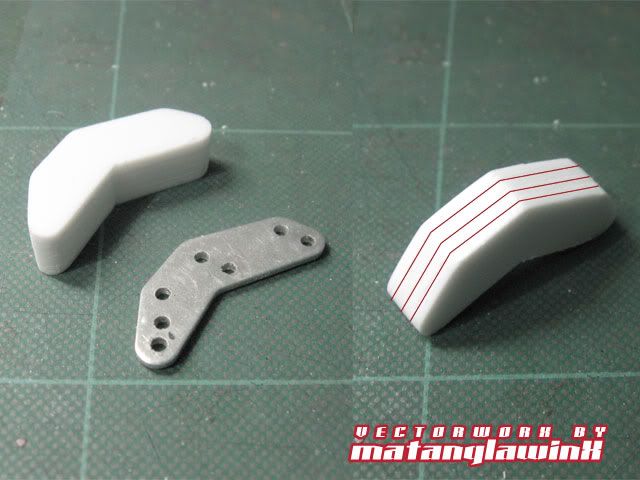
And VOILA! By now, the build is "taking shape," and one guy at MAC Online actually guessed what this thingamajig is.
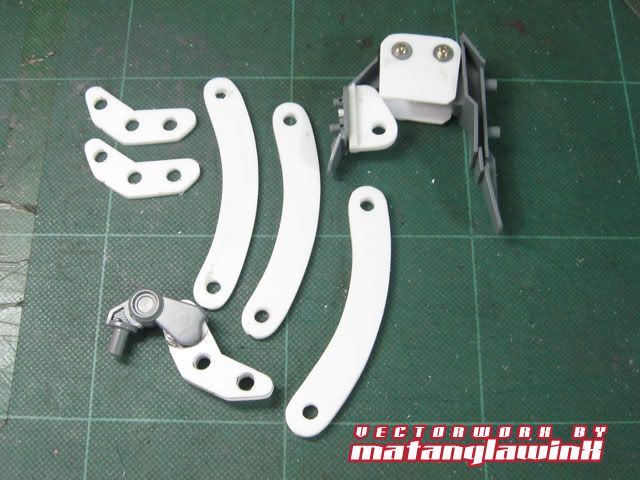
Guess What?
As I finalize the Scarlet JinX's weapons, and contemplate what to do next with the 00 Qan[T], I revisited one of my older builds and rethought the design. It's a bit of a "secret," so I won't be posting a full progress WIP. Those familiar with my work a couple of years back might have an idea what this is about.
Round Beams. Tamiya round plastic beams come in 1mm, 2mm, 3mm and 5mm diameters and are perfect for most peg, coring repair work, extension fixes and custom-built joints and hinges. For this particular part of the project I am working on, 3mm would be too thin and would break easily, and 5mm would be too thick, and I do avoid drilling too big a hole in most cases as they become loose faster than smaller ones owing to the nature of plastics especially PS.
I was able to procure 5mm and 4mm plastic tubes from Joli's (a local art shop located at Espana near UST) as well as a few other stuff. I've "modified" the 4mm tube by inserting then cementing a shaft of 3mm round beam to produce a 4mm solid beam.
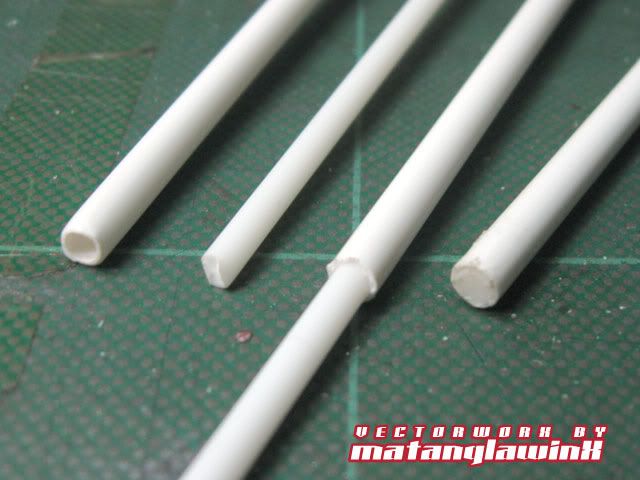
This will then become the hinge part for this mystery build.
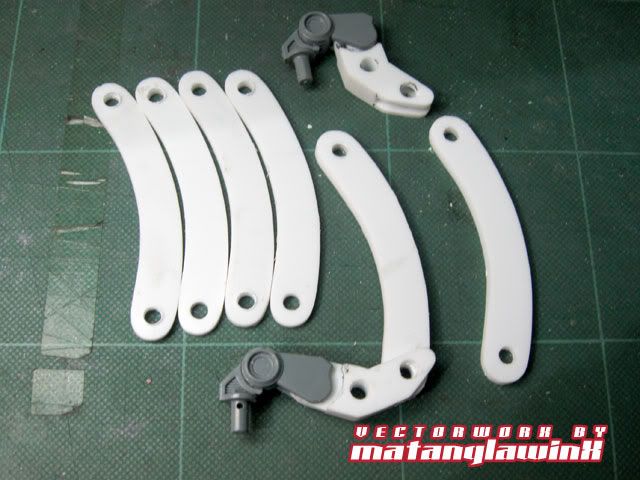
These curved buggers are plaplate sandwiches, and will act as skeletons to what I am planning to make.
More later...
Sunday, June 20, 2010
Hobby Link Japan's "Playing with Plastic" Gundam Competition
HobbyLink Japan is conducting the Playing with Plastic Gundam competition. Grand Prize is the impressive MG The-O, with the MG V-Dash and RG RX 78-2 as second and third prizes respectively.
I don't know about you guys, but I want that MG The-O.
Just scoot over their website for more details.

I don't know about you guys, but I want that MG The-O.
Just scoot over their website for more details.

Thursday, June 17, 2010

Subscribe to:
Posts (Atom)
The Newbie Stash
Source This is a collection of specific guides for reference in Gunpla Building and Modeling in General. • Gunpla™ and Modeling Terminolog...

-
 With the intent of going full AB, dropping if not minimizing my use of Bosny spray cans, I got an Airbrush + compressor set from a friend ...
 -
 This tip was brought on courtesy of a question Krescenhaze asked regarding height proportions of Gundams (or any MS design for that matt...
 -
Before anything else here are a couple of useful links regarding LEDs http://www.kpsec.freeuk.com/components/led.htm http://www.free-ci...
