Sunday, October 31, 2010

Zaku/Sinanju Cables Quick Sanding Tip

 (Note: I'm not sure if anyone else does it this way, but this is the same method I used more than a year ago with my first Sinanju.)

If you've ever built a Zaku or a Sinanju, I share your pain in sanding the nubs off the teeny tiny cable modules. Here's a quick way of sanding and painting those buggers.

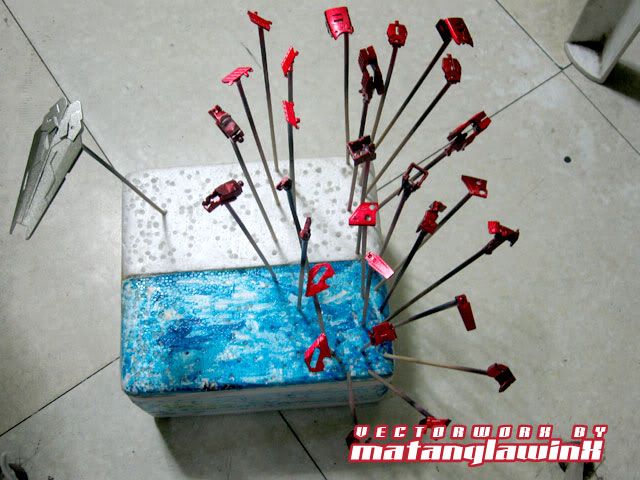
Get a runner stem with a diameter small enough to fit the Cable module and long enough to fit at least three rows (12 pcs). If the runner stem is too thin, wind enough tape around it so that the module will fit snugly and won't slide freely while mounted on the runner, but not too tightly to allow it to slide enough for distance adjustments.


These modules are often cut at angles so they form a "closed" cable around curved sections. Use this to your advantage by aligning them opposite one another (see picture). Once done, cut the rest of the nubs as close as possible and sand the rest away including minute mold lines that become more visible after painting.


When you're satisfied with the sanding results, separate the modules a bit in preparation for painting and paint away. The tape "holds" the modules just enough for it not to slide off while you're painting them.


Monday, October 18, 2010

The Chimera Borne Part IX

Clawed.  The storm came in as I added the finishing touches to the main kit.  I felt the weather change as the temperature dropped and the wind started to blow, taking with it much of the humidity that accumulated.  I'm glad that the sudden change did not affect the curing paint, as I really don't want to redo anything.  I've had a few mishaps and misfires which I have easily fixed, and I've noticed that I could work faster with cans even with the changing weather.  I screwed up the shield earlier since I used a paint that smelled like Tamiya Basic Putty and dried/cured just as slow, so I had to forego the effect I was going for with that paint.

Anyways, another snippet.  I decided to sharpen the Lion Claws, for maximum effect and consistency with the Dragon Blade and Ram Daggers.


I also had the idea of making the claws independent from each other for that middle finger action, but decided against it because of stability issues.

Edit:

More sneak pics...


Just in case you're wondering, the pictures are in duotone, and do not represent the actual colors of the kit.

Saturday, October 16, 2010

The Chimera Borne Part VIII

Procrastinating.

As the days pass me by,
with Bosny getting me high
I look back to the itch
that started this all.

The deadline looms so close
and I continually scratch my nose
I stop every now and then
And my build comes to a crawl.

I'm almost well and done
and sure do I have fun
but somehow something seems
to make my body stall.

With still a ways to go
there is no way to know
I got to answer that
one last delaying call.


Here's how a jumble of painted parts looks like.


I sure do dig RED.

And here's the RAM SHIELD,


Which should give you an Idea of the color scheme.  As of this post, only the feet, hands and the scratch0built, er, backpack, remain unpainted.


Saturday, October 9, 2010

The Chimera Borne Part VII

 
The mods are 90-95% complete, then it's off to painting and the diorama. I'll say again that this has been the most challenging project I've tackled as of yet. I'll be very "tame" in painting this. I won't be posting any more full updates, but a few snippets every now and then. I'll keep the major scratch-build under wraps until November 5. For the meantime, here's a sneak peek.

Posted Image


What a jumble of parts prepped for painting looks like.

Posted Image

Some of the modified parts. The Ram shield is now lightly detailed.

Posted Image

The modified back pack. This one is a simple modification to fit the polycap attachments. The plaplates are added to "lock" the modifications in place when the pack is assembled

Posted Image Posted Image Posted Image

The Newbie Stash

Source This is a collection of specific guides for reference in Gunpla Building and Modeling in General.  • Gunpla™ and Modeling Terminolog...