I've done neck extension mods for the Ronin, the Kshatriya, and quite recently, the JinX. The thing about neck extensions is that if you are working with MGs or PGs, you'll run into the inherent problem of ABS plastic's semi-resistance to cement, and the problem of CA/superglue becoming brittle over time thus making it worthless for high stress/tension area repair work or modification.
The Kshatriya's Neck Extension was the "easiest" by far to pull off because of the frame construction and being made of PS. It was quite easy to simply saw off the neck, stick an ample-sized beam in between, and mount it on to the modified frame with a generous amount of cement (saturating the modified parts allow resin build up from the cement which reinforces the ABS/PS bond since ABS will also melt a bit when saturated enough with the solvent from cement).
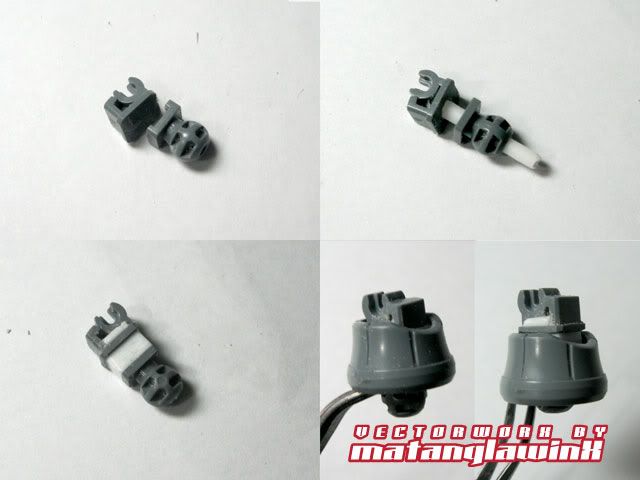
The Ronin was a bit more challenging because the neck joint, aside from being made from ABS, is also a ball joint that is part of the lower frame/base plate that encases the LED module. I cut the ball joint from the base plate and reconstructed it with beams and pla plates.
The beams act as pegs which in turn also extend into the shaft of the ball part in what I would like to call side coring, and the pla plates extensions, which also increased the surface area that would be adhered to the ABS base plate. This is secured underneath with more plaplates and cement, and with the pegs/beams being that of the same material as the plaplates, they lock into place when cemented.
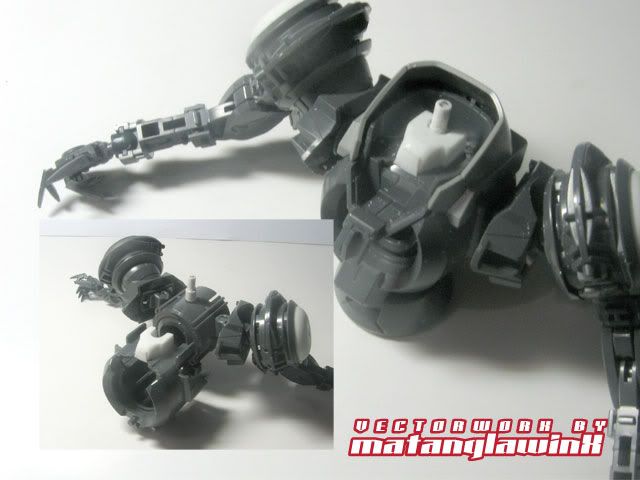
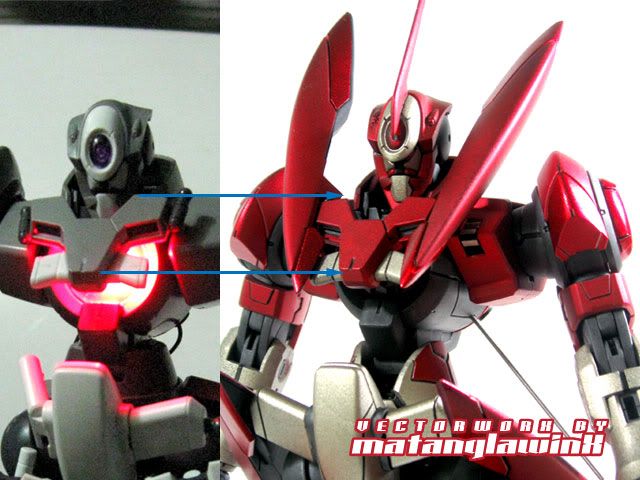
The JinX's Neck Extension was also tricky mainly because of how the chest frame was constructed. The neck peg basically just sticks out alone, and supported by the outer frame (which is also the external armor in the GN-X's case). The modification was a two-part process where I had to extend the peg with a round beam and a pipe using the coring method, then HIDE that extension by creating a neck mount on the OUTER frame. The neck mount provides a perfect spot for the JinX's neck to rest on.
The resulting neck modification, along with the waist extension gave the JinX an addition 6-8mm height and it now dwarfs the Exia by a full head height.
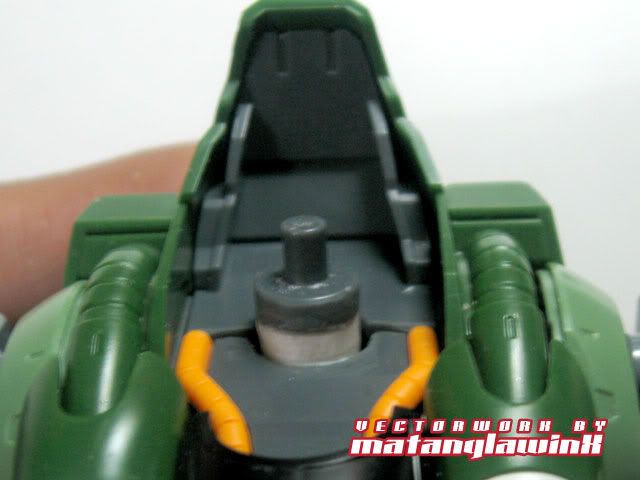
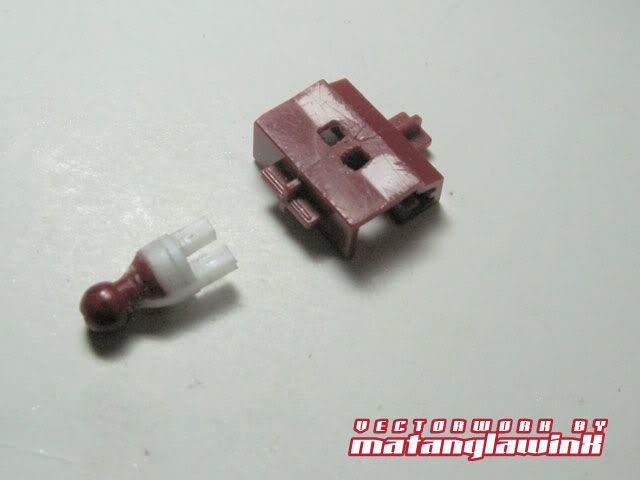
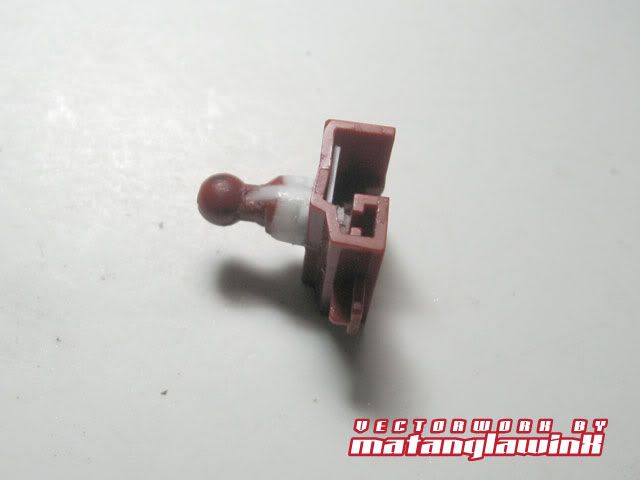
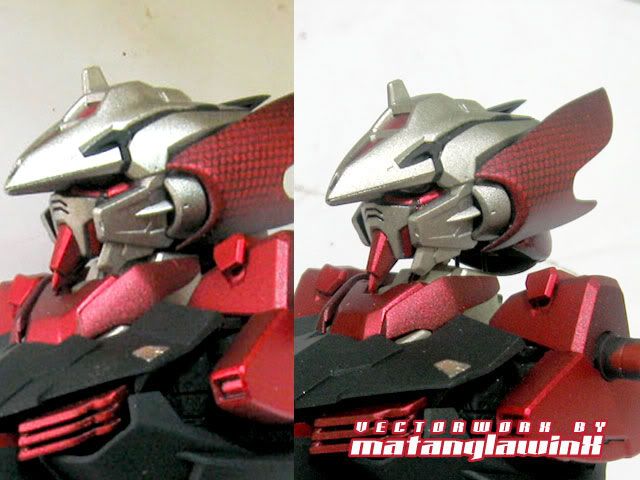
The Angelus' Neck Extension mod. This was a simple enough modification, but again, the main concern was the ABS plastic. I decided to cut the Sinanju's neck joint and use the coring method to make the extension. I drilled a 2mm hole in the lateral center of the cut parts and inserted a 2mm round beam. Then, 3 pieces of 1mm plaplates were sandwiched in between the parts, for a 3mm extension (which seem to be my standard extension length).
Like in most of my ABS/PS mods, I reinforced the joins especially at pivot point where the Sinanju's head connects to with small pieces of plaplates that lock the core in place, saturated it with extra thin cement, and let cure for 24 hours.
Note: Though cement dries in minutes and is workable after an hour, it's still best to wait at least 12 hours to tension/stress test fit the modded part.
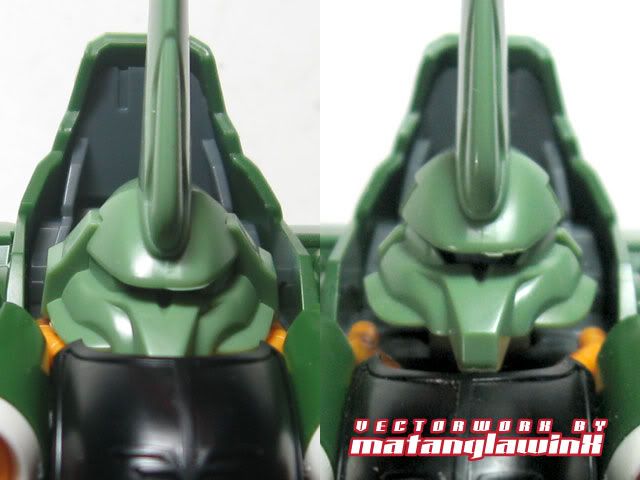
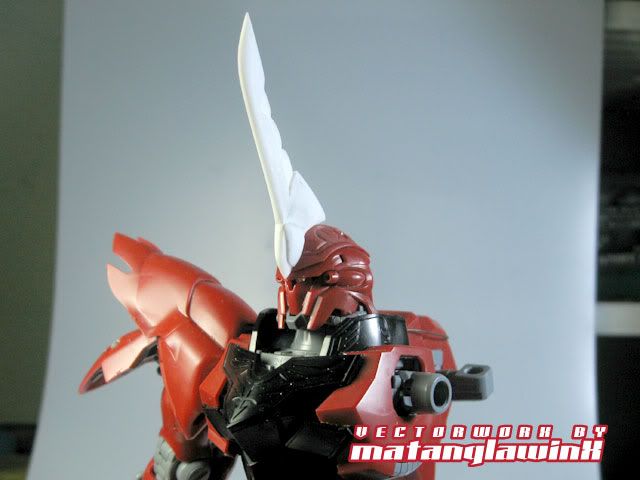
The neck joint height is still adjustable and gives an additional 2-3mm to the head height, something an AWESOME MS should have instead of one that makes it look like a midget body builder.
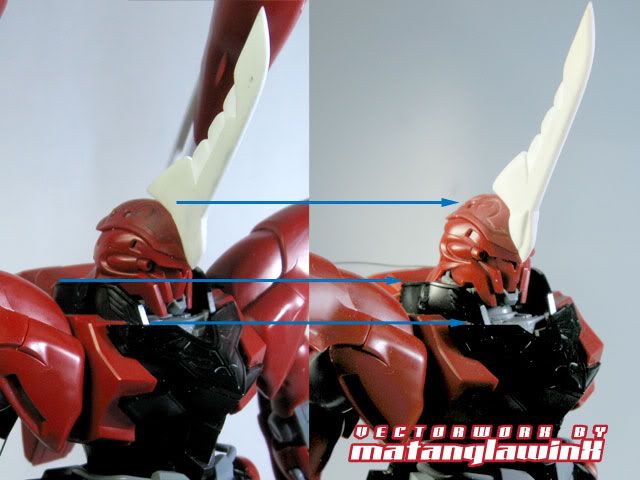
I've also added volume to the base of the Angelus Horn.
Voila! A lot of people often have told me I make this look easy, but I promise you, it's not. I enjoy these types of modifications because it gives my work identity and uniqueness aside from keeping my hands busy.
More later...


No comments:
Post a Comment