While working on the Unicorn improvements I got a chance to finish ALL the painful engravings on the Angelus' armor, but kinda screwed up the shield. Sufficed to say that I'll be fixing that. I'll start working on the diorama this week, and hopefully my plans for the dio will pan out.
Alternatively, I've been thinking on how to power the Monoeye and decided on a rather simple setup. Instead of building an external power pack, I opted to use the main back pack to encase the batteries. I've used two of the second to the smallest batteries I have on stock (each is 2mm thick). I built a battery case by sandwiching four ample-sized pieces of 1mm plaplates together and carving out the middle to fit the diameter of the batteries. I then cemented 0.5 mm at opposite sides to enclose the case and drilled a small hole underneath to help push the batteries out.
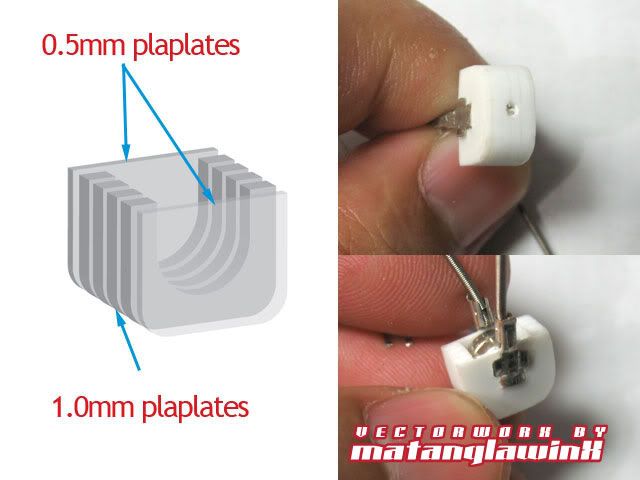
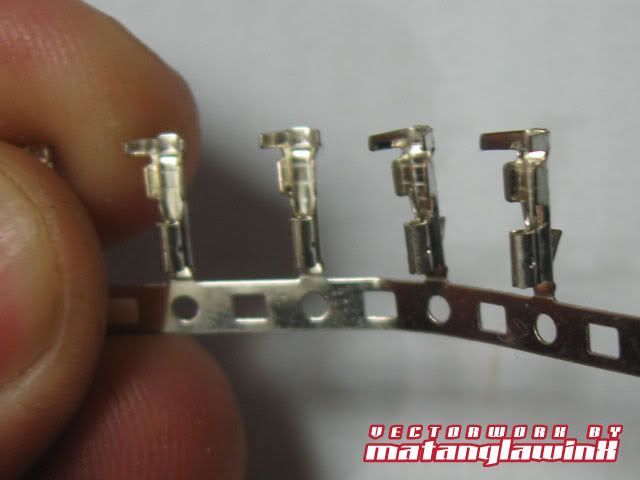
For contacts, I used metal wafers used in electronic circuits. These nifty little buggers come with connector modules or can be purchased as is. I simply mounted it on the 0.5mm plates by punching slits on the plates inserting the legs, and securing it by bending the legs. The bent part become the contact points.
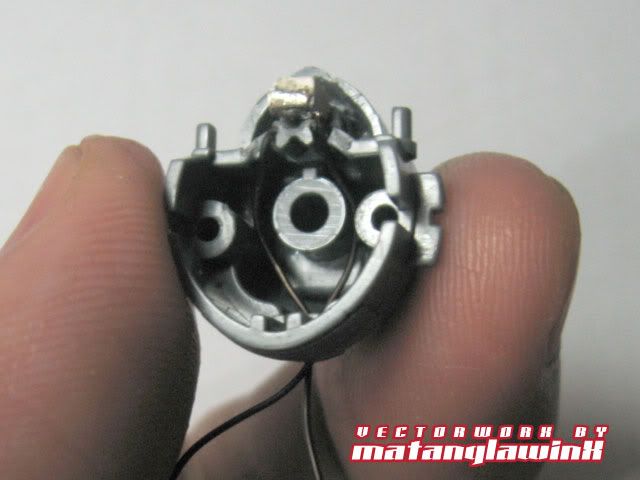
I then added 1.0mm wave springs (which I now prefer over kotobukiya springs because the latter have the tendency to rust over time), and simply encased the setup between and withing the back pack frame. The only modification done in this case is removing one of the connector pegs to fit the battery pack.

I'm still deciding if I'll include a micro switch in the setup, or simply employ a contact assembly as it is now.
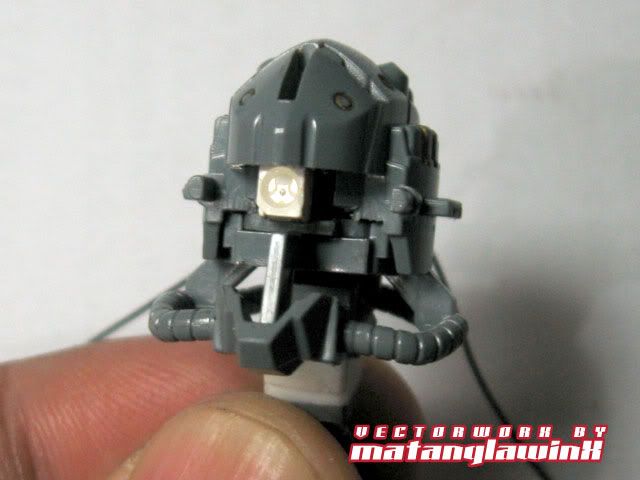
The Monoeye Wiring. I decided to be neater with this build by hiding the wiring altogether. Since the Angelus' head frame is actually small, there wasn't really enough room to maneuver the wiring if I have decided to use springs (as I have done with the Impaler). It's a good thing I was forced to use thin wires here because I don;t have to worry about the wires coming into contact and causing a short circuit. I let the wire run inside the head cavity towards the back of the head.
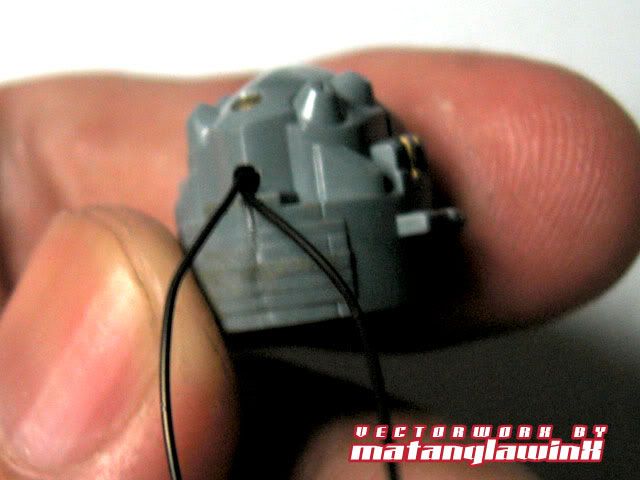
There's enough space between the head frame and the head armor to let the wire run through freely without being stressed.

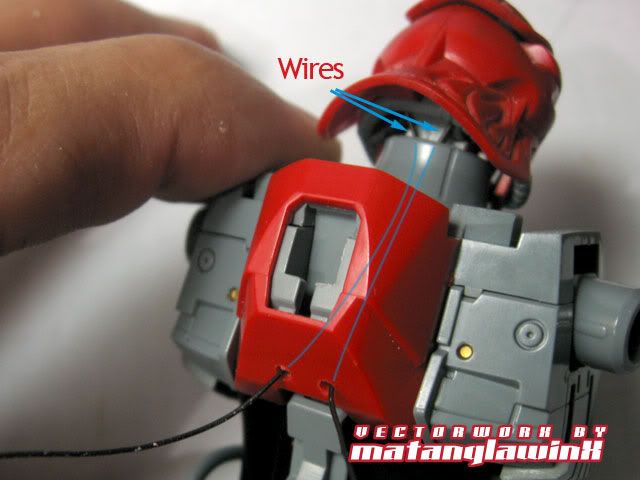
From there, I simply routed the wires into the neck frame into the chest cavity, then out the lower back, just below the back pack mount. When mounted, the back pack hides the wires coming out. I'll be mounting 1.0mm springs over the wires at this point for consistency.


2 comments:
OHHH THIS IS HOLY!!!! I read all the parts. And sure it did became taller!! But is it as tall as sazabi? I think so^^ You area genius!!! Don's blog introduced me to yours!!! Mind exchanging links?
Link added. The Angelus is slightly taller than the Saz. And thanks!
Post a Comment